Style Guidelines
Scale + Proportions
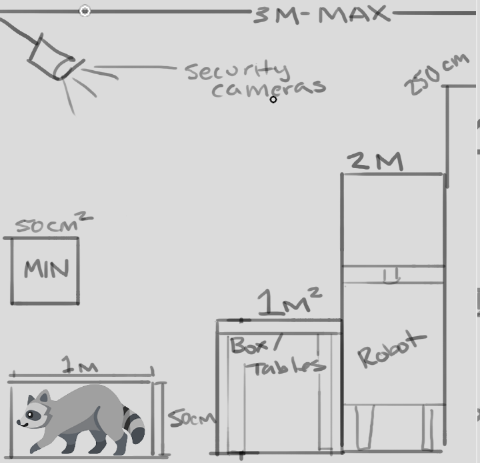
All proportions will be very exaggerated in order for the tiny tanuki to navigate the environment. interactive elements will be placed within 3m of the floor. The main playable character has a size of 100cm x 50cm- all reachable surfaces will be 100cm tall (table tops / switches / crates/ etc )
Larger characters and elements, like the security robots, should be a max of 2m tall. Security cameras should be placed at 3m above the ground to be visible to the tanuki but out of reach. Non-interactive elements will be a max of 250cm tall to fit within frame
Props that the tanuki can transform into should fit within 50cm-100cm
No props should be smaller than 25cm or larger than 3m
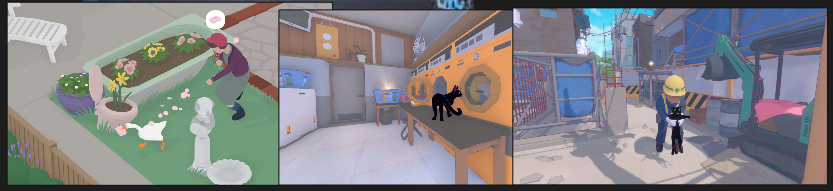
When translating elements to the game style, proportions will be exaggerated for a playful effect. See the example above^ whenever there are areas that can be exaggerated without losing their silhouette, they should be exaggerated. Below are examples of how similar games have pulled off this scale exaggeration- the goose and the cat would be much smaller, but the worlds don't feel "looming" or overly giant around them.
Granularity + Detail
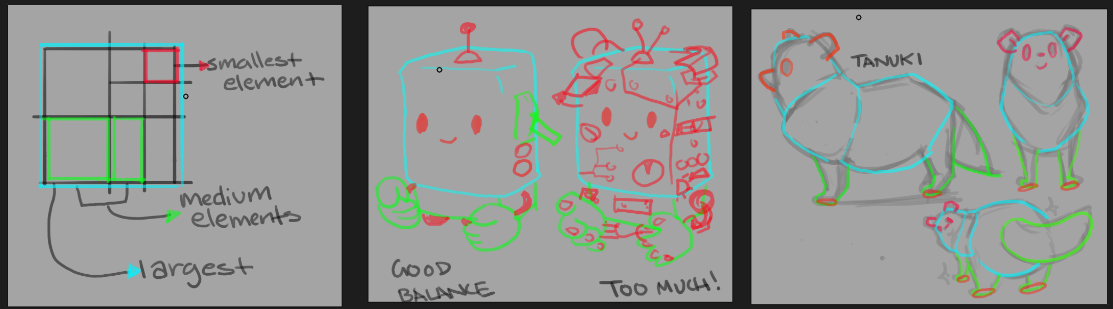
Designs should be sorted into large, medium, and small elements- finding a balance between them. There should be a main form that is the largest element and make up 75% of the object or character's silhouette. Medium elements should be 25%-33% of the size of the largest shape, and take up about 20% of the silhouette. Small elements should only have a very minimal impact on the characters main silhouette, 5%. See the example above, the robot on the left is easy to read at a glance, and still includes cute details - like a few buttons and levers. However the robot on the right is too busy to understand, with too much visual information and the main shape gets lost. For our game, we want to keep a good balance and use small elements that are no smaller than what is pictured above, and used sparingly to tell a story- not to overwhelm the viewer.
This is a very simplified style, so start by seeing what the least possible amount of information is necessary in order to communicate the object or character, and build up from there
Edges + Beveling
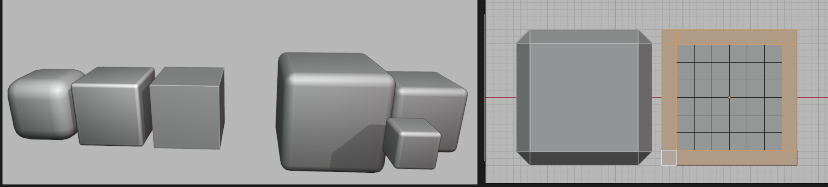
1m = 0.1m bevel distance
2m = 0.2m bevel distance
3m = 0.3m bevel distance
This game will be a very soft, inviting , and playful environment. Because of this, edges will be rounded off but there is a level of standardization necessary to keep the game cohesive. On the left you can see 3 cubes, one that is super round, one that is a little beveled but still sharp, and one that has completely sharp edges. You can see these each have a different feel to them. On the right is the level of softness we will be using for our game- 10%. so, if you love numbers you can take that literally, and apply a 0.1 bevel to a 1m cube, or using the reference on the right, try to match that amount- using an orthographic view is very helpful when setting this up, or ideally a bevel modifier, where you can easily and non destructively adjust the bevel proportionately to the shape.
This applies mostly to prop building, like shelves and architecture- but if you are doing organic modeling please still keep this in mind and don't include any hard edges or sharp corners
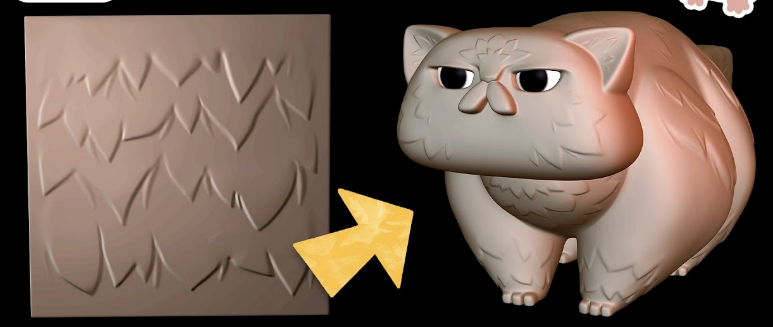
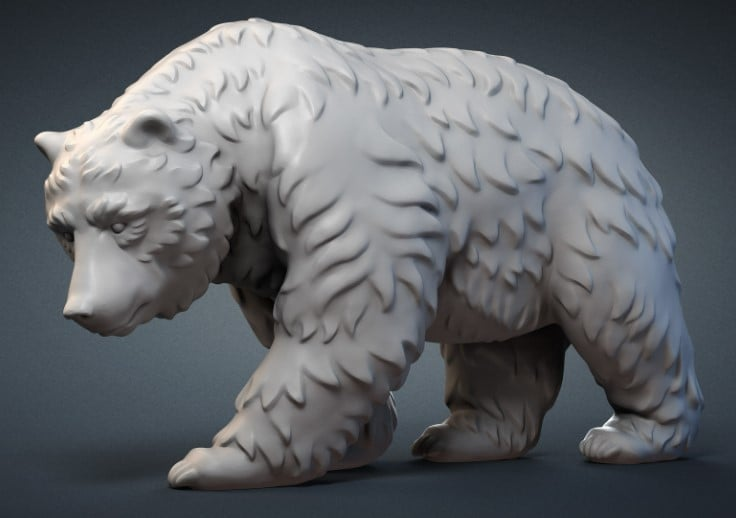
High Poly Sculpt Pass
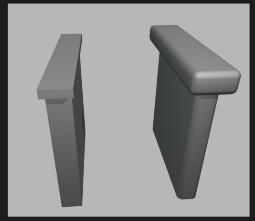
All assets will include a high poly sculpt pass! DONT BE OVERWHELMED this is still a very stylized game, NO ONE should be doing hyperrealism but we are going to learn a high to low poly baking workflow, what this means is that when we make each element- we will be adding some smaller details in a sculpt pass that add more interest + history to the item / character. For example, when making the tanuki, the sculpt pass will include adding some areas of chunky fur, or if you are making a crate, finding areas to add a chipped piece of wood, a dent in the side of a can, or a chipped corner on a table. These details will be baked onto the mesh later
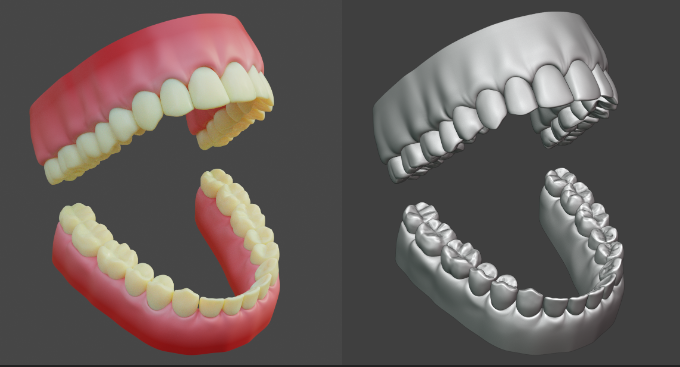
We are going to be using a high - low polygon workflow, which means you can go pretty high when working on the details of your model! If your computer can handle it- go for it! Please see Xury's punk character series to understand this workflow in depth. Included example is this pair of teeth by Xury- see the difference in the original sculpt vs final game model

Materials
WIP
No comments to display
No comments to display