Gray boxing levels with Godot's CSG nodes
What is CSG?
CSG stands for Constructive Solid Geometry. Godot has a built-in CSG system that's great for quickly prototyping and grayboxing levels or any other mesh.
If you're used to Blender, think of it like adding a ton of meshes together with the Boolean Modifier but a lot quicker to iterate on.
There is a page for this in the Godot docs, but it is a little bare-bones and does not go over the export process very well:
https://docs.godotengine.org/en/stable/tutorials/3d/csg_tools.html
It is good to give 👆 a read before continuing on this page!
Creating CSG levels
Adding the CSGCombiner3D
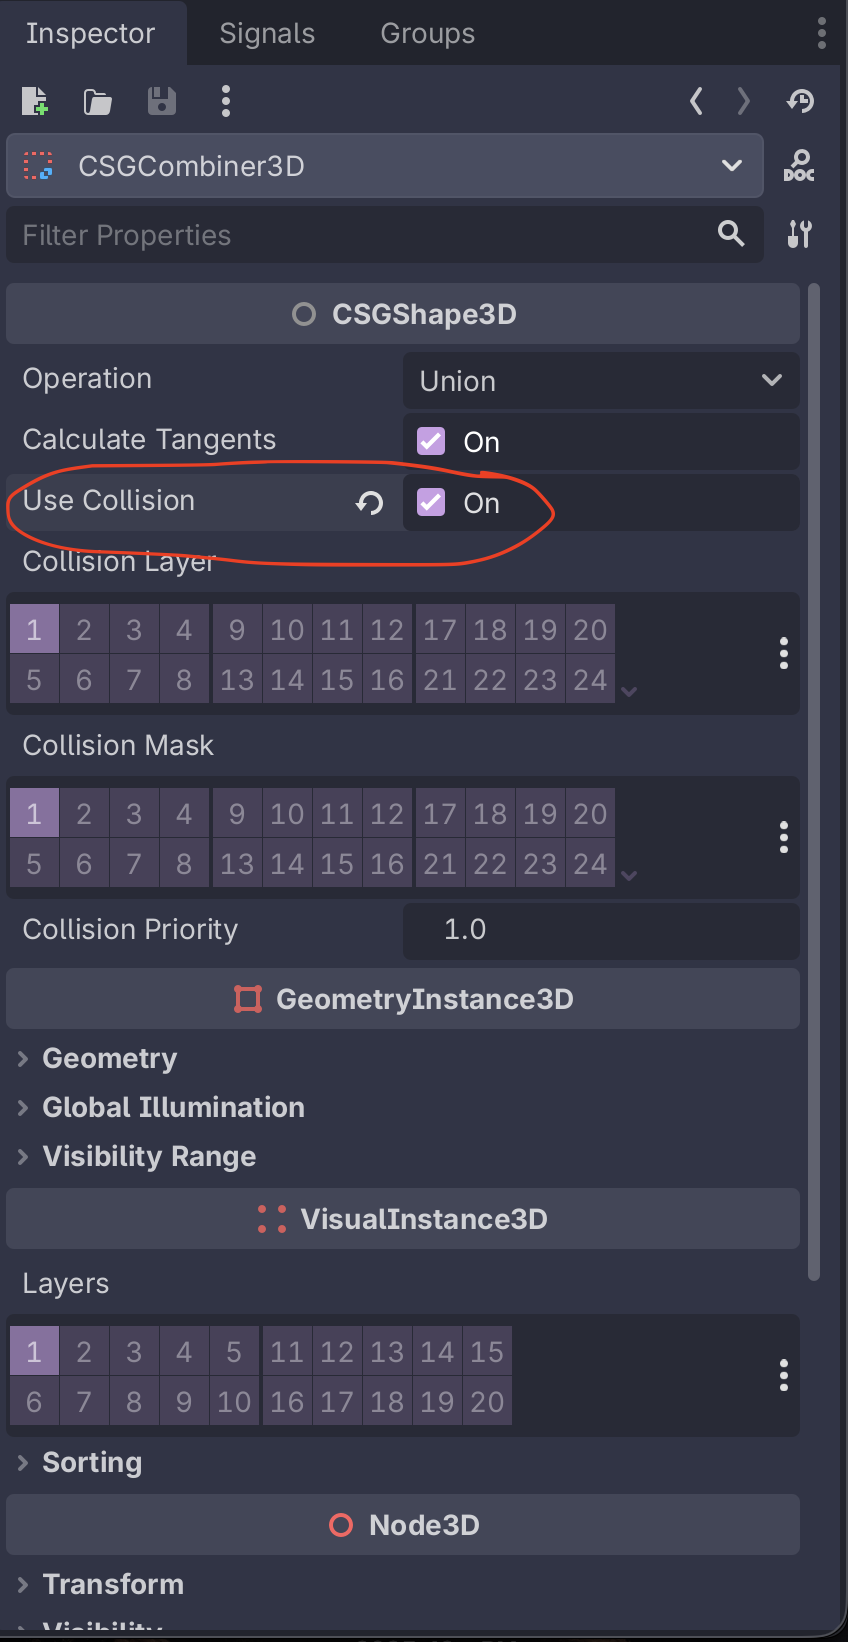
First, you will want to create a root CSGCombiner3D node. This node will combine all of the CSG nodes underneath it into one big mesh.
Make sure that you also turn Use Collision on. This will also create a static collision body as part of the CSG node - important for level geometry!
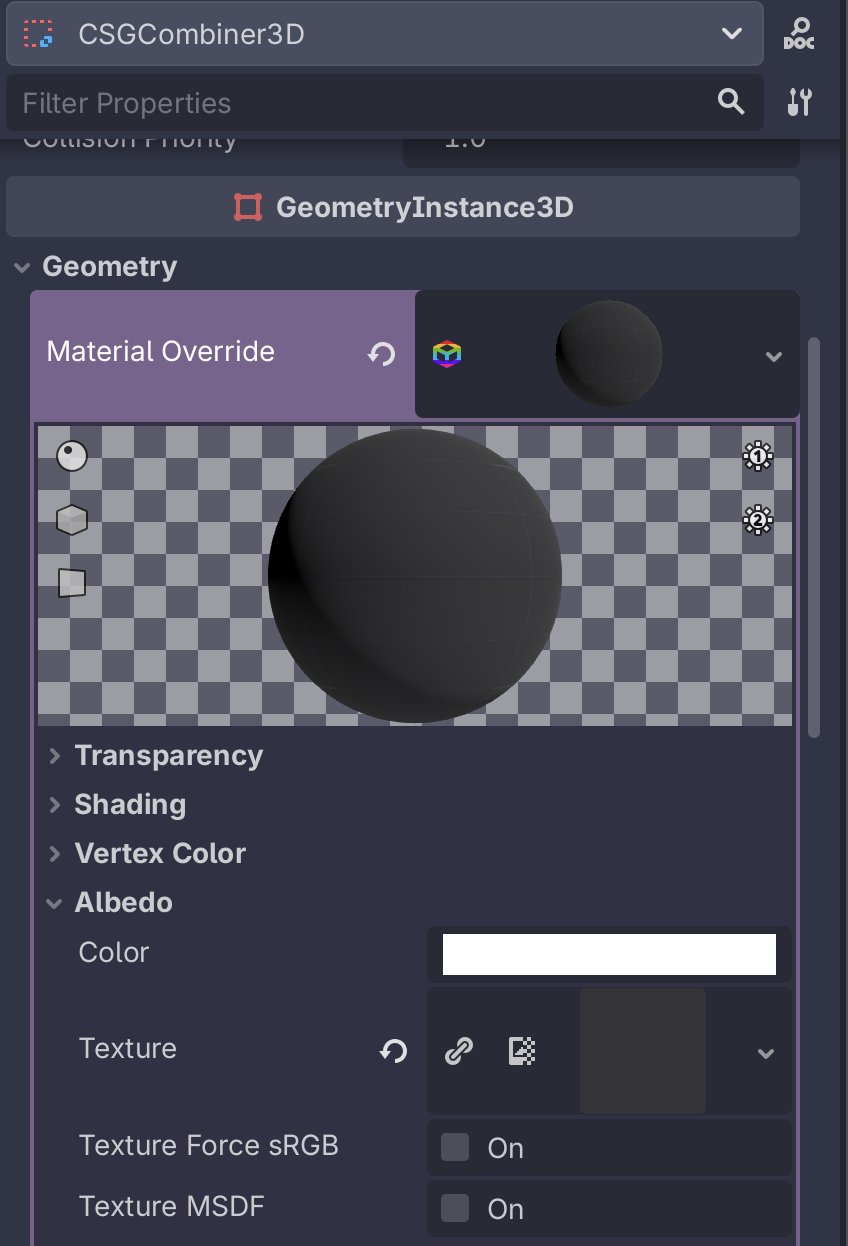
You will also want to add a Material Override to the CSG combiner. This material will automatically be used for the generated geometry.
Kenney's Prototype Textures pack is very useful here!
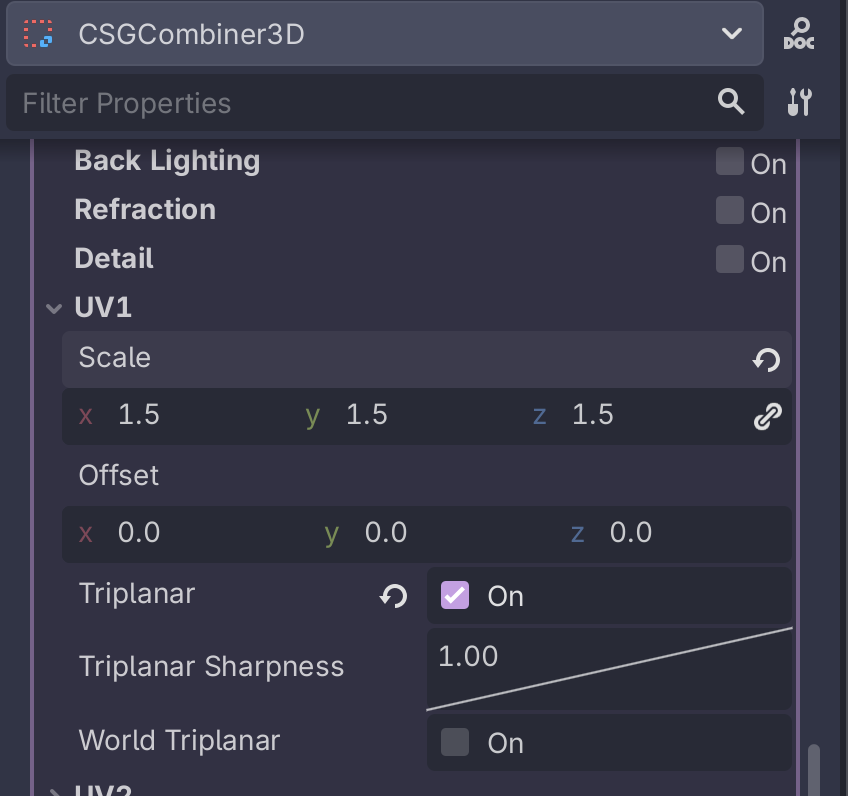
Inside of the material, make sure you turn on UV1 → Triplanar. This will make the texture repeat over the final geometry. You can also change the UV1 → Scale to change how the texture repeats. Higher numbers means it will repeat more.
Side note: if we're doing this a lot, we should probably just have a material that is saved to a resource to use for this.
Adding CSG nodes
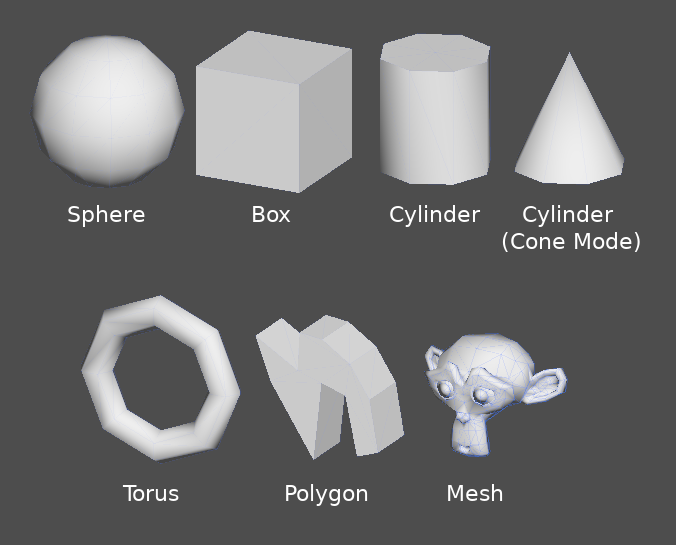
As children of the CSGCombiner3D , you can add any of the CSG nodes:
-
CSGCylinder3D (also supports cone)
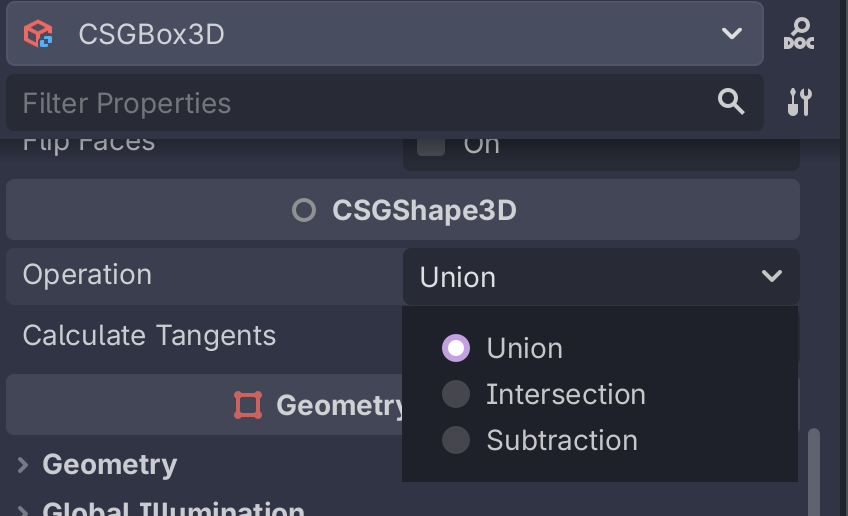
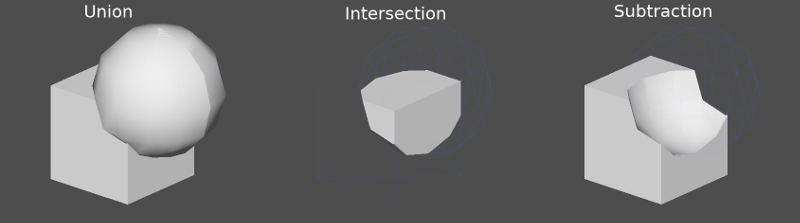
Note that for each node, you can also set its Operation, this can be used to i.e. make holes in a mesh:
Making rooms
Method 1: Flip faces
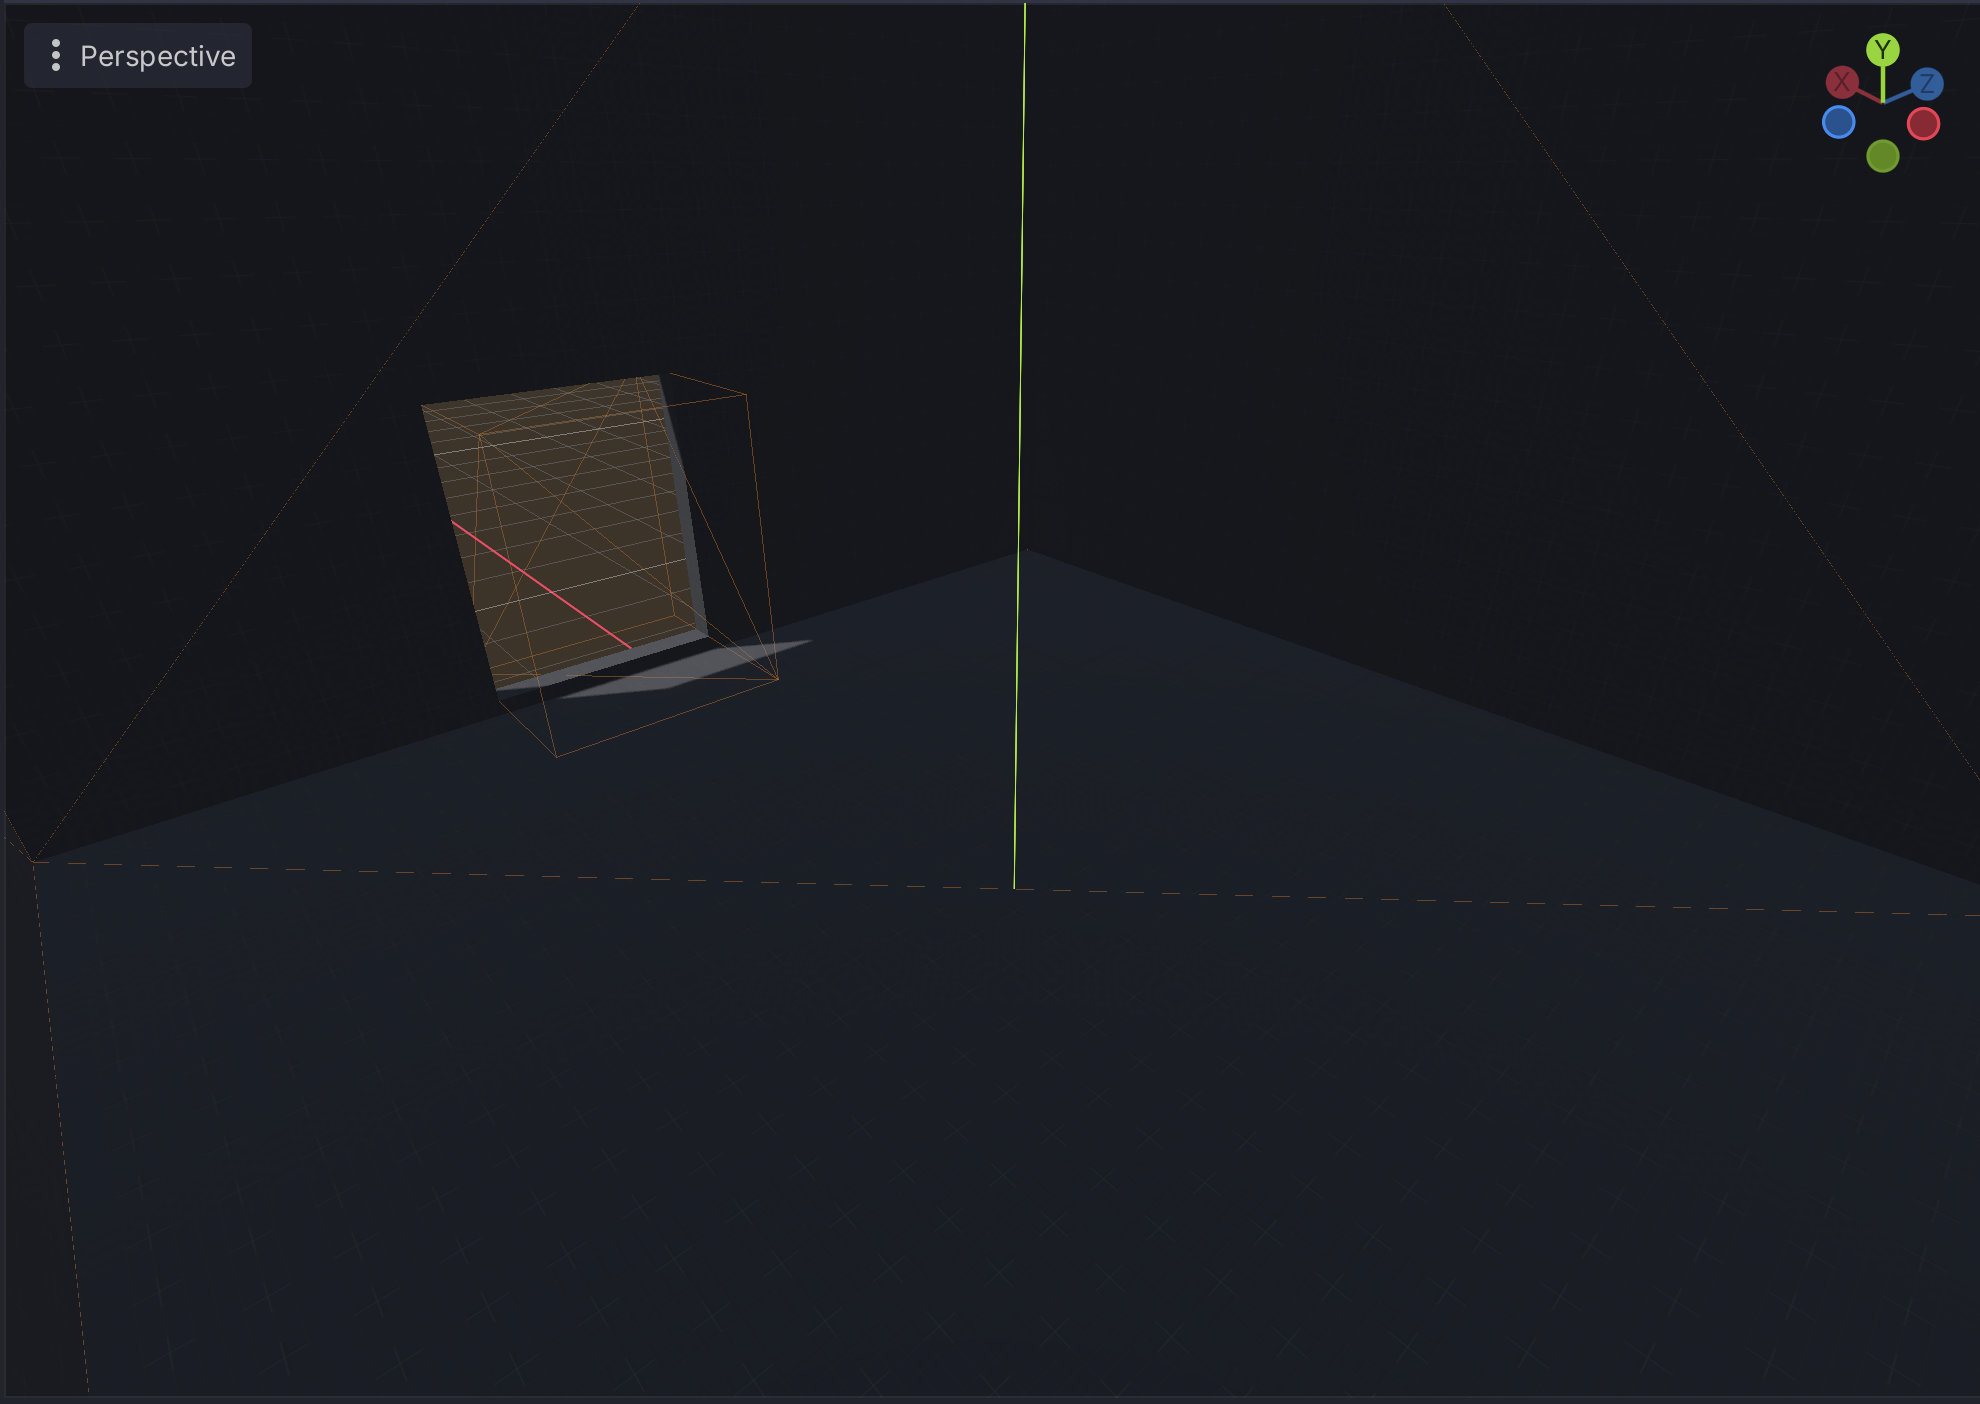
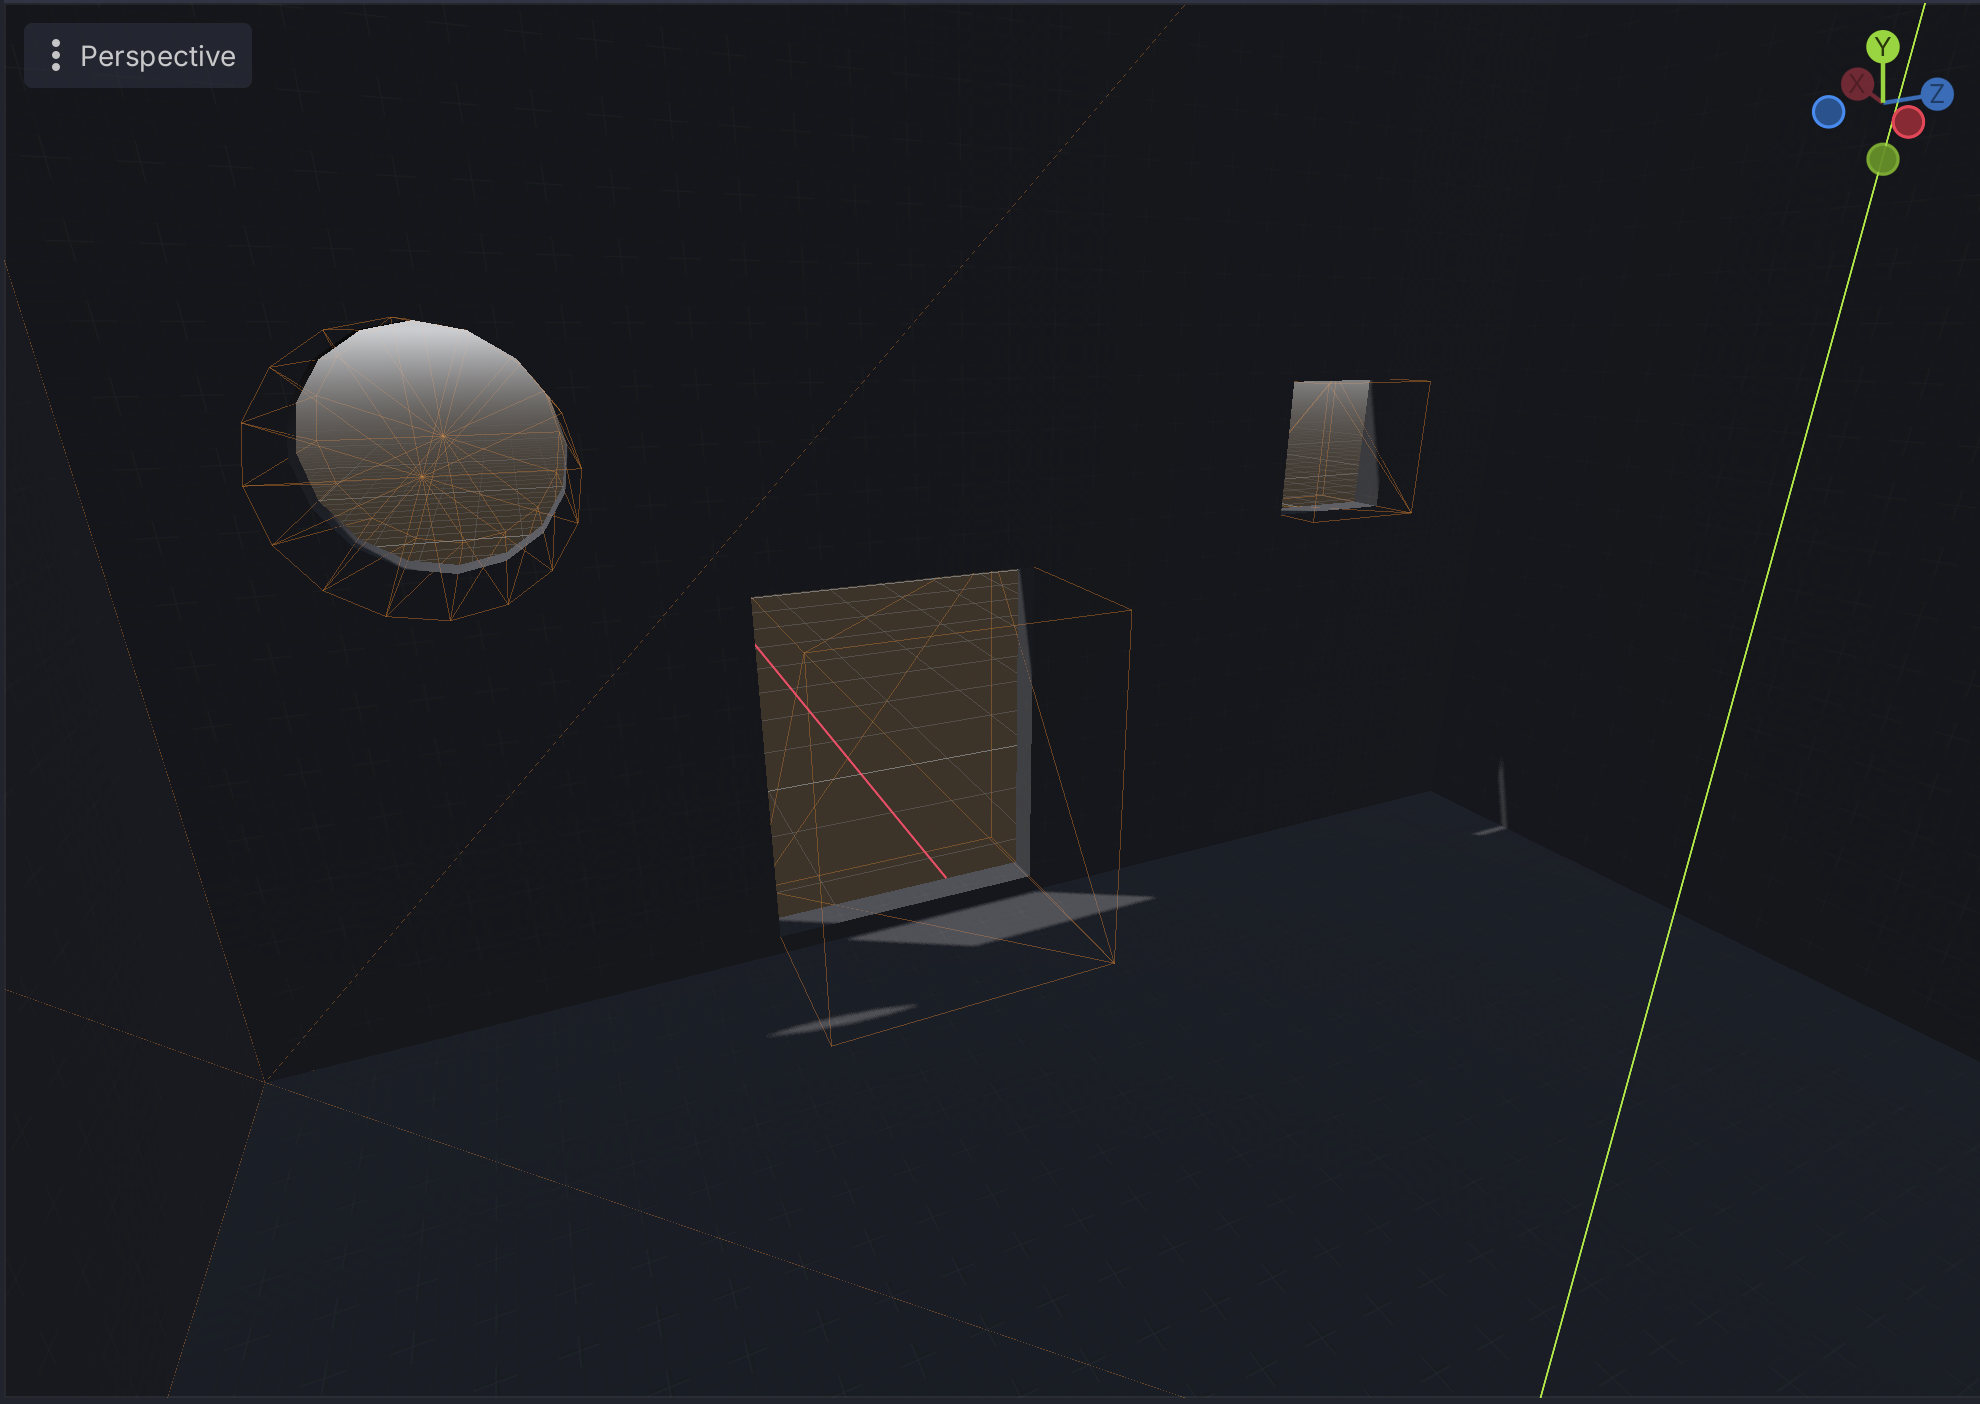
As noted in the "Prototyping levels with CSG" page in the Godot docs, there is a "Flip Faces" toggle for CSG primitives. Turning this on will create a sort of "inverted box" that you can go inside of:
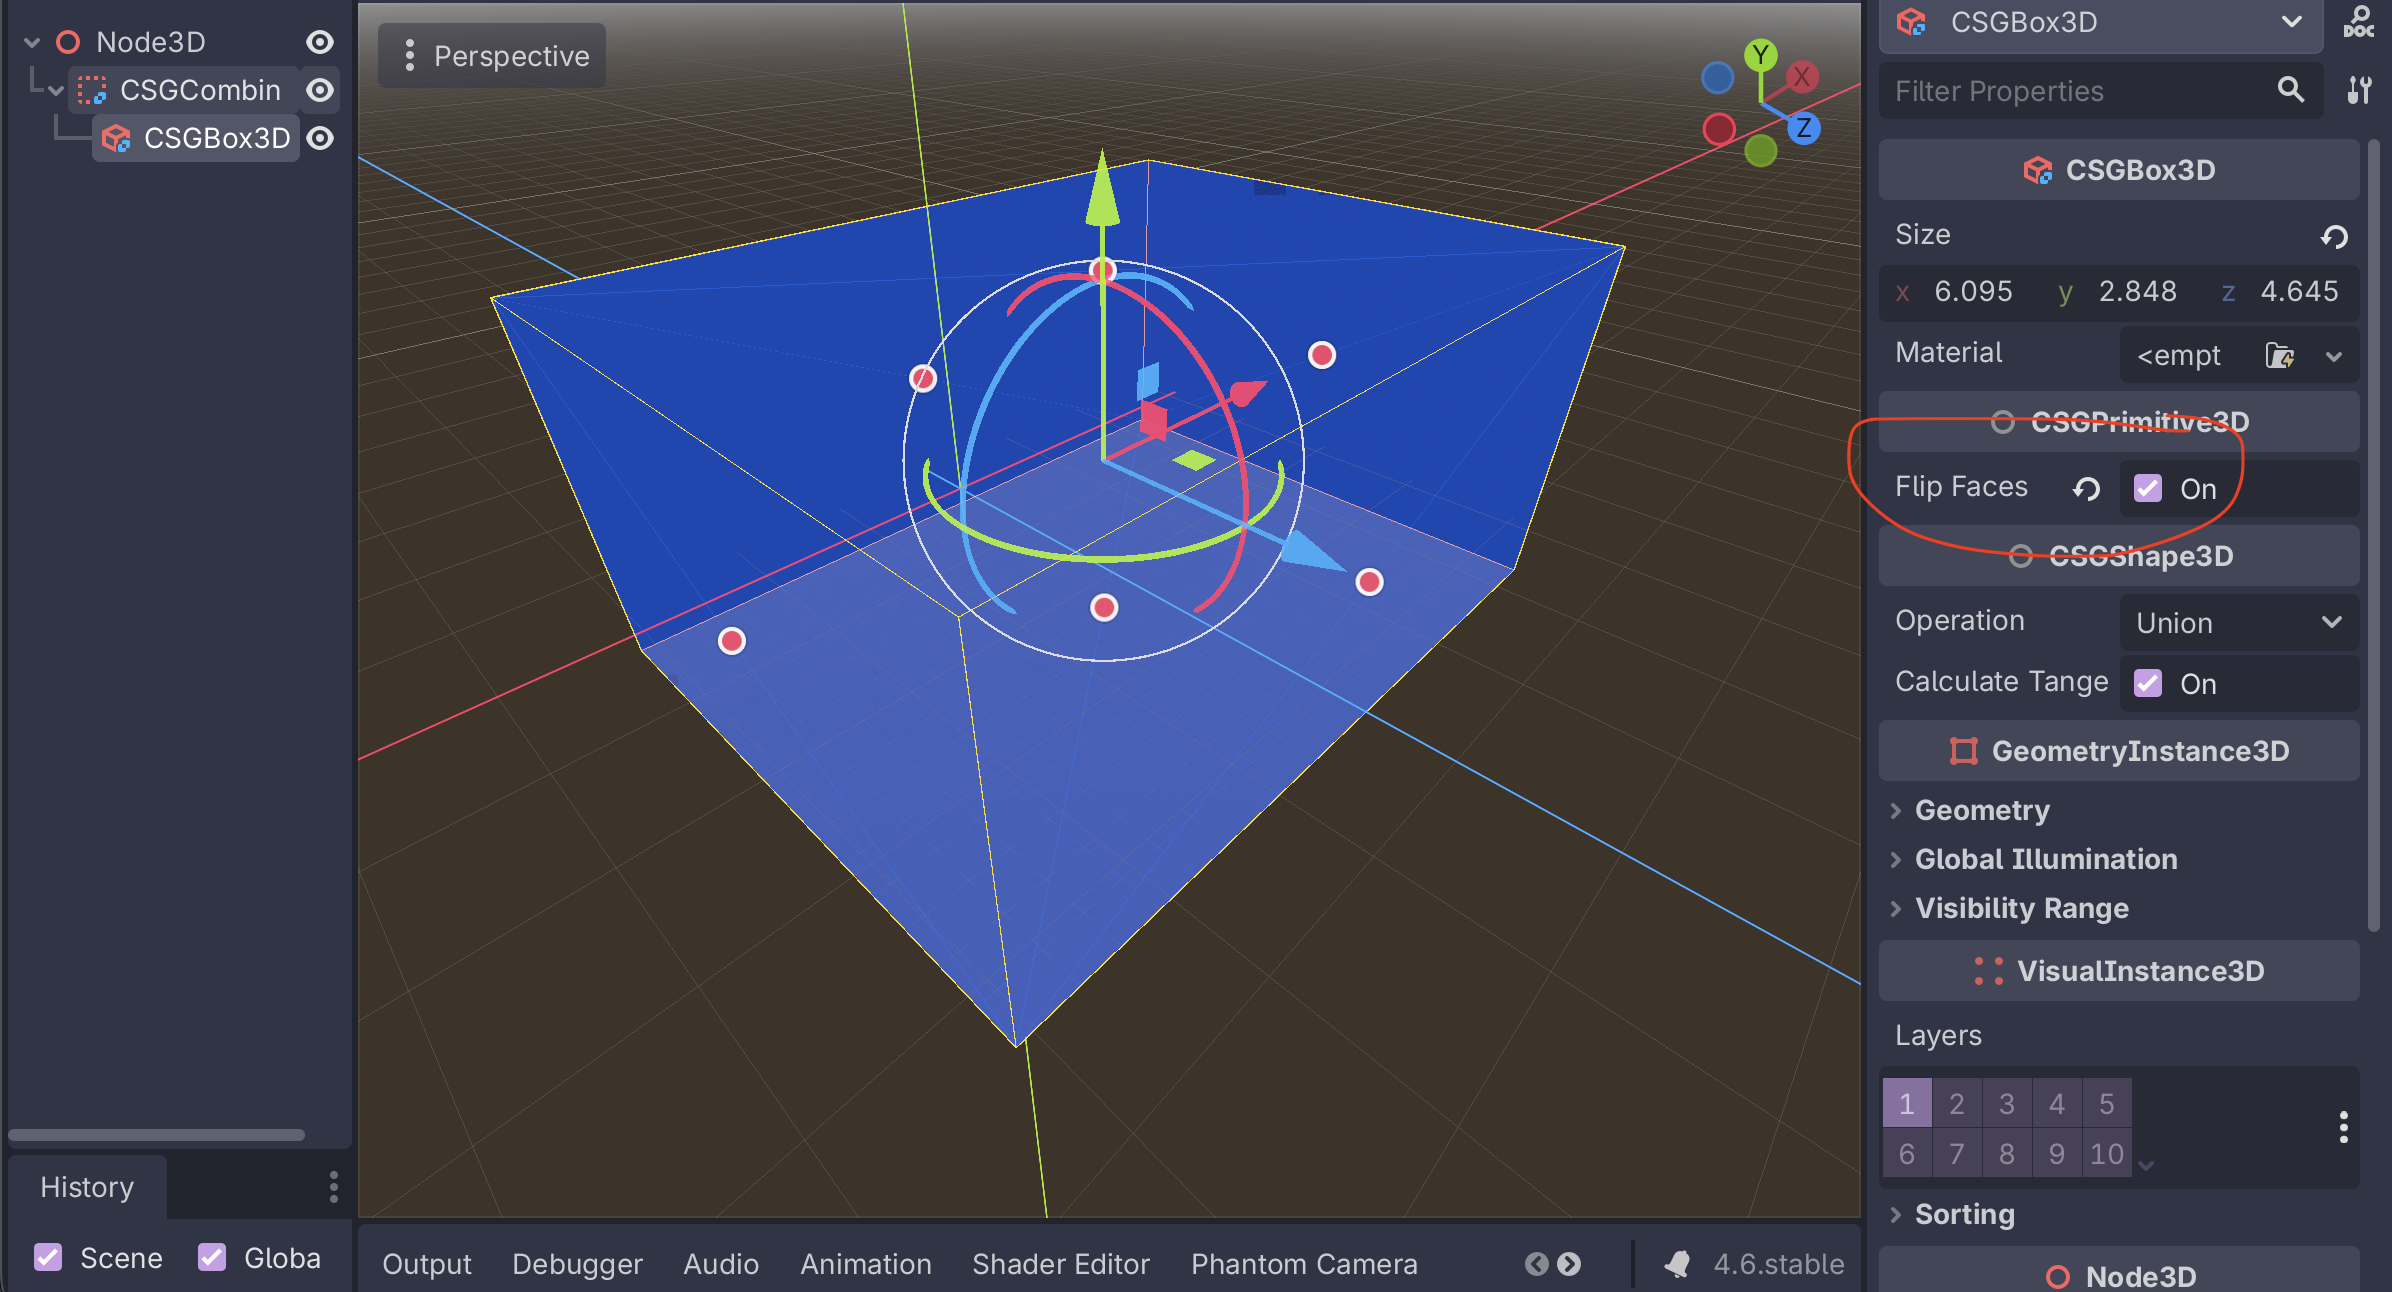
However, this has some problems when used for level geometry:
- You cannot easily poke a hole in the box for i.e. a door
- The walls have no width to them, which can lead to physics objects clipping through them easily
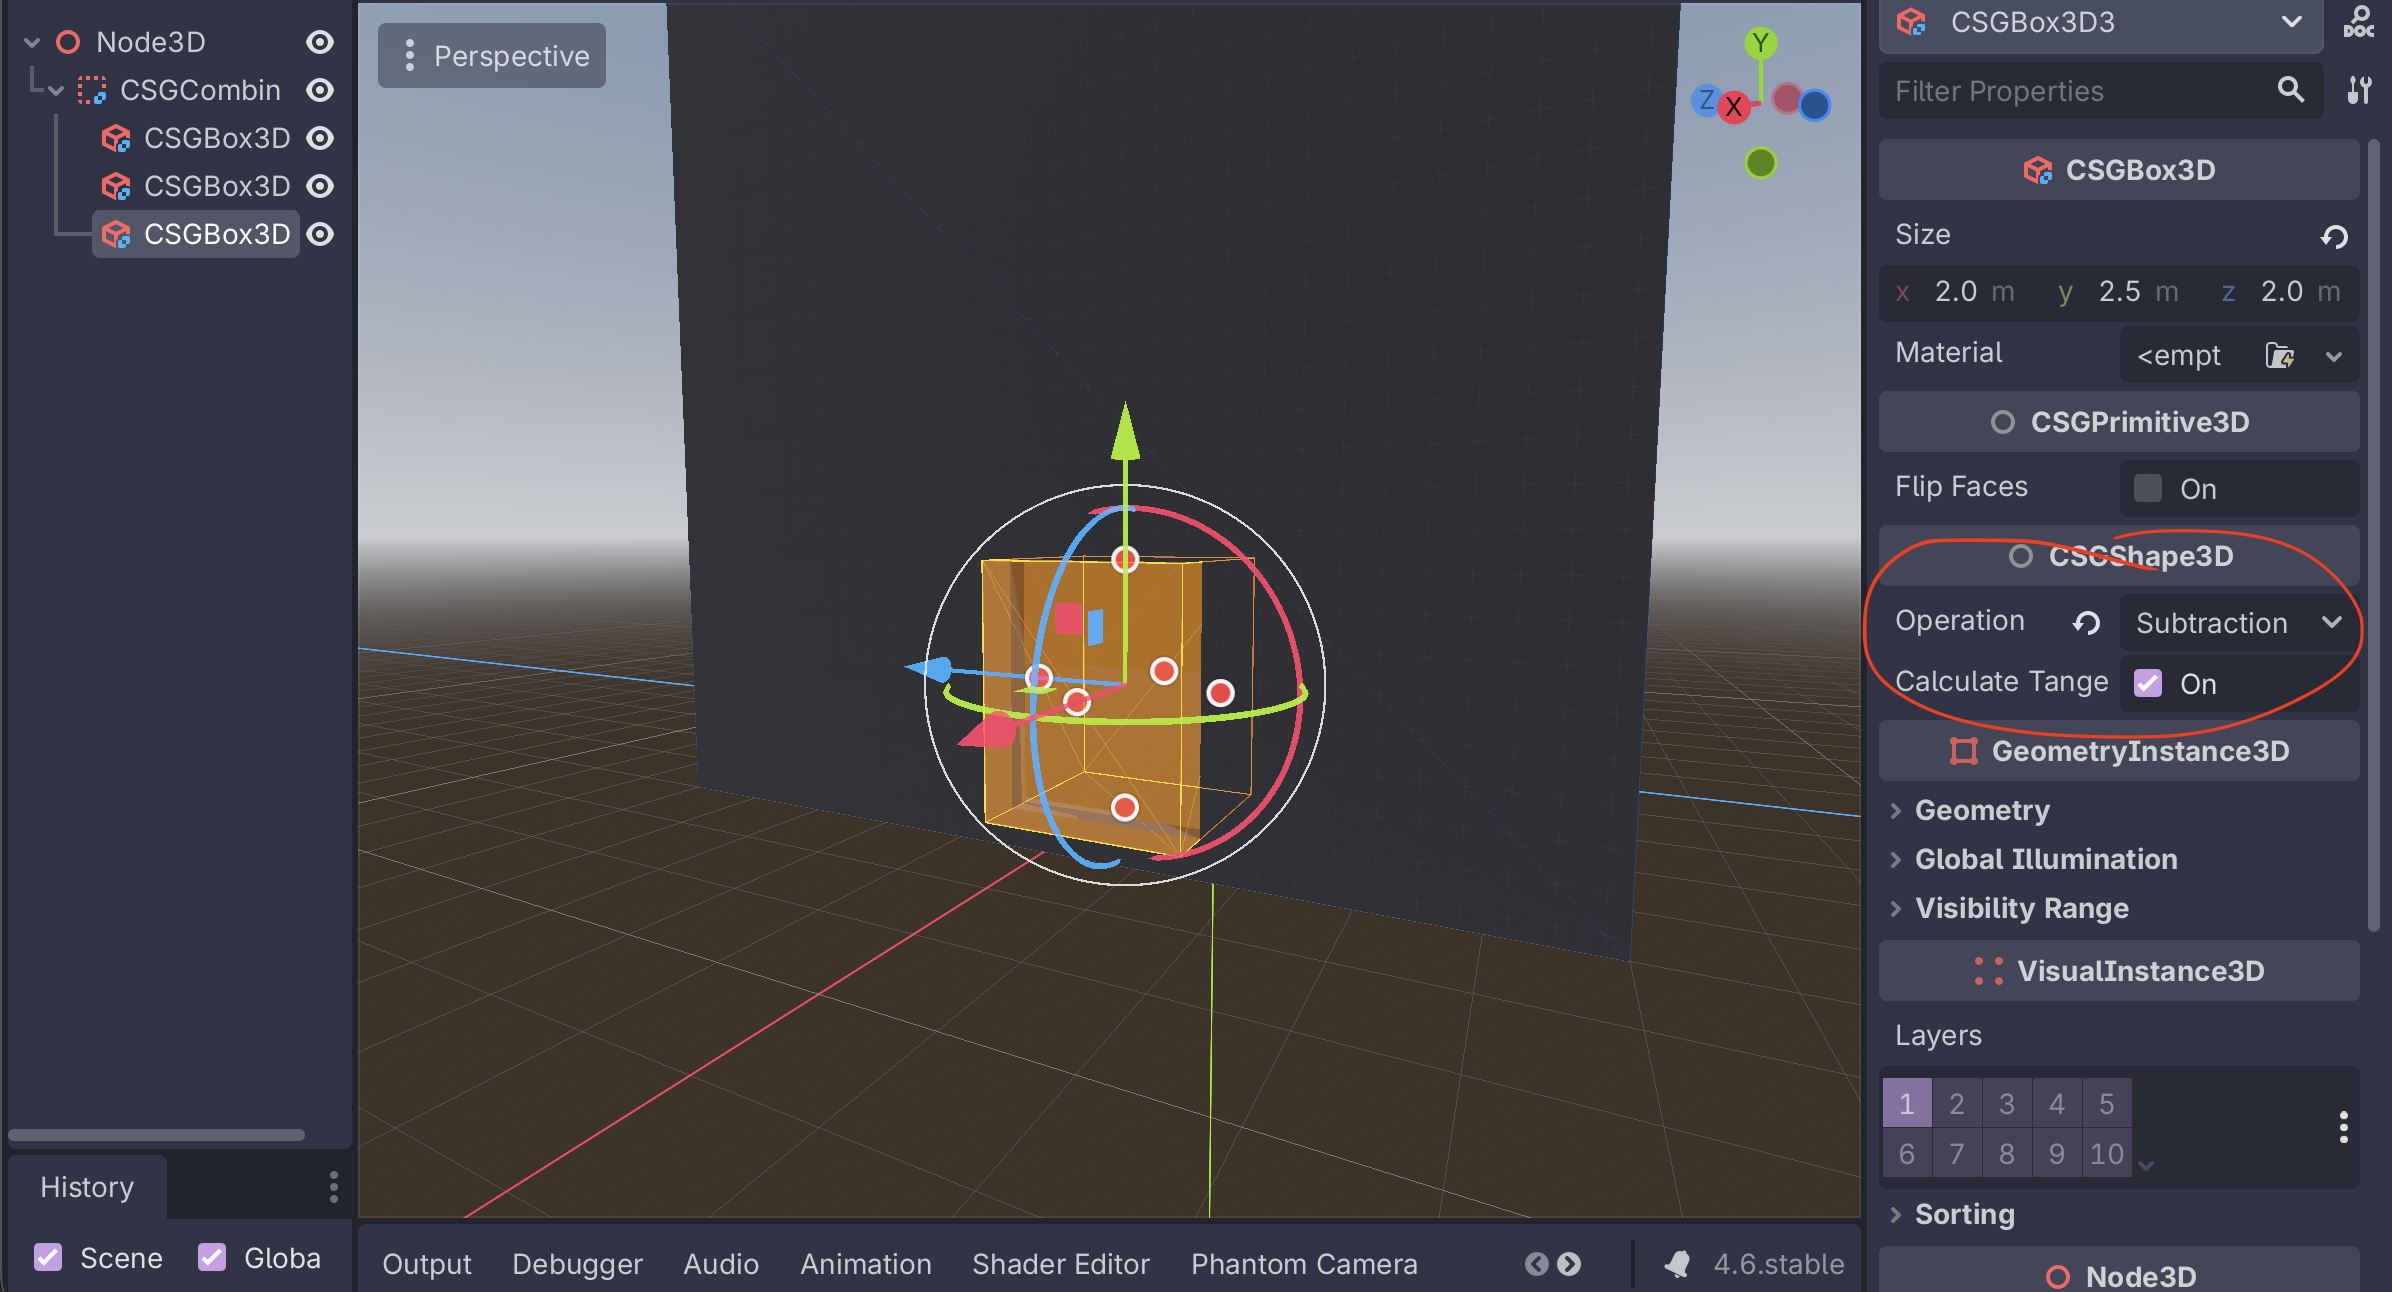
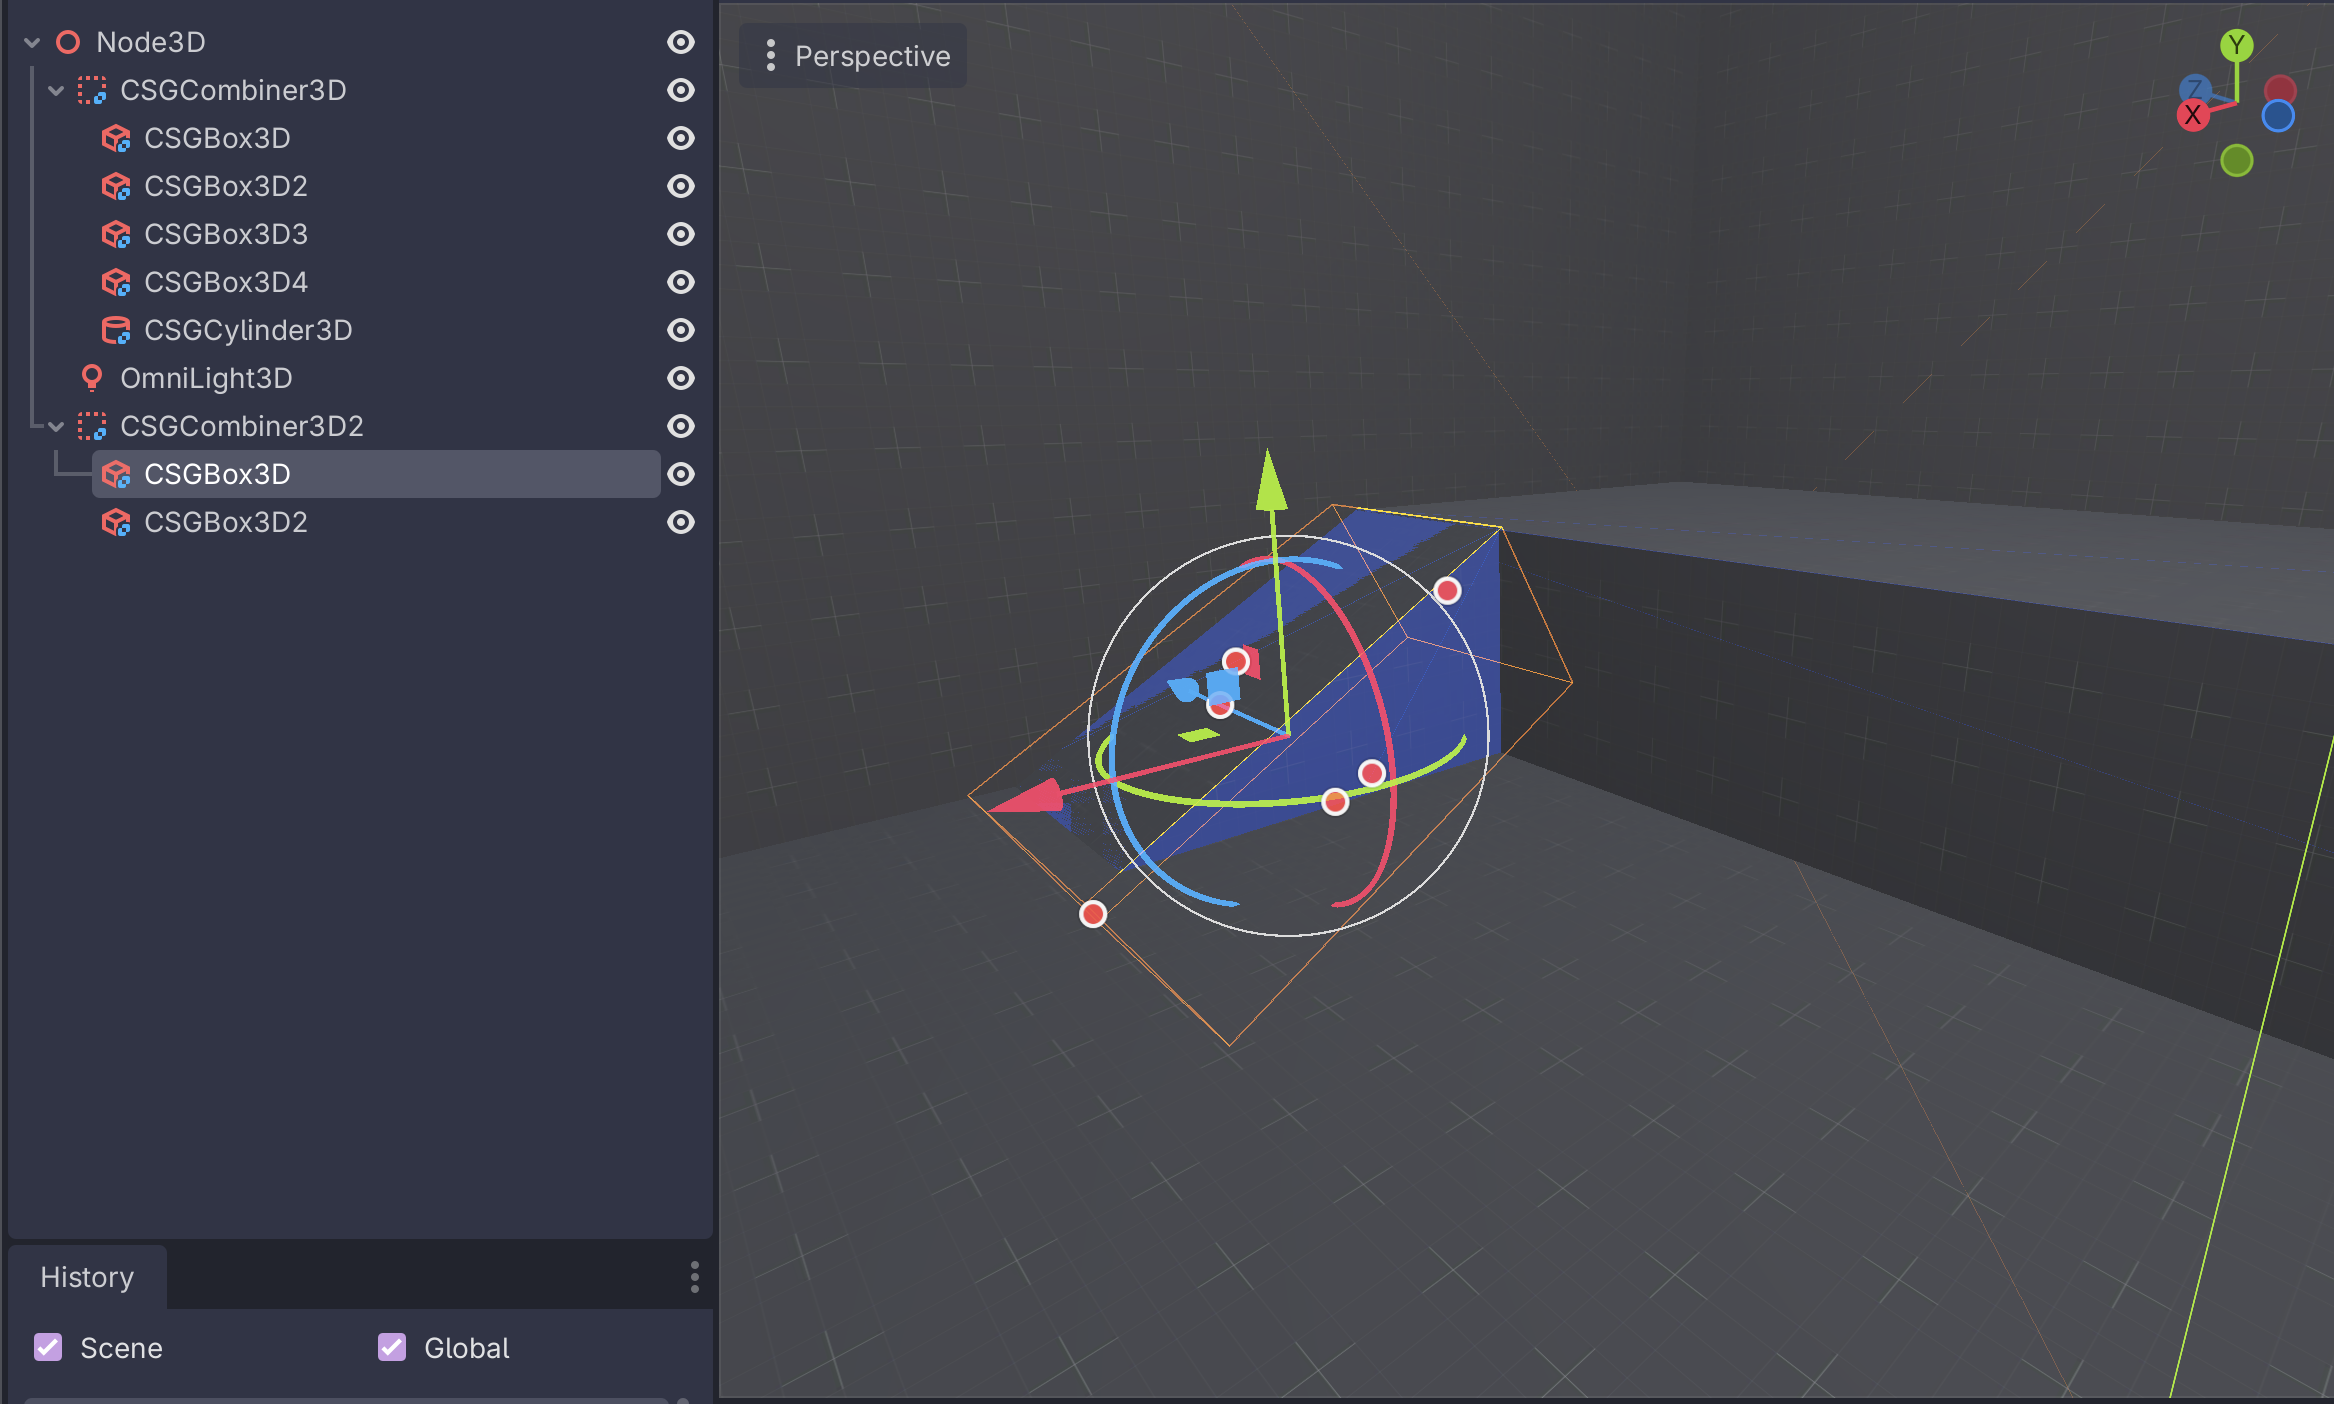
Method 2: Double primitives with subtraction
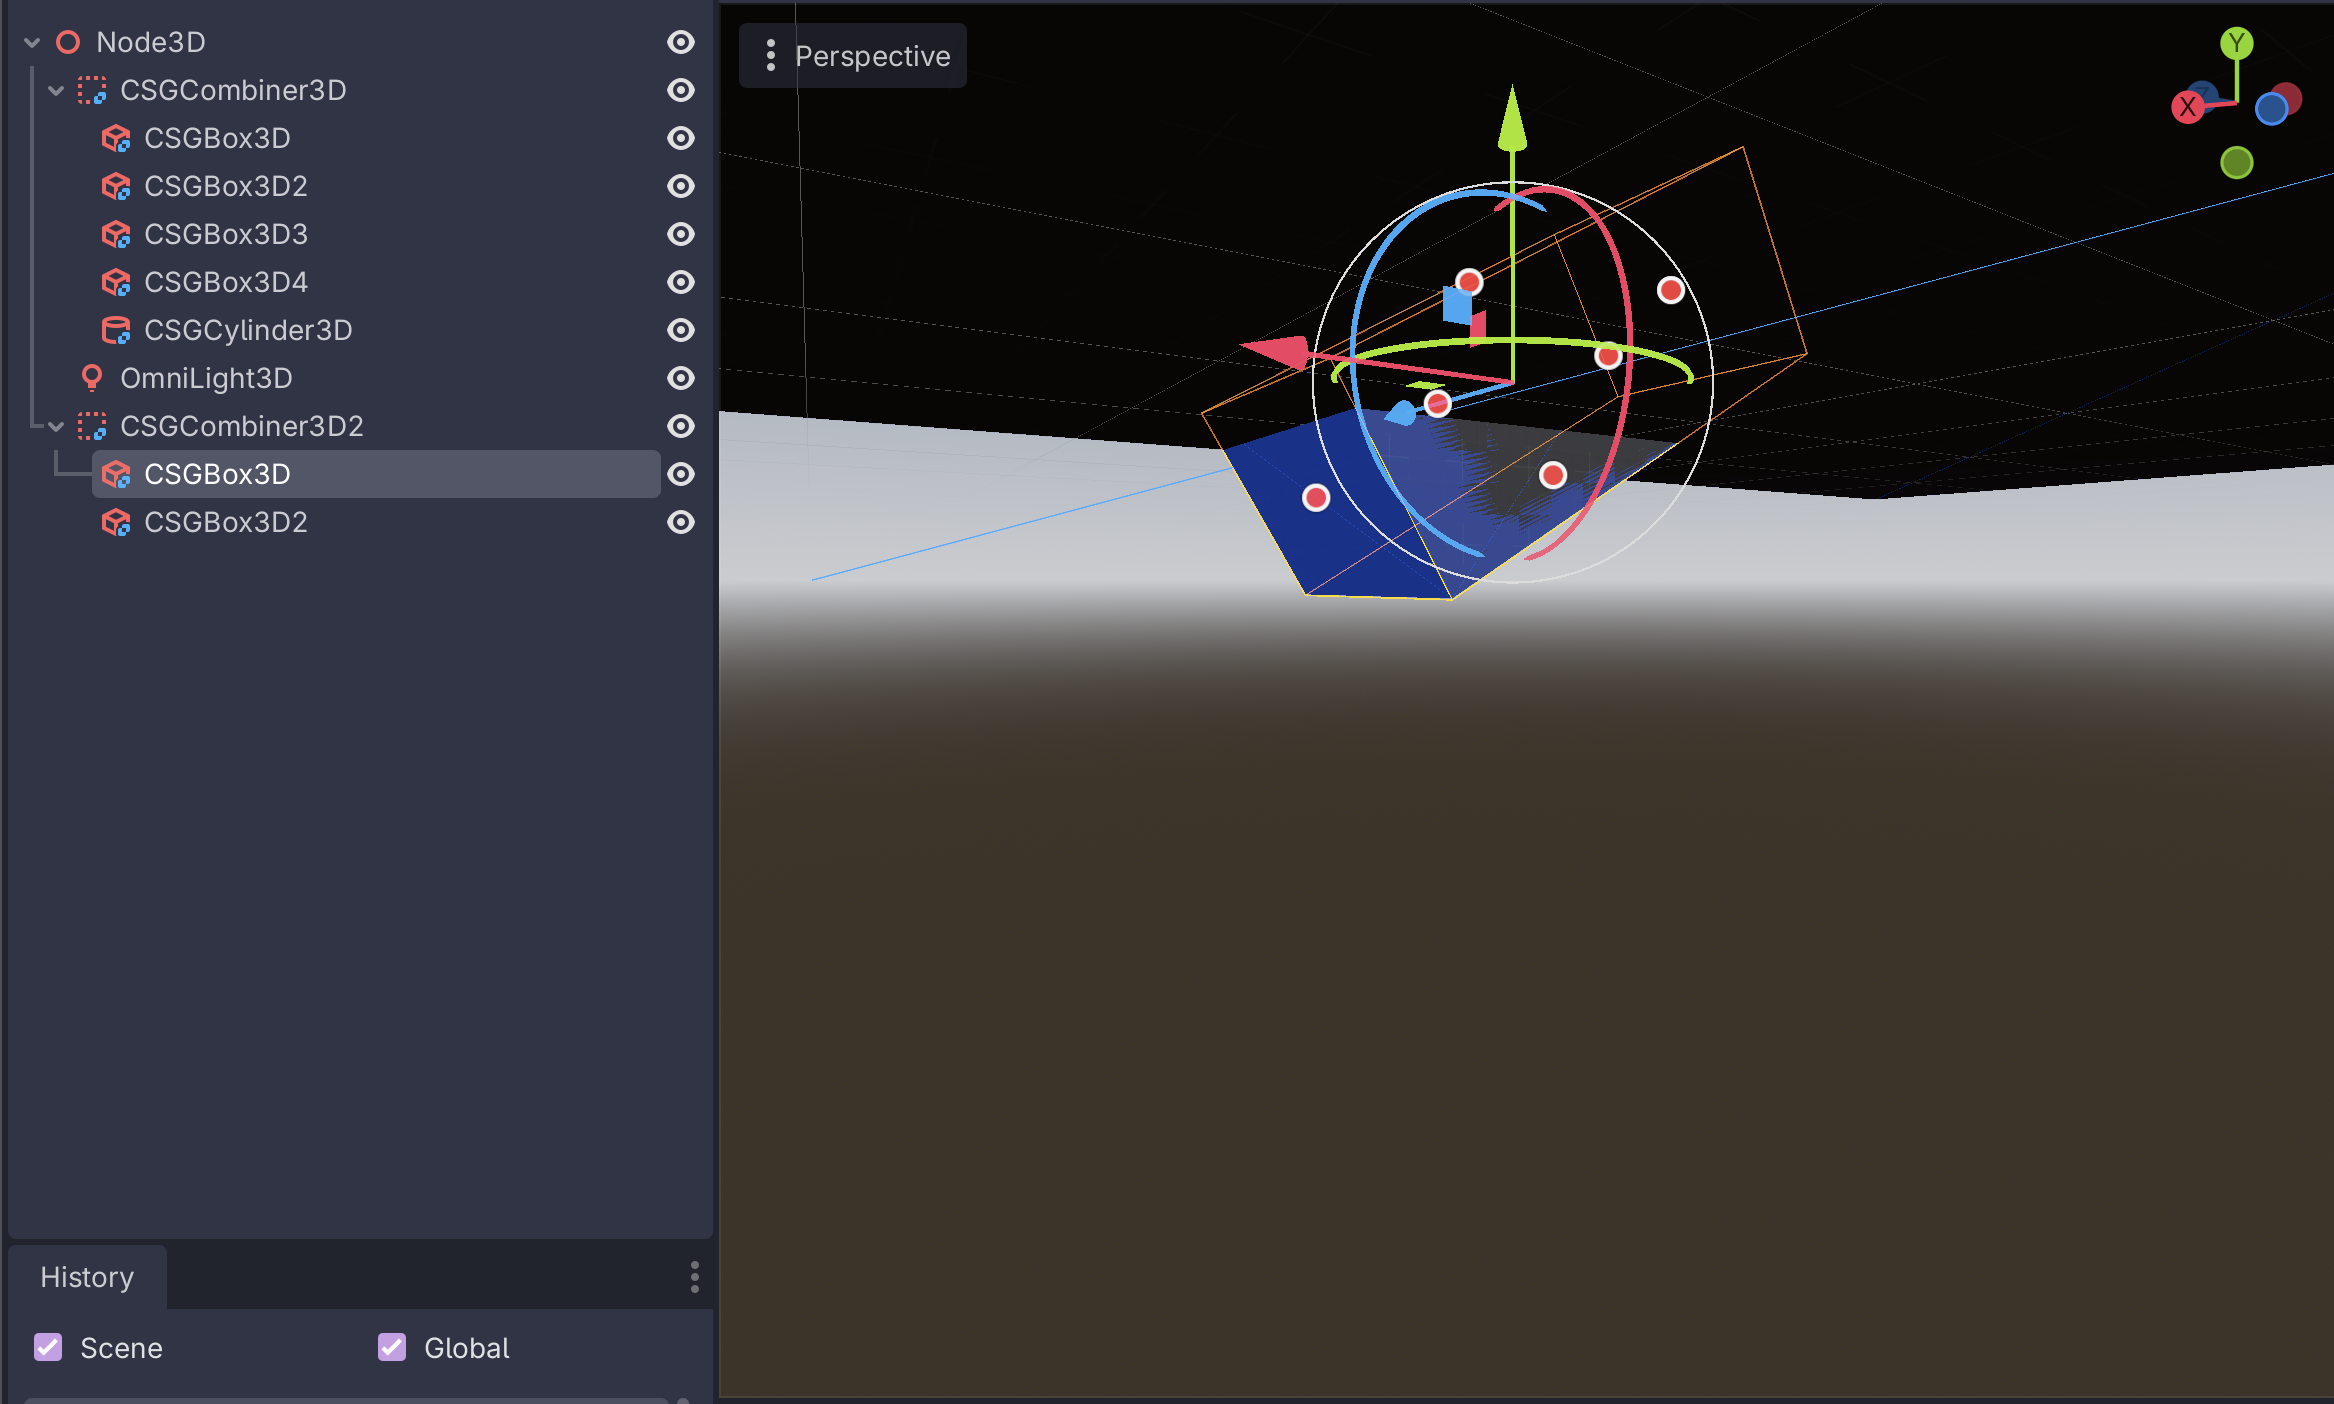
You can also create two of the same CSG primitives, shrink one down by a bit, and then set the "Operation" of the smaller one to "Subtraction".
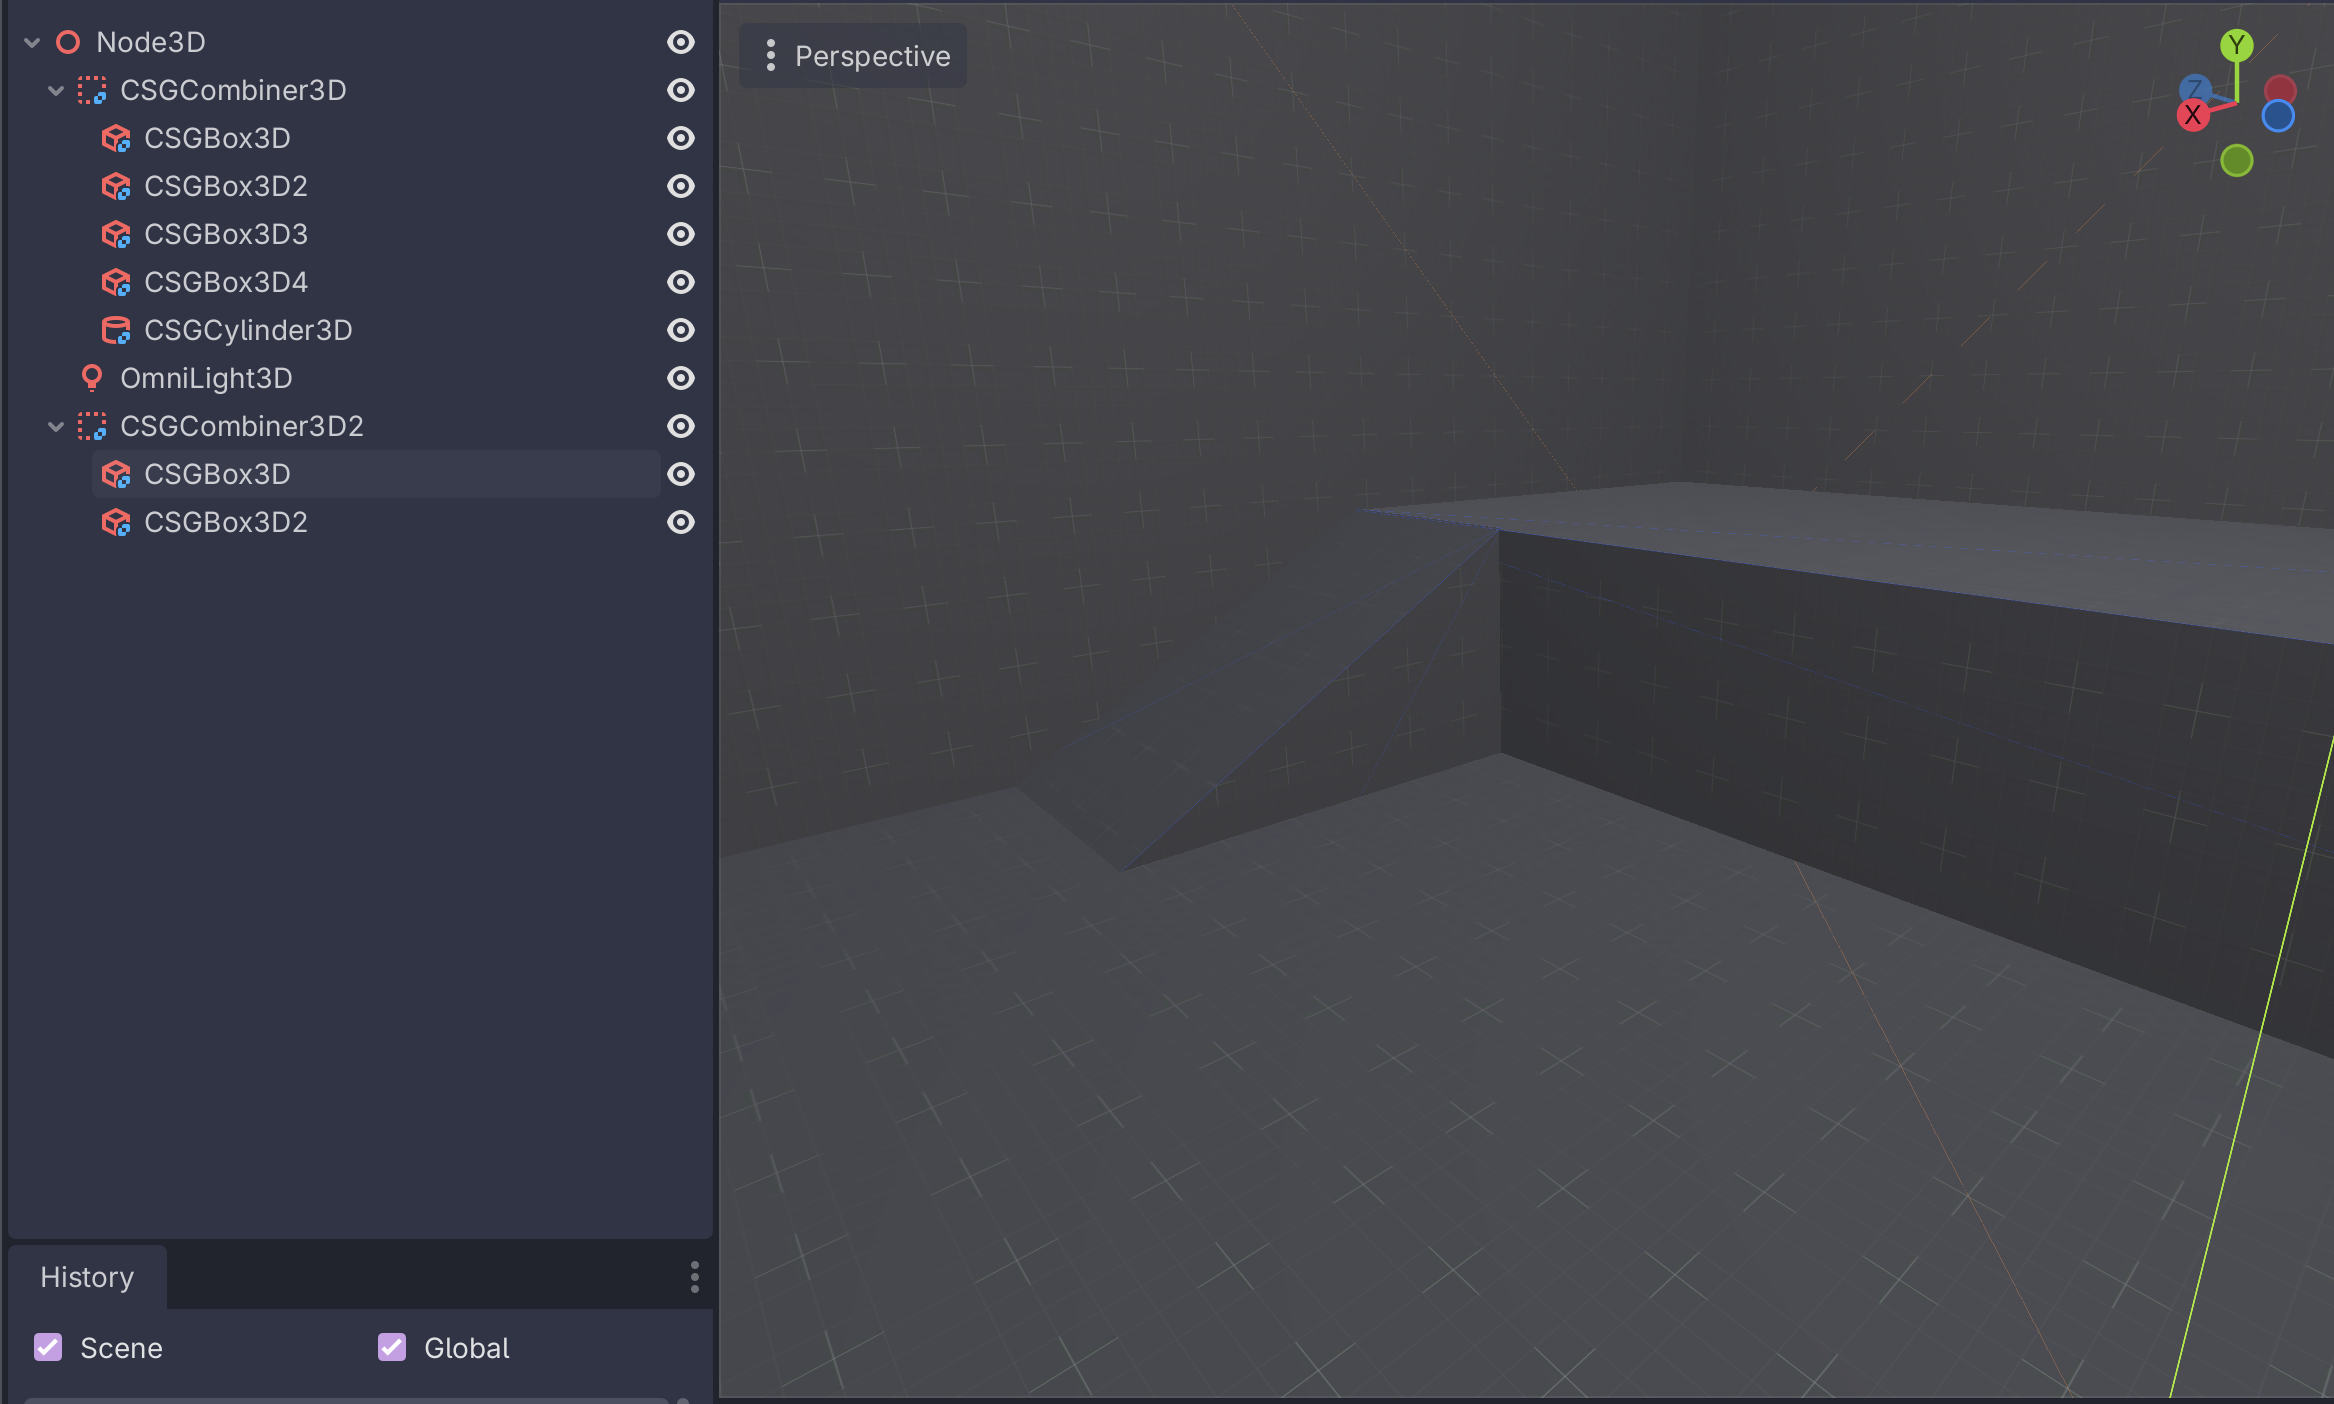
Here, I have two boxes. The outer one has a size of (10, 10, 10) and the inner one has a size of (9.5, 9.5, 9.5)

This leaves you with a hollow box with nice, thick walls. Walls that are ~0.5 units thick are nice since they make it easy to hide overlapping geometry if you have anu.
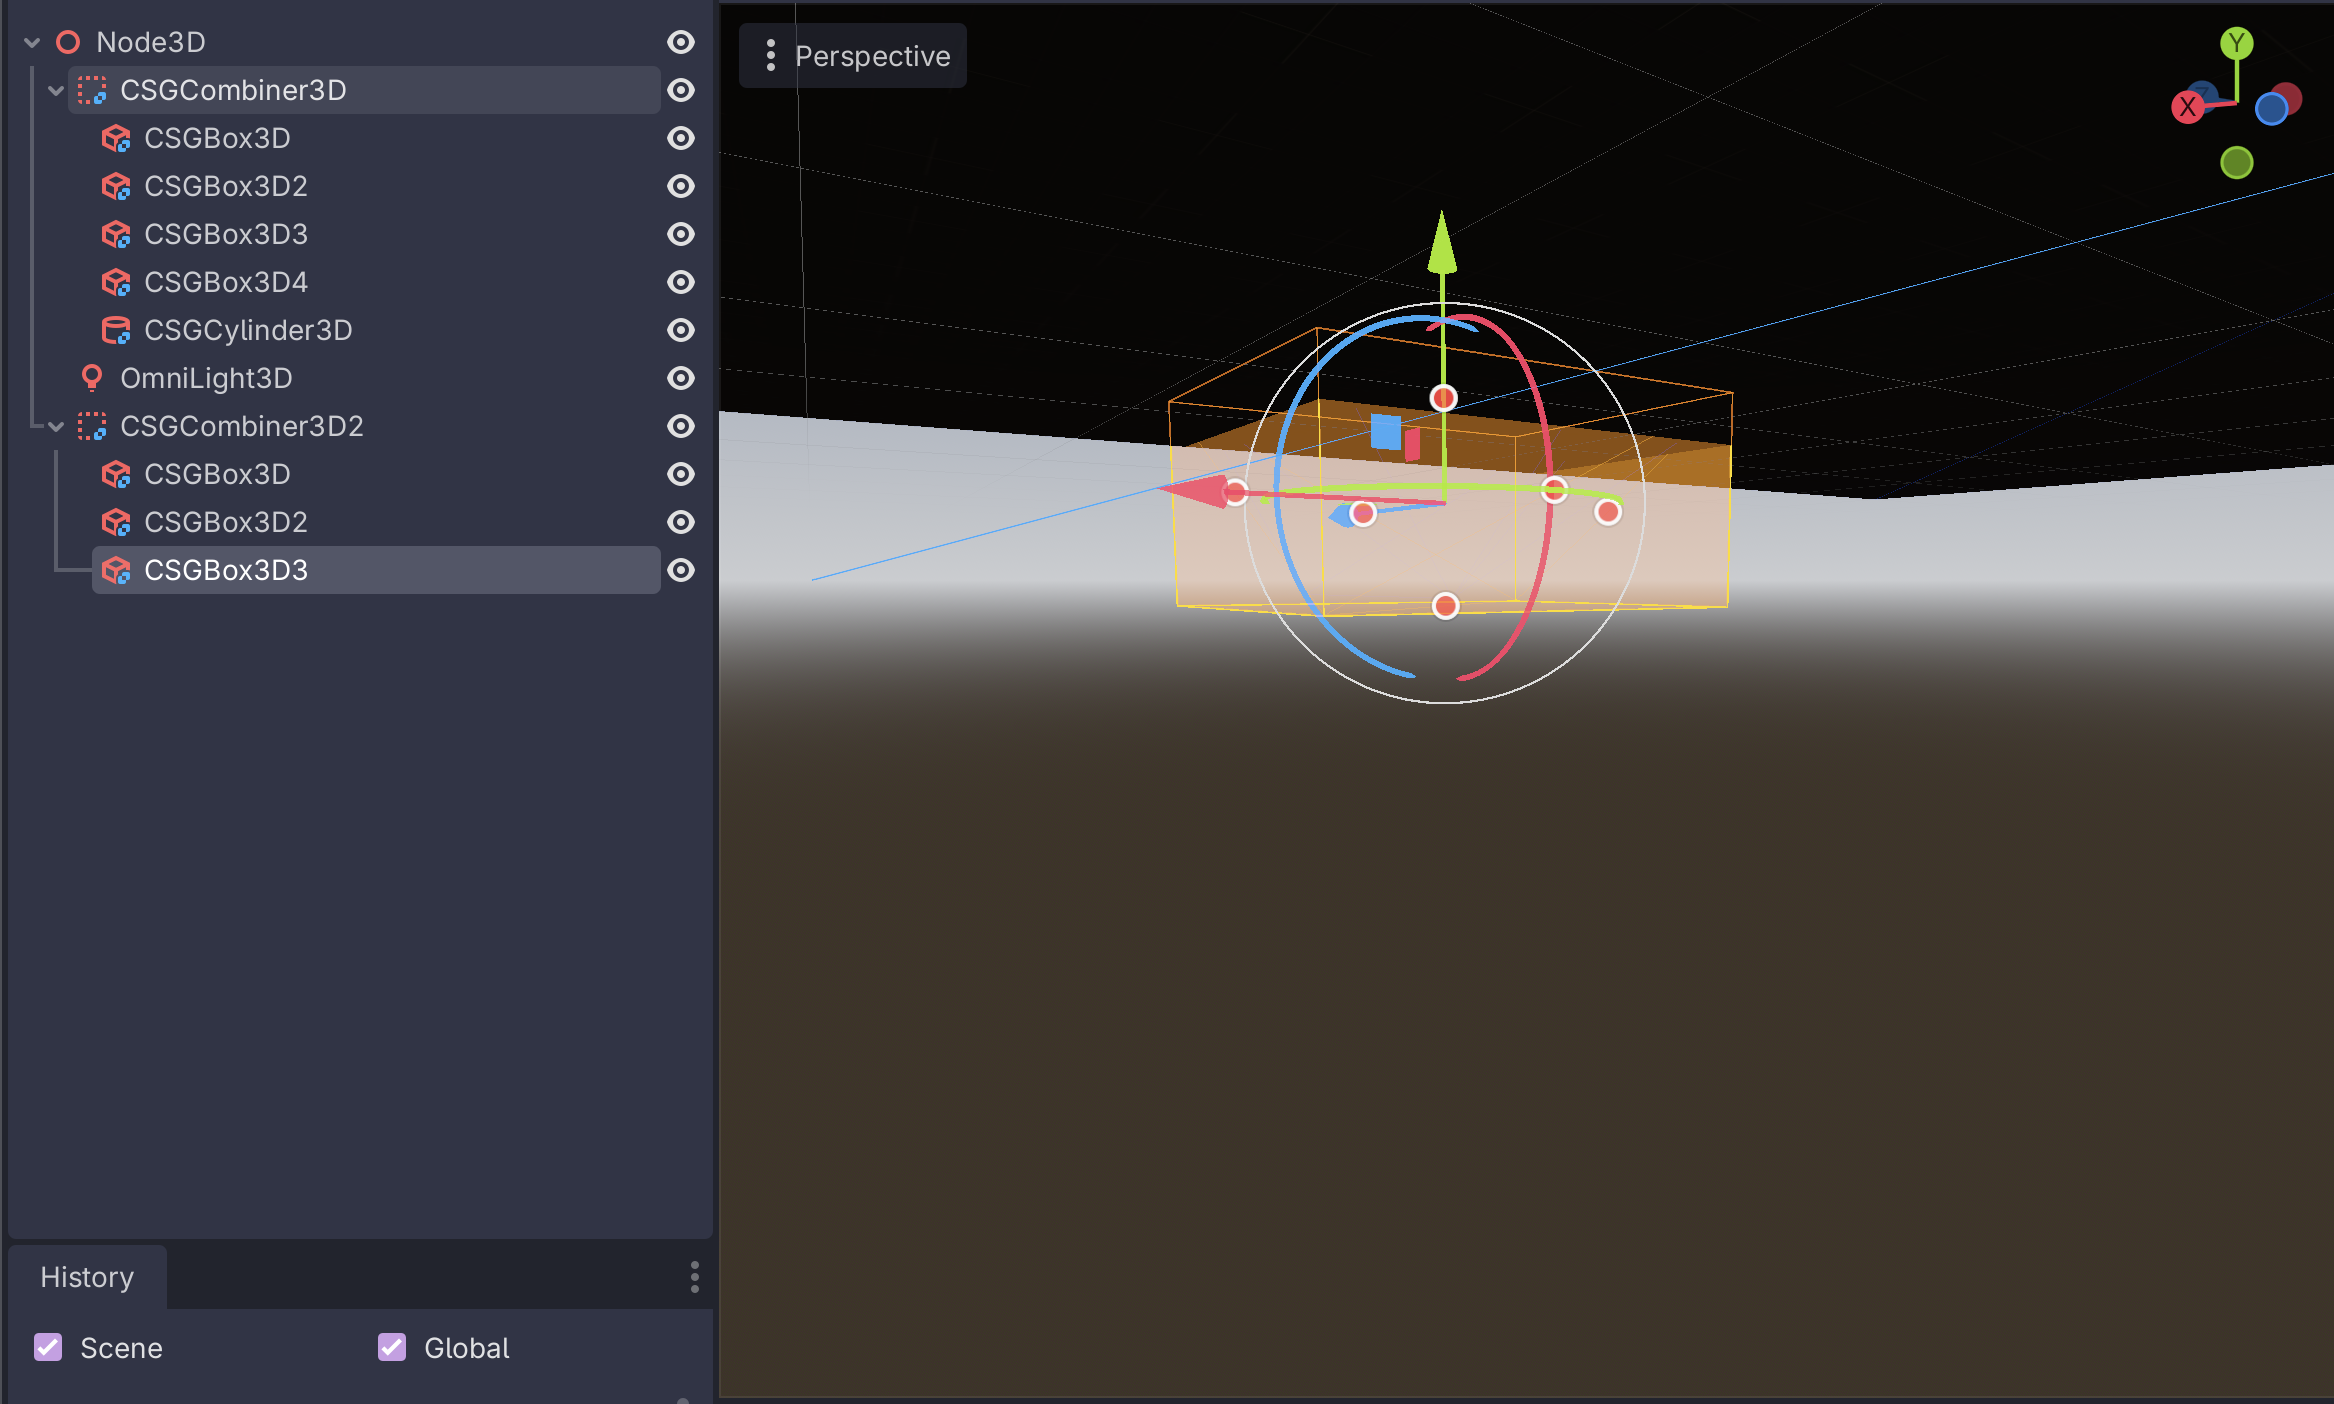
To something like a door, you can add another node with subtraction:
You can also add things like windows:
Making ramps and multiple levels
Ramps can be made by adding a box and, rotating it by 30deg on the Z axis, and then positioning it against another box.
You can make the ramp taller so that there isn't any space underneath it. Getting these lined up exactly can be tricky, but in general character controllers are able to deal with small gaps/hitches and it can be cleaned up in Blender.
However, making the ramp tall enough to not have space underneath it, it will poke out of the bottom of whatever it's on:
This can be remedies with another subtraction node that goes a bit into the floor. Again, this is why thicker walls are nice - you can hide these seams inside of them!
Rapid iteration
At this point, you should be able to drop the player node into the scene, play it, and then move around inside of it.
Super power here is that you can edit the CSG nodes as the game is running which means you can change things on the fly to see how they behave!
Some tips
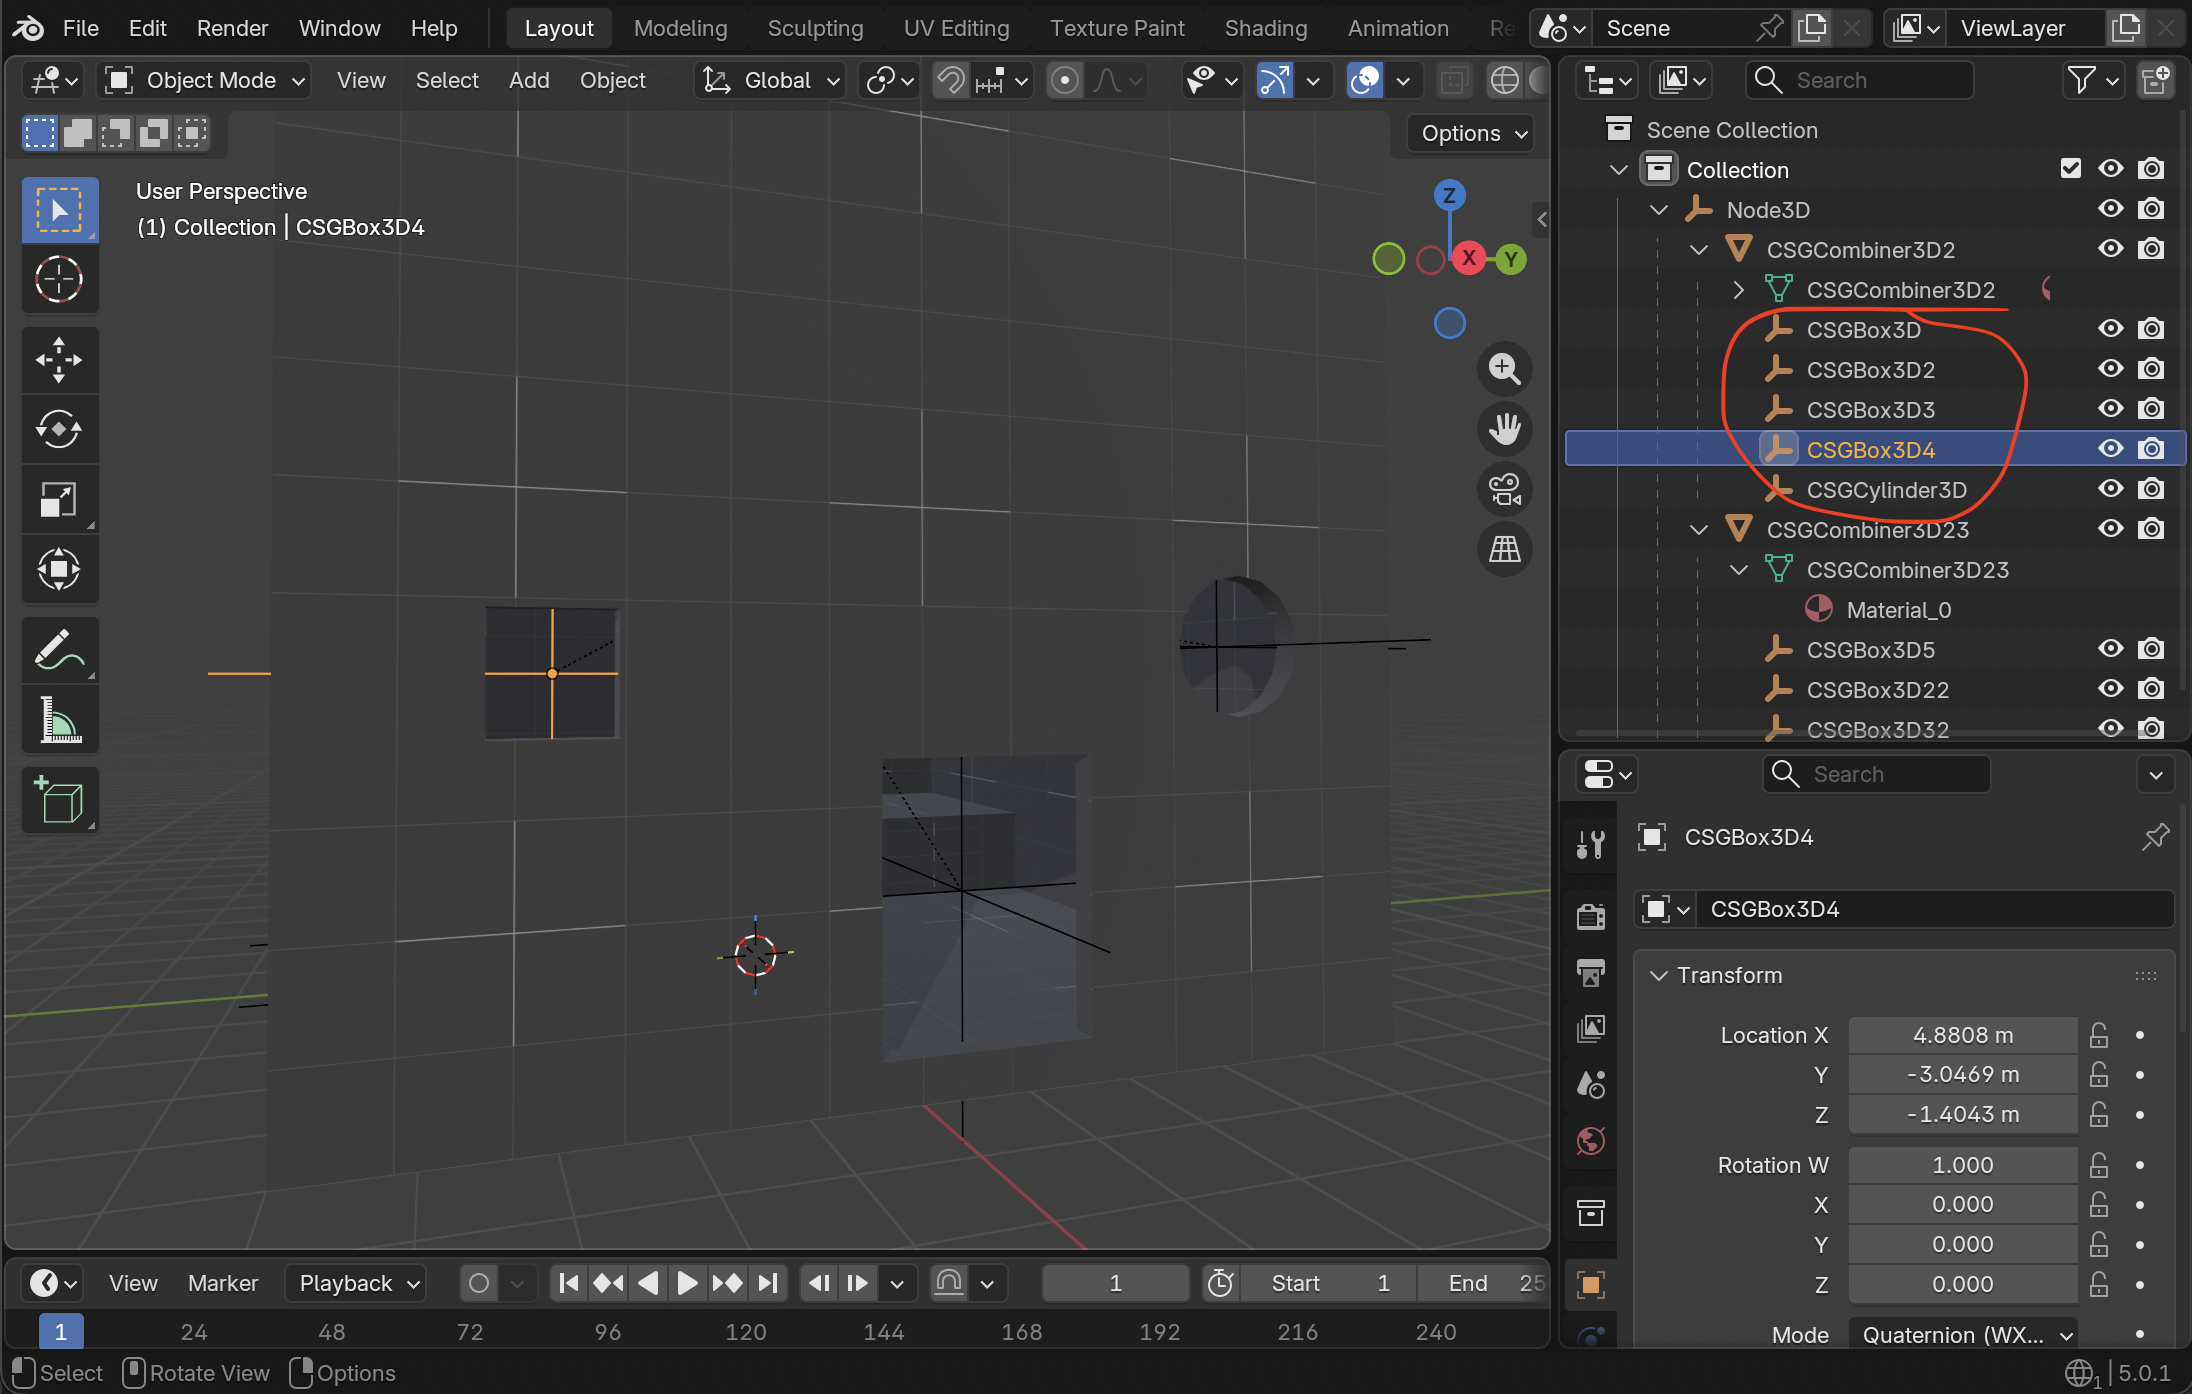
- In one scene, you can use multiple
CSGCombiner3Dnodes.- It's a good idea to keep things separated in this way, for example having the "shell" of a room be one combiner and having each "section" of it (floors, inner rooms, etc) be separate combiners
- When using multiple combiners, try to keep the origin of the combiner at or near the actual geometry being created. This makes it easier to move things around later.
- Order matters in the combining!
- Sometimes if you try to move things around, it will mess with the operations
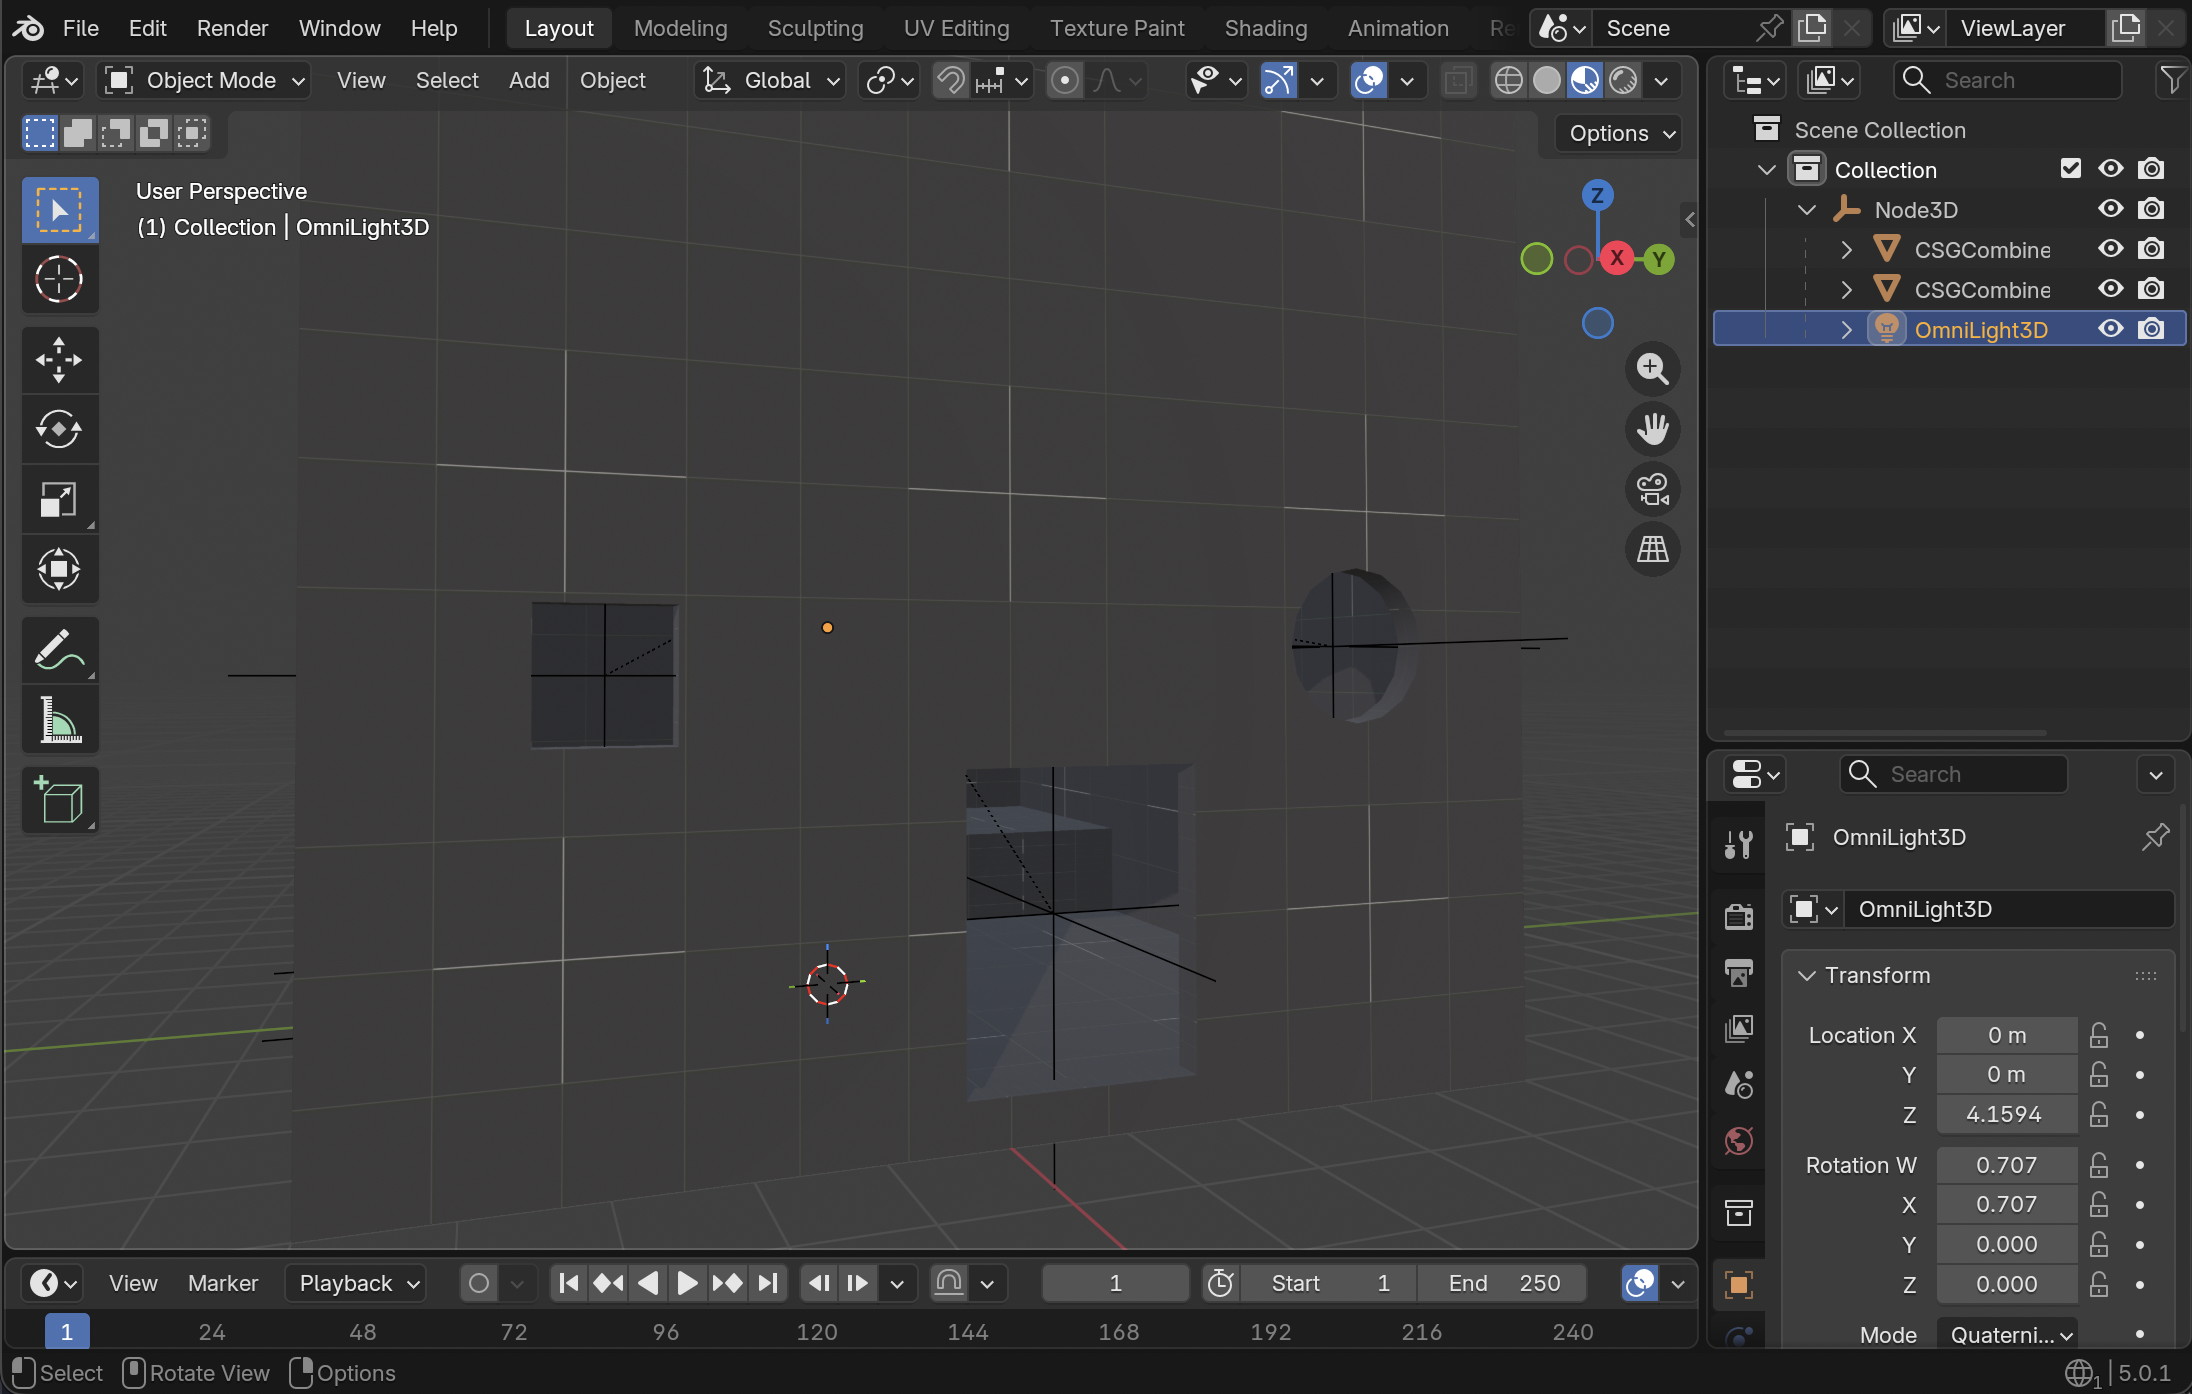
- Name nodes as you go to keep sanity
- In the moment, having
CSGBox3D33,CSGBox3D45,CSGBox3D13is fine but if you ever have to go back and touch them up later you're in for a world of pain
- In the moment, having
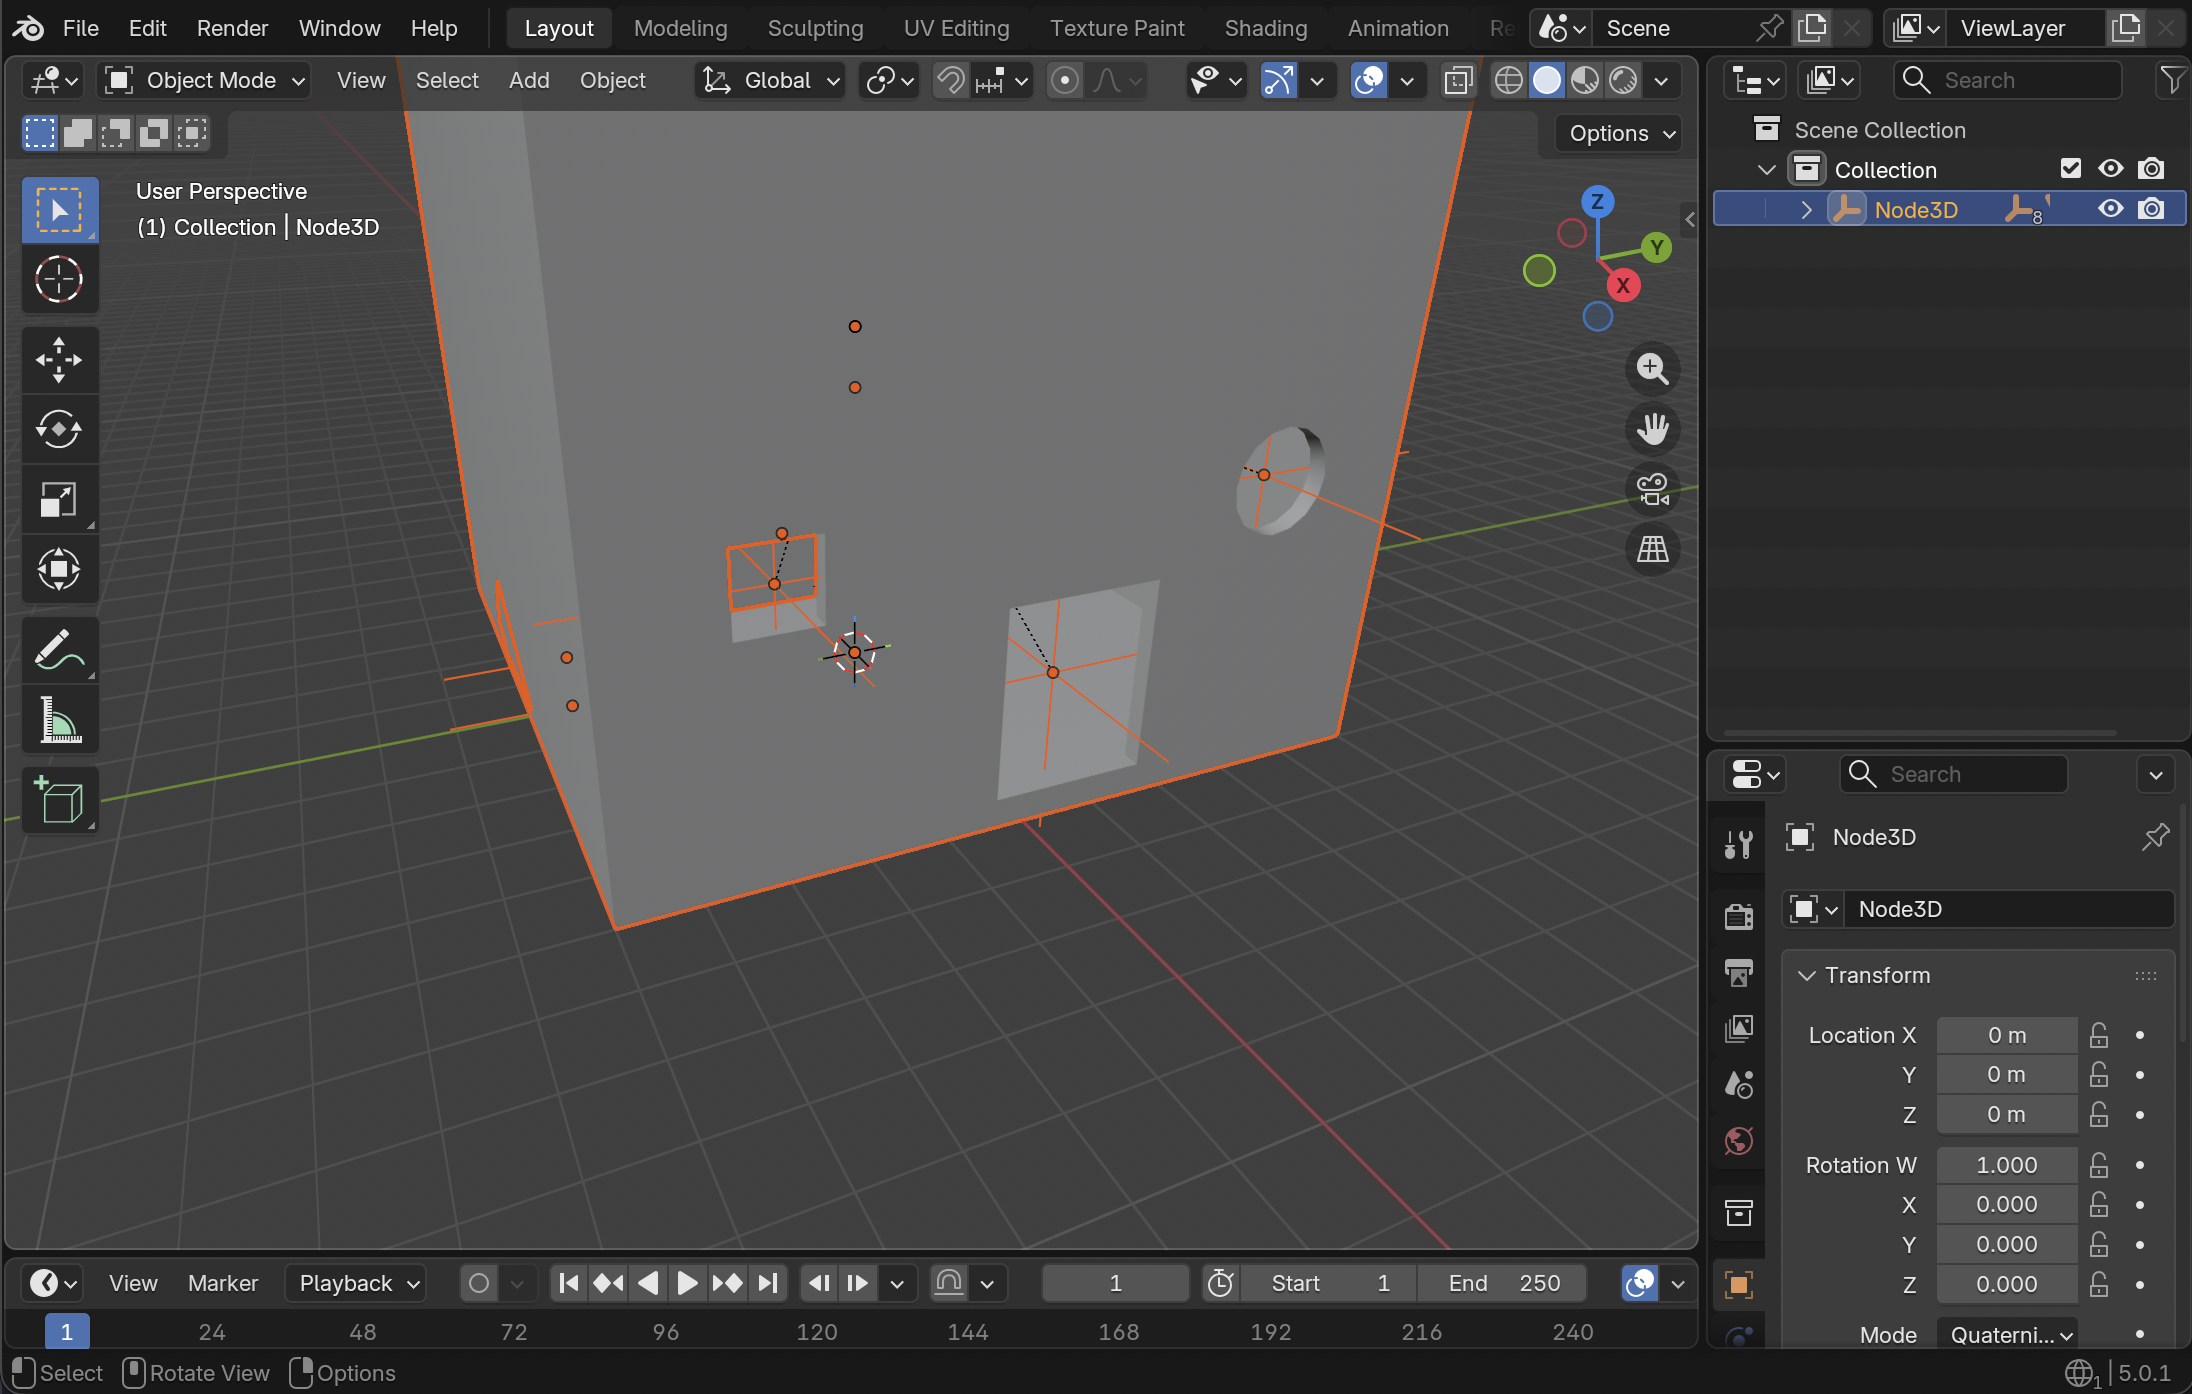
- Add an
OmniLight3Dinside of the scene to see things better as you go
Exporting CSG to Blender
Export glTF from Godot
Godot has a native scene glRF exporter built-in that can do this.
This is a one-way conversion!!!
That means that you should be pretty sure that your CSG layout is how you want it before exporting it from Godot.
Depending on the changes you want to make, it could be easy or difficult to port them back and forth.
It lives under Scene → Export As... → glTS 2.0 Scene...
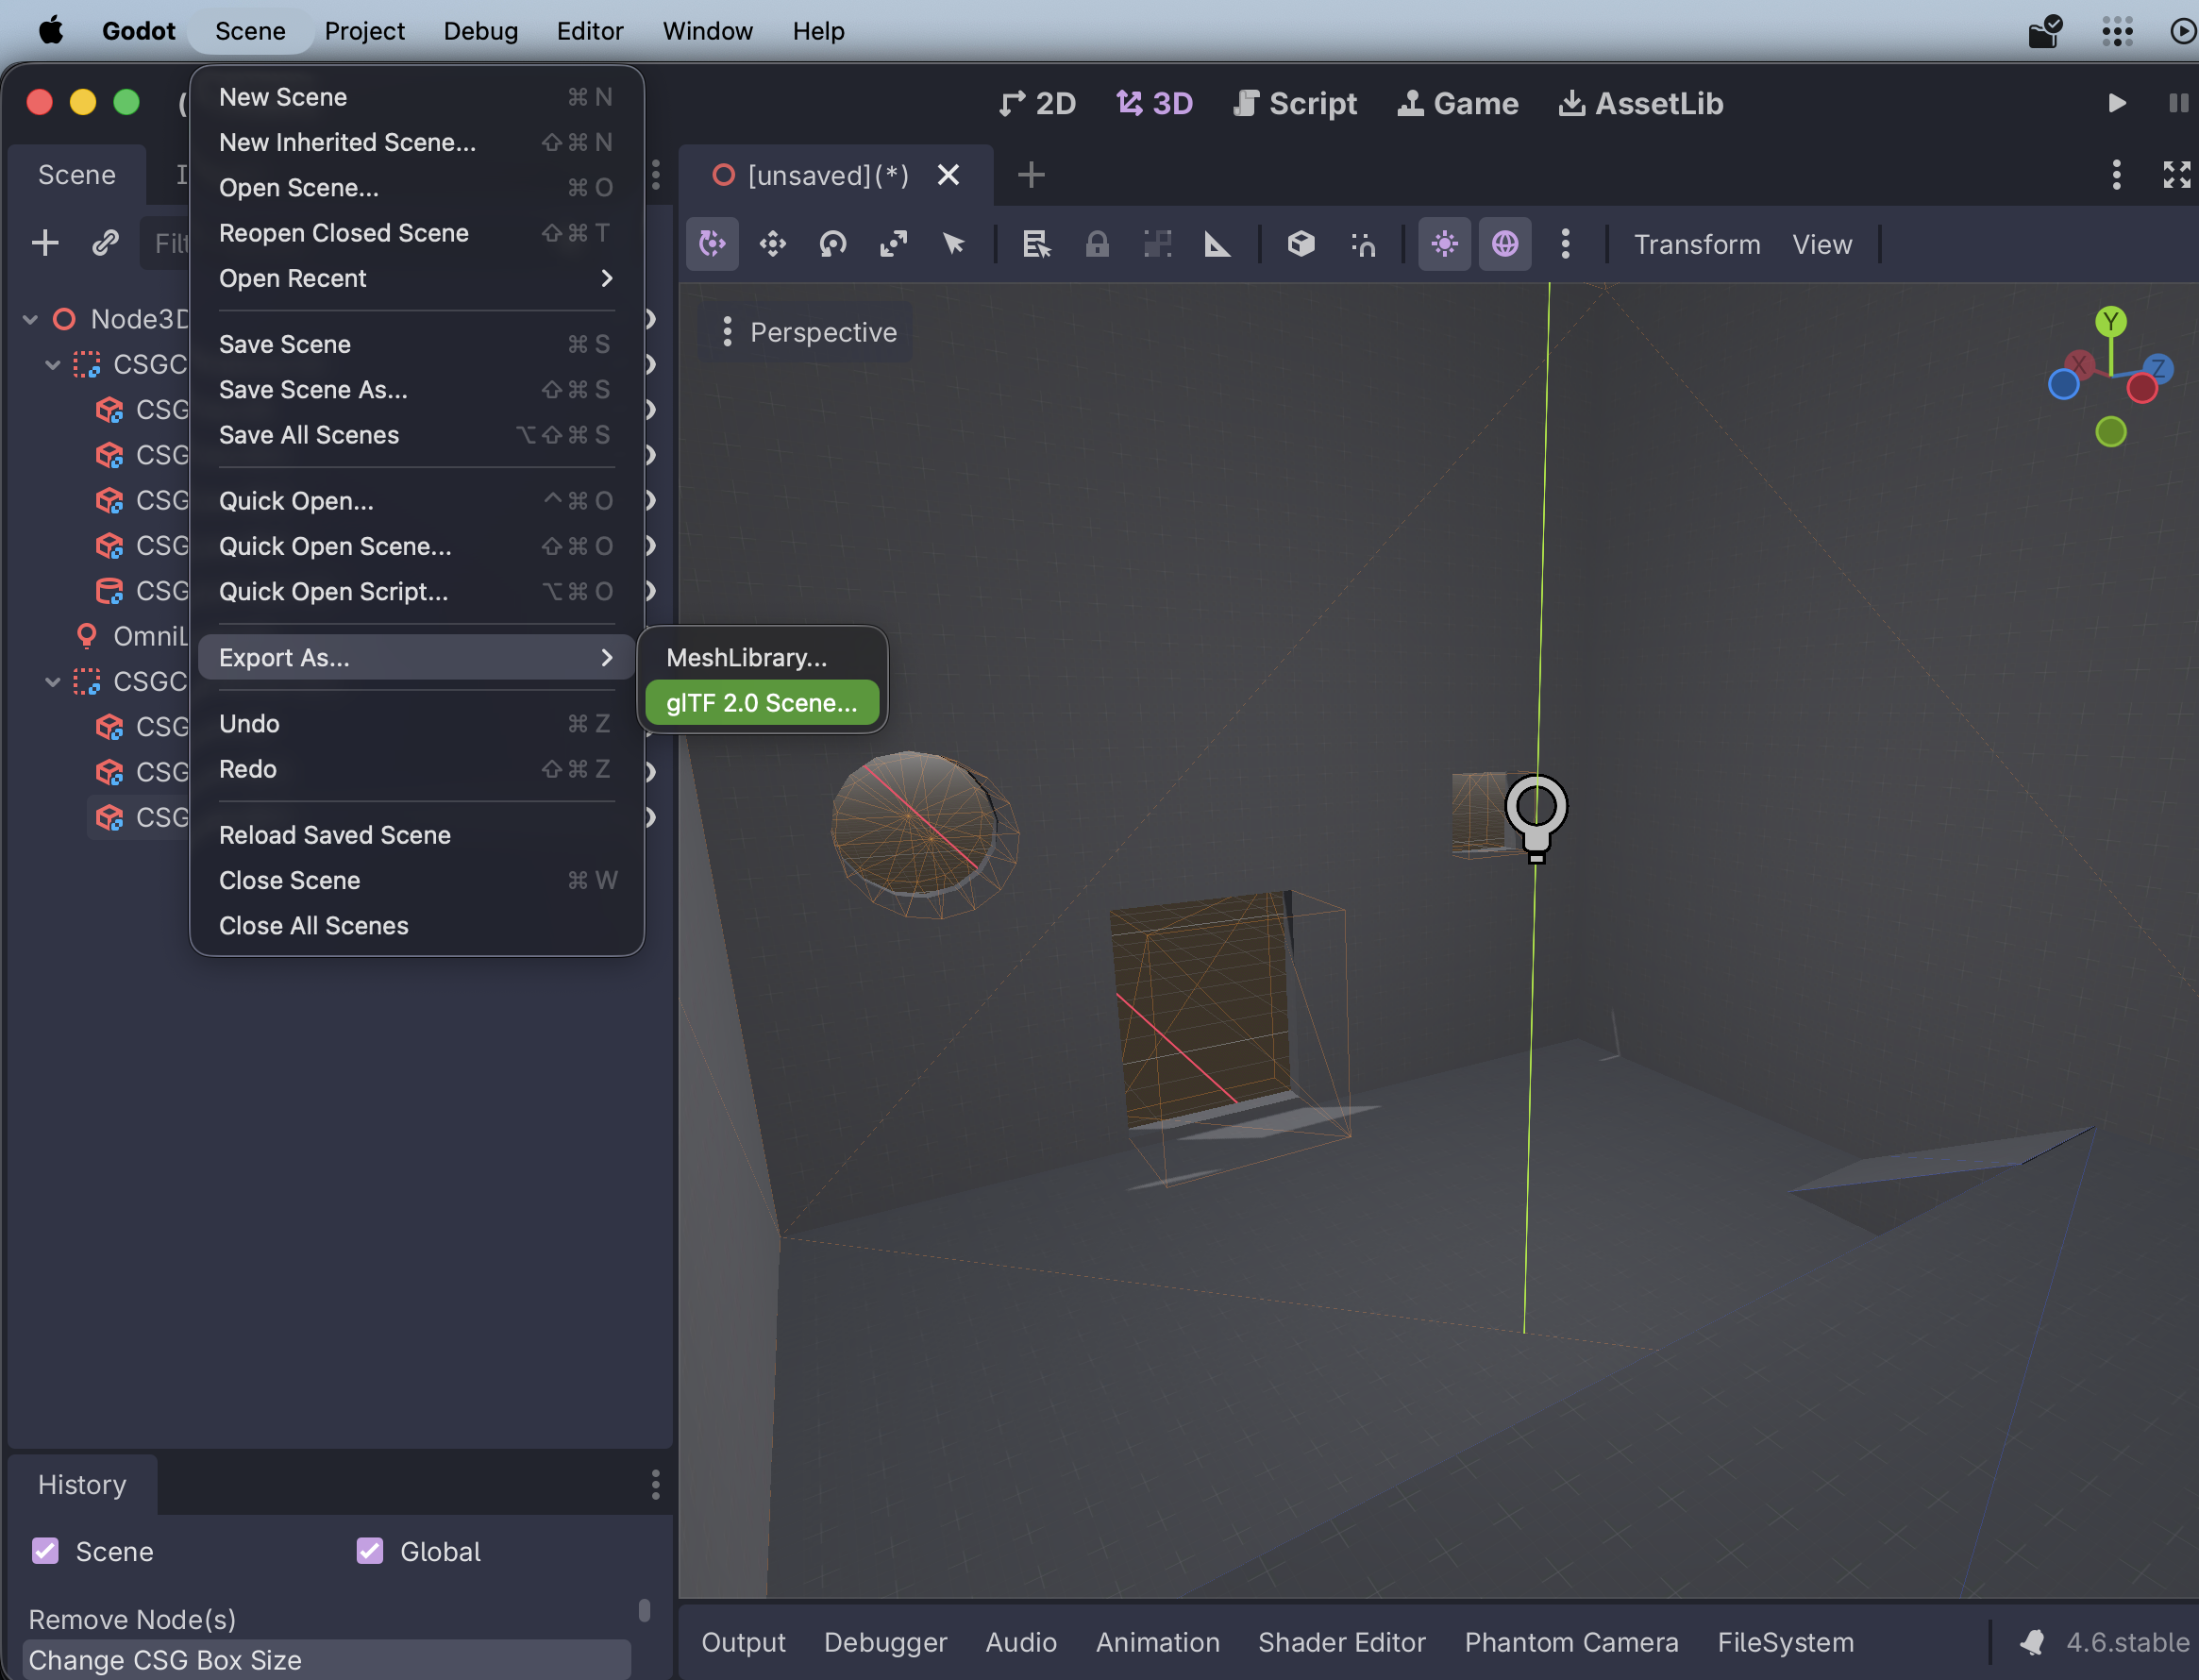
The settings you choose here don't really matter:
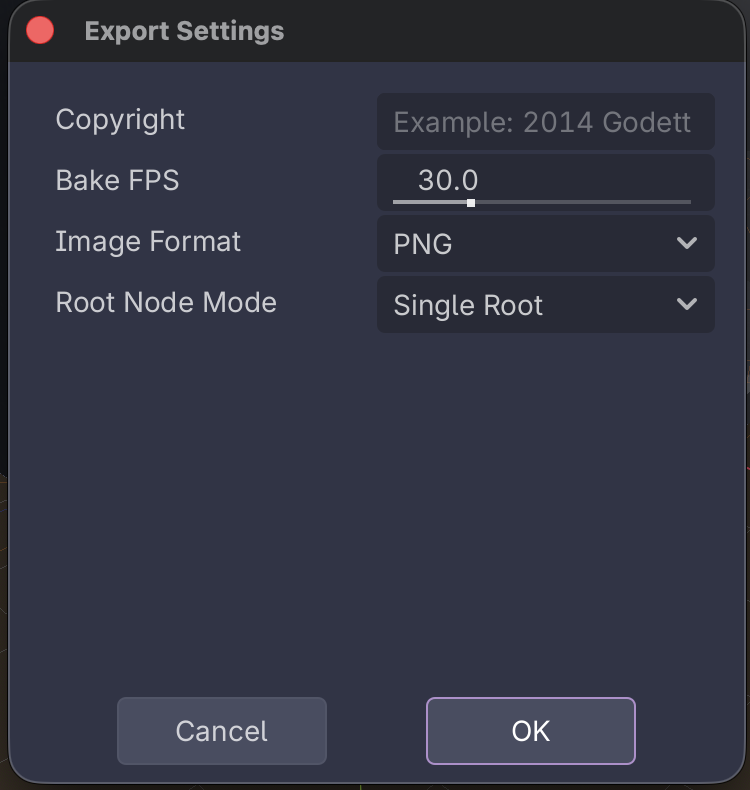
You will then be prompted for where to save the scene.
Import glTF to Blender
Over in Blender, create a new file and sacrifice the default cube 🔪🧊
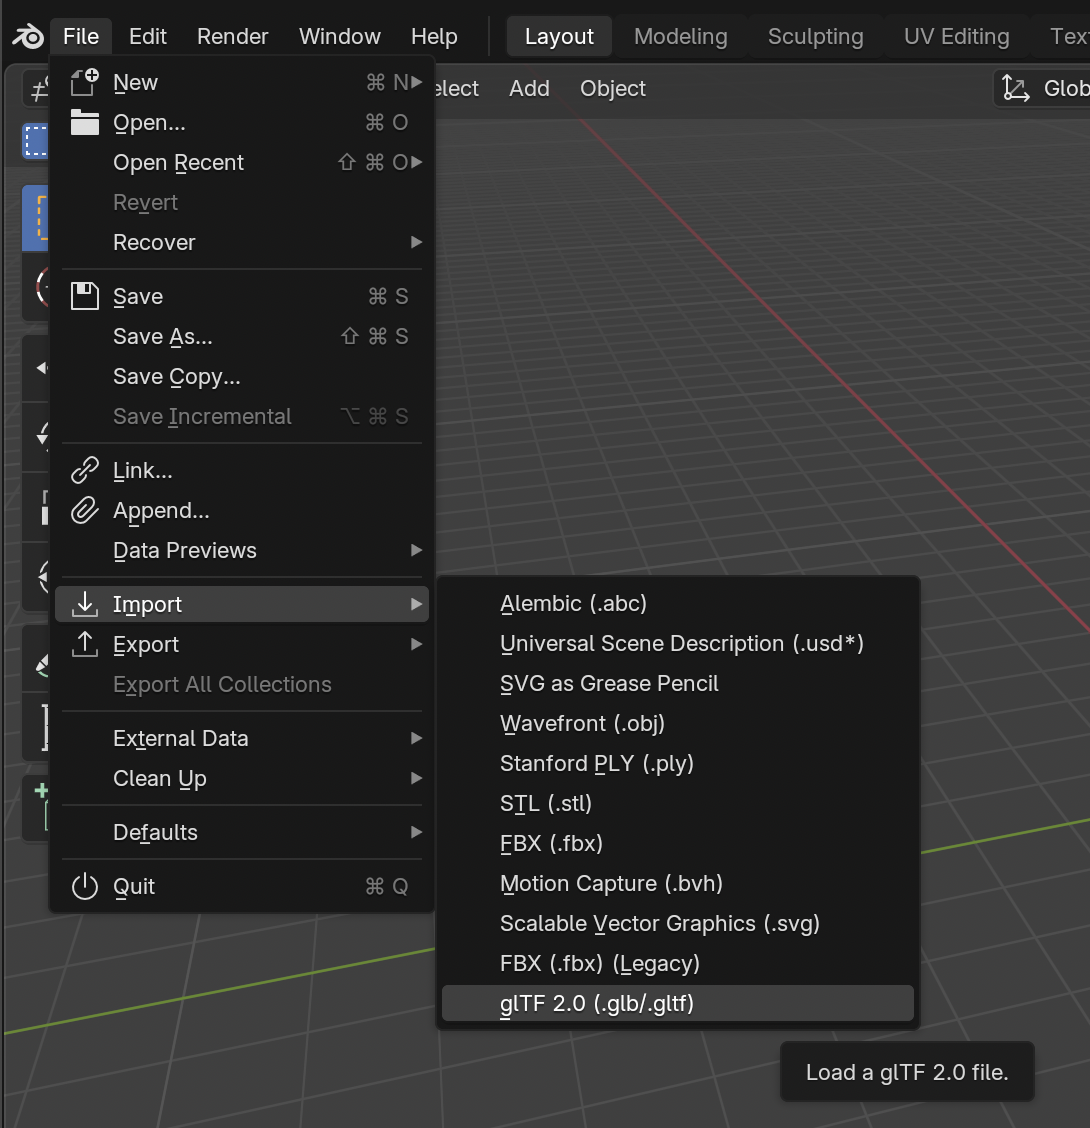
Then, go to File → Import → glTF 2.0 (.glb/.gltf)
After importing, you'll see your CSG mesh
Note that materials, lights, etc. that were in the scene get imported as well! Delete anything you don't want.
Cleaning up the imported glTF
Note that for each CSG node that you added, there will be an "Empty" object. You can delete these.
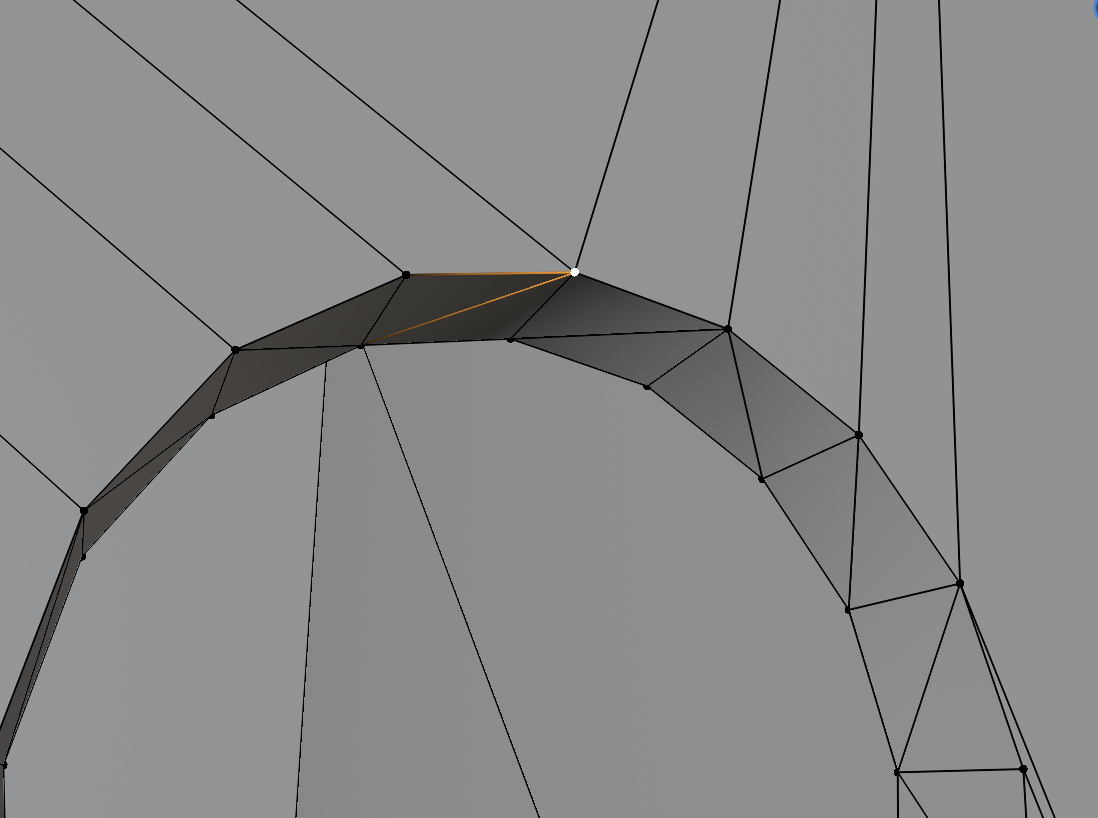
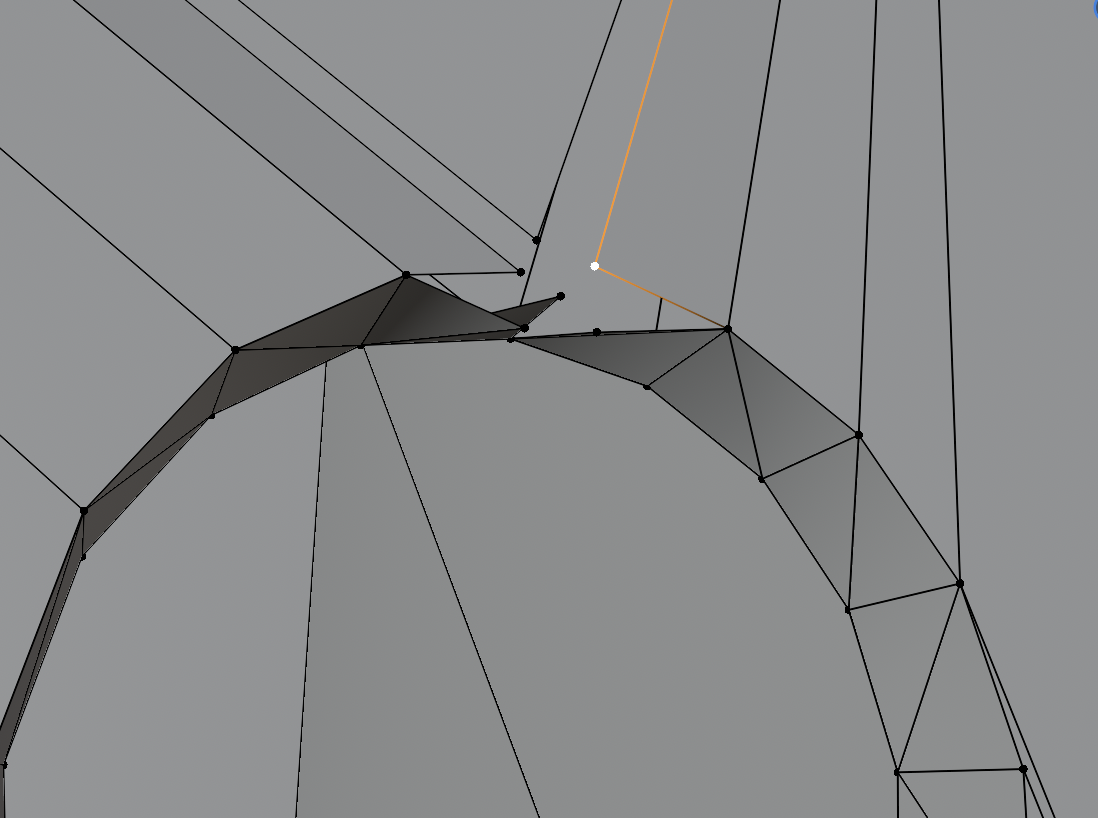
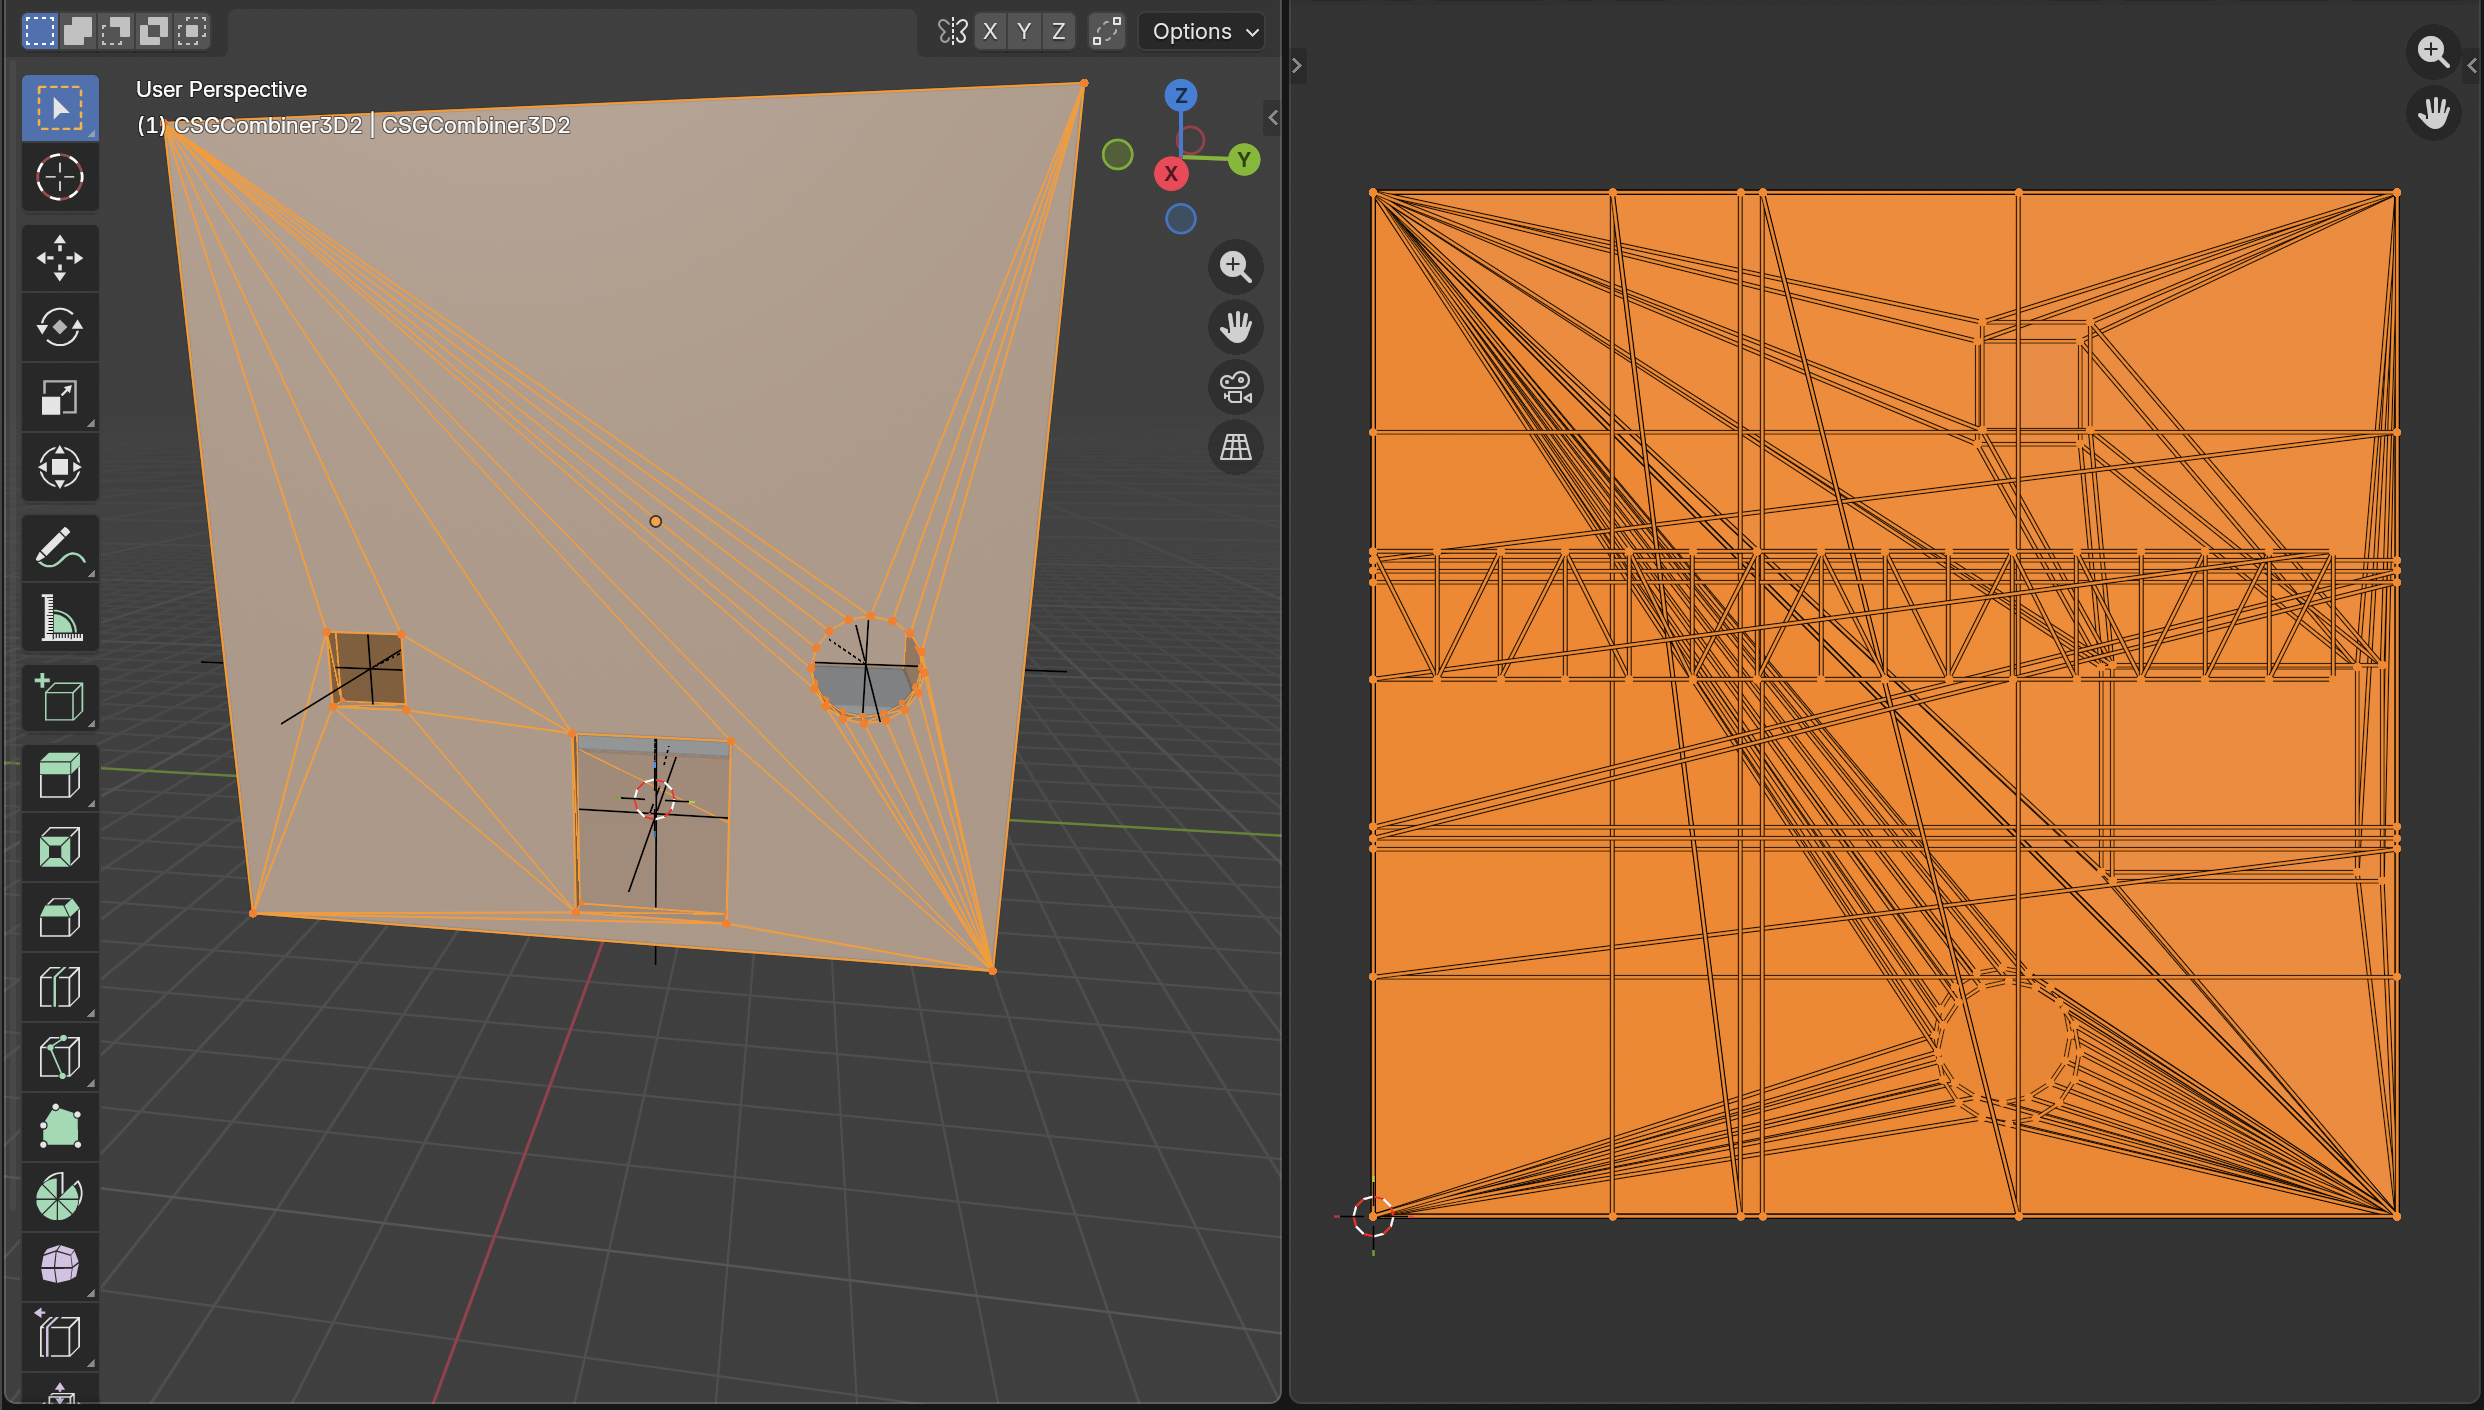
Also very important here, none of the vertices are connected in the exported mesh! As an example, check out this one vertex that is actually 5 vertices together 😭
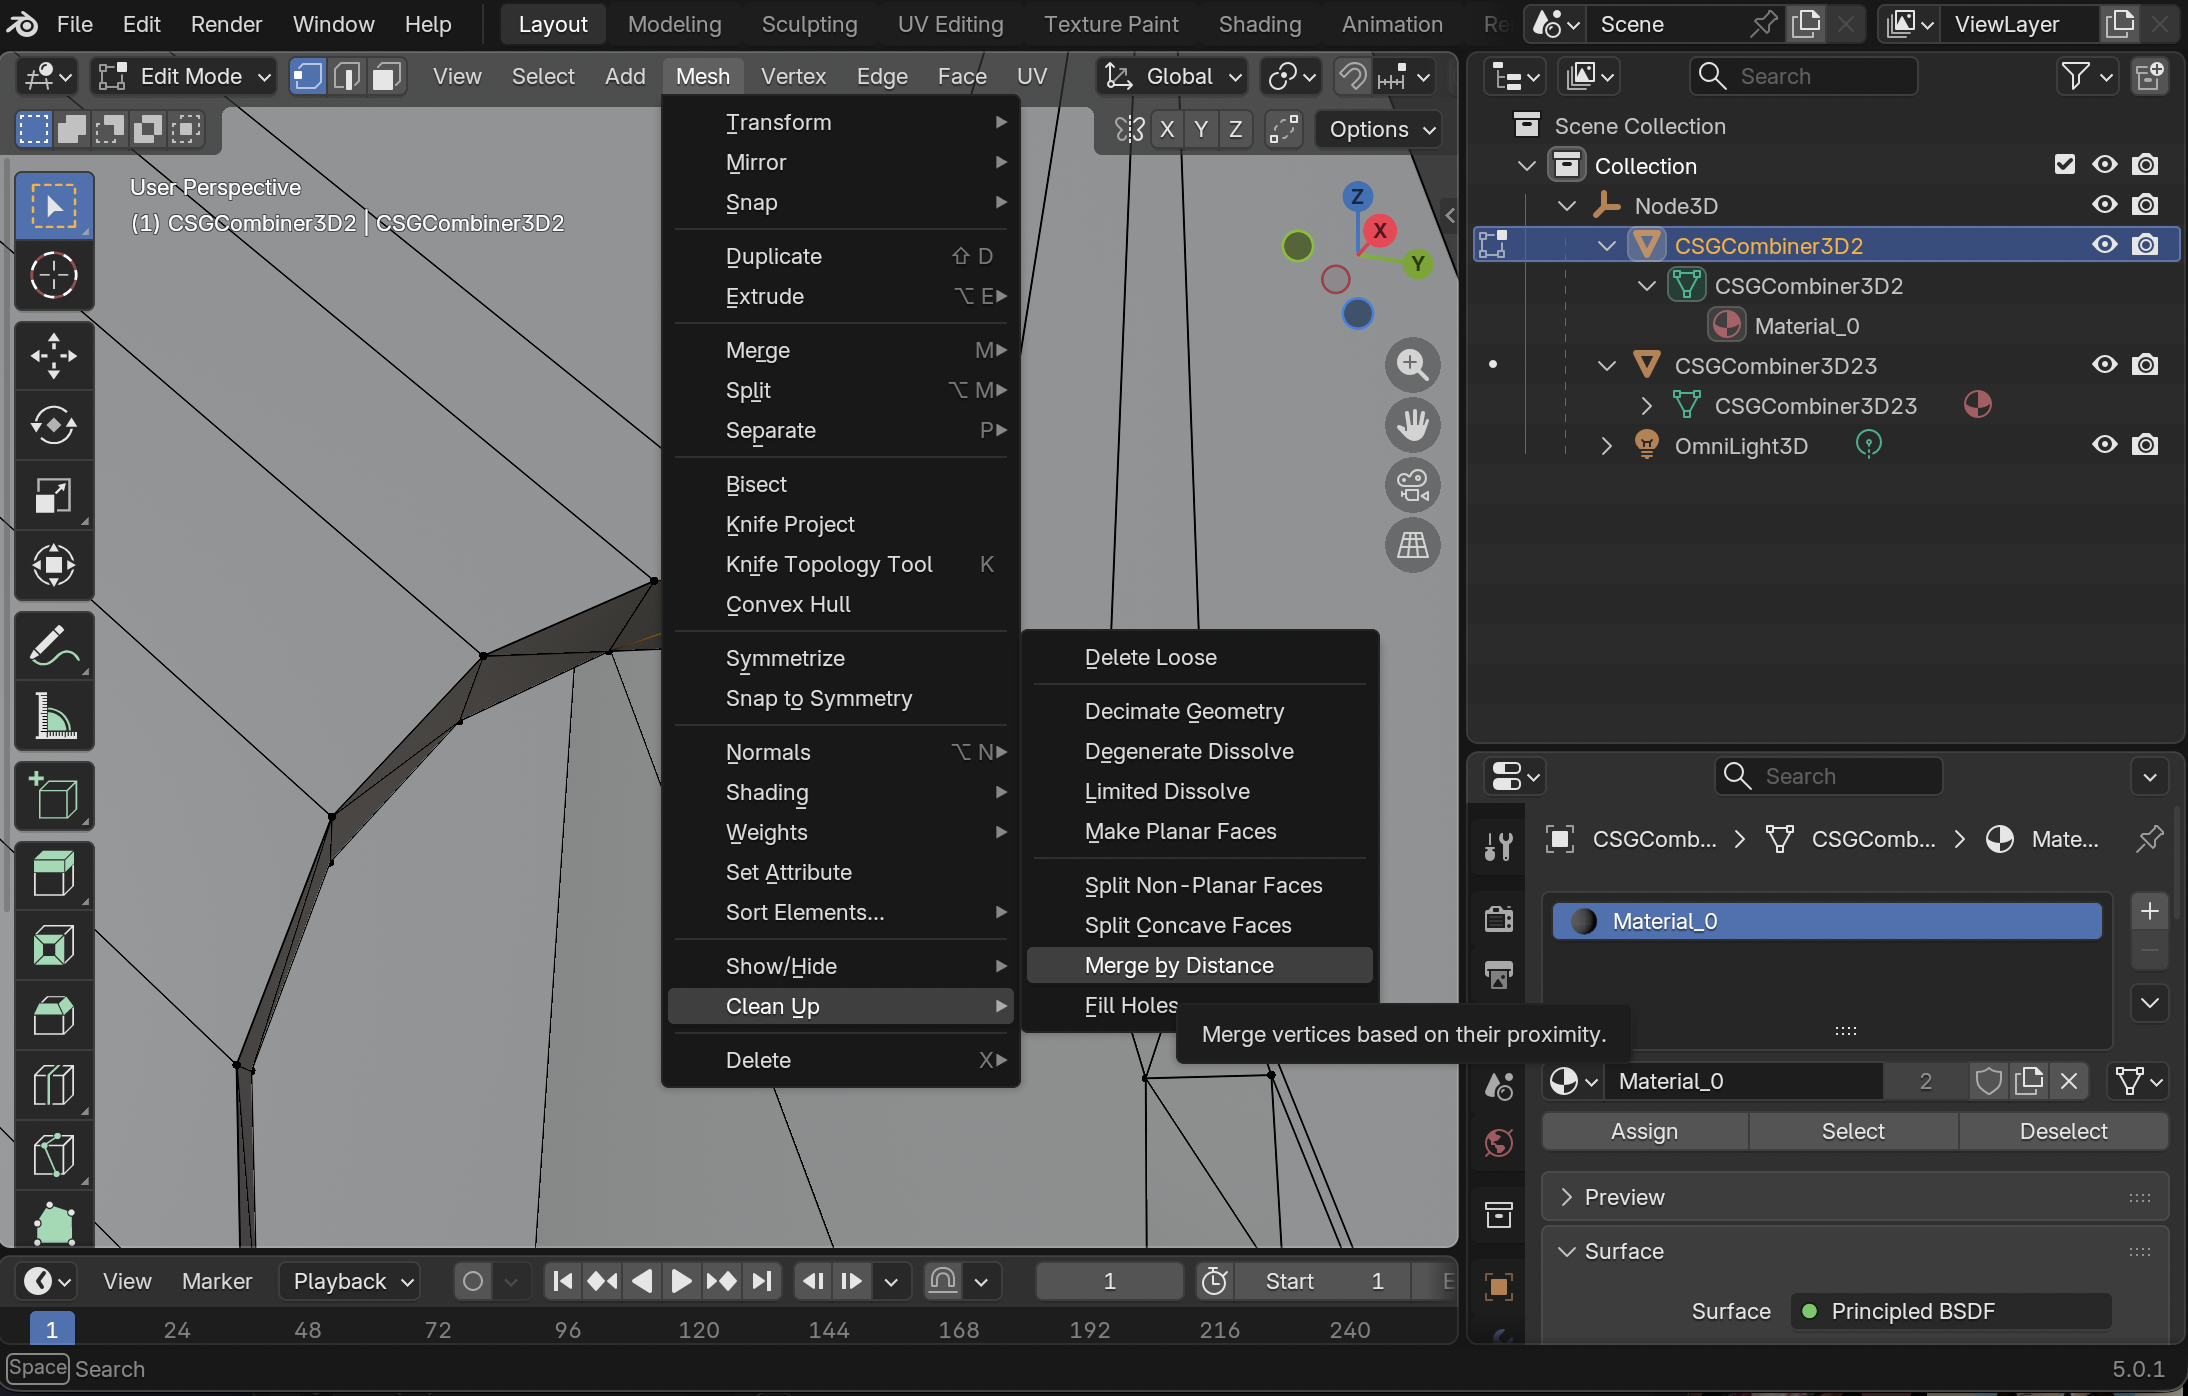
To fix this hit "A" on your keyboard to select all vertices, then go to Mesh → Clean Up → Merge by Distance
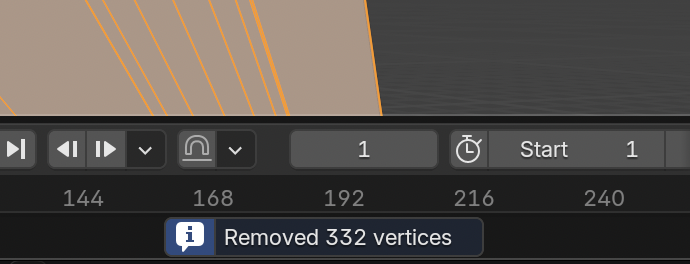
You should see a number of vertices removed at the bottom of the window.
You will have to do this for each individual CSG mesh that was exported.
For a little bit of extra clean-up you can also go to Face → Triangles to Quads.
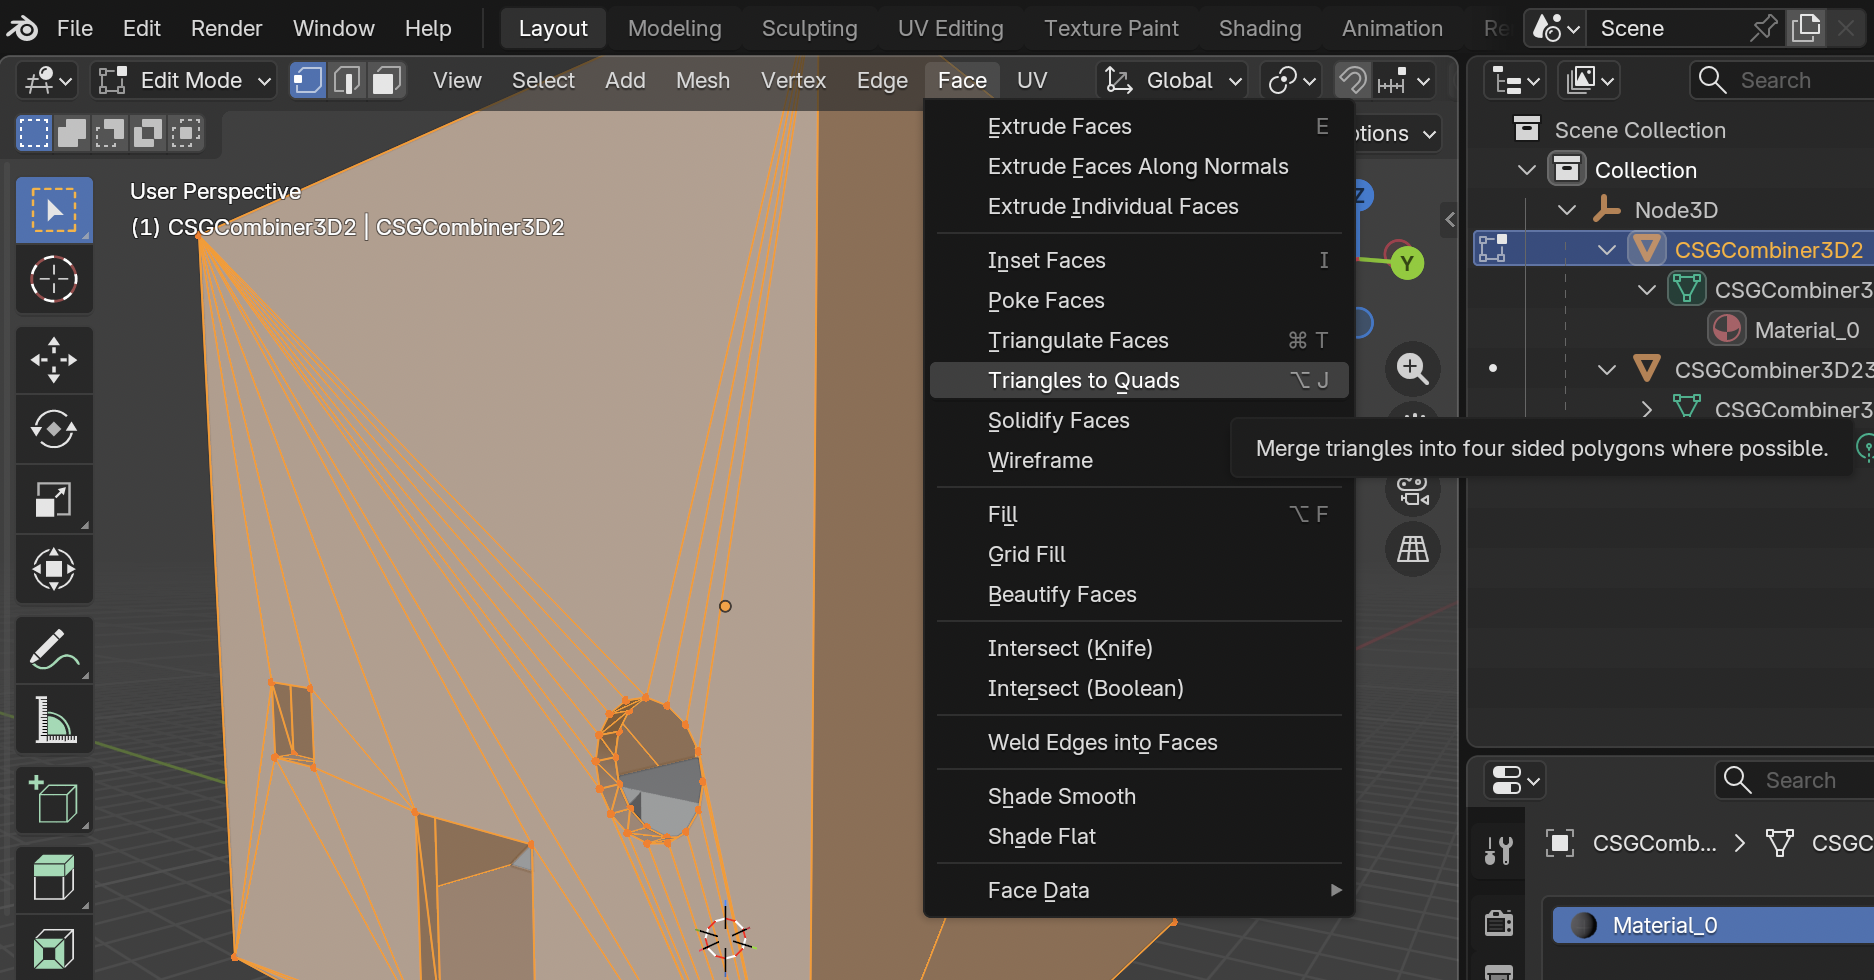
The topology here is not great, but you can at least get the overall shape of what you're working with. You can either edit this mesh directly, or build another mesh on top of it that has better topology.
The UVs here will also be a total mess - you may want to mark seams and unwrap it manually.
Back into Godot
After making changes to the mesh, export it back to glTF using our art pipeline and then import that back into Godot.
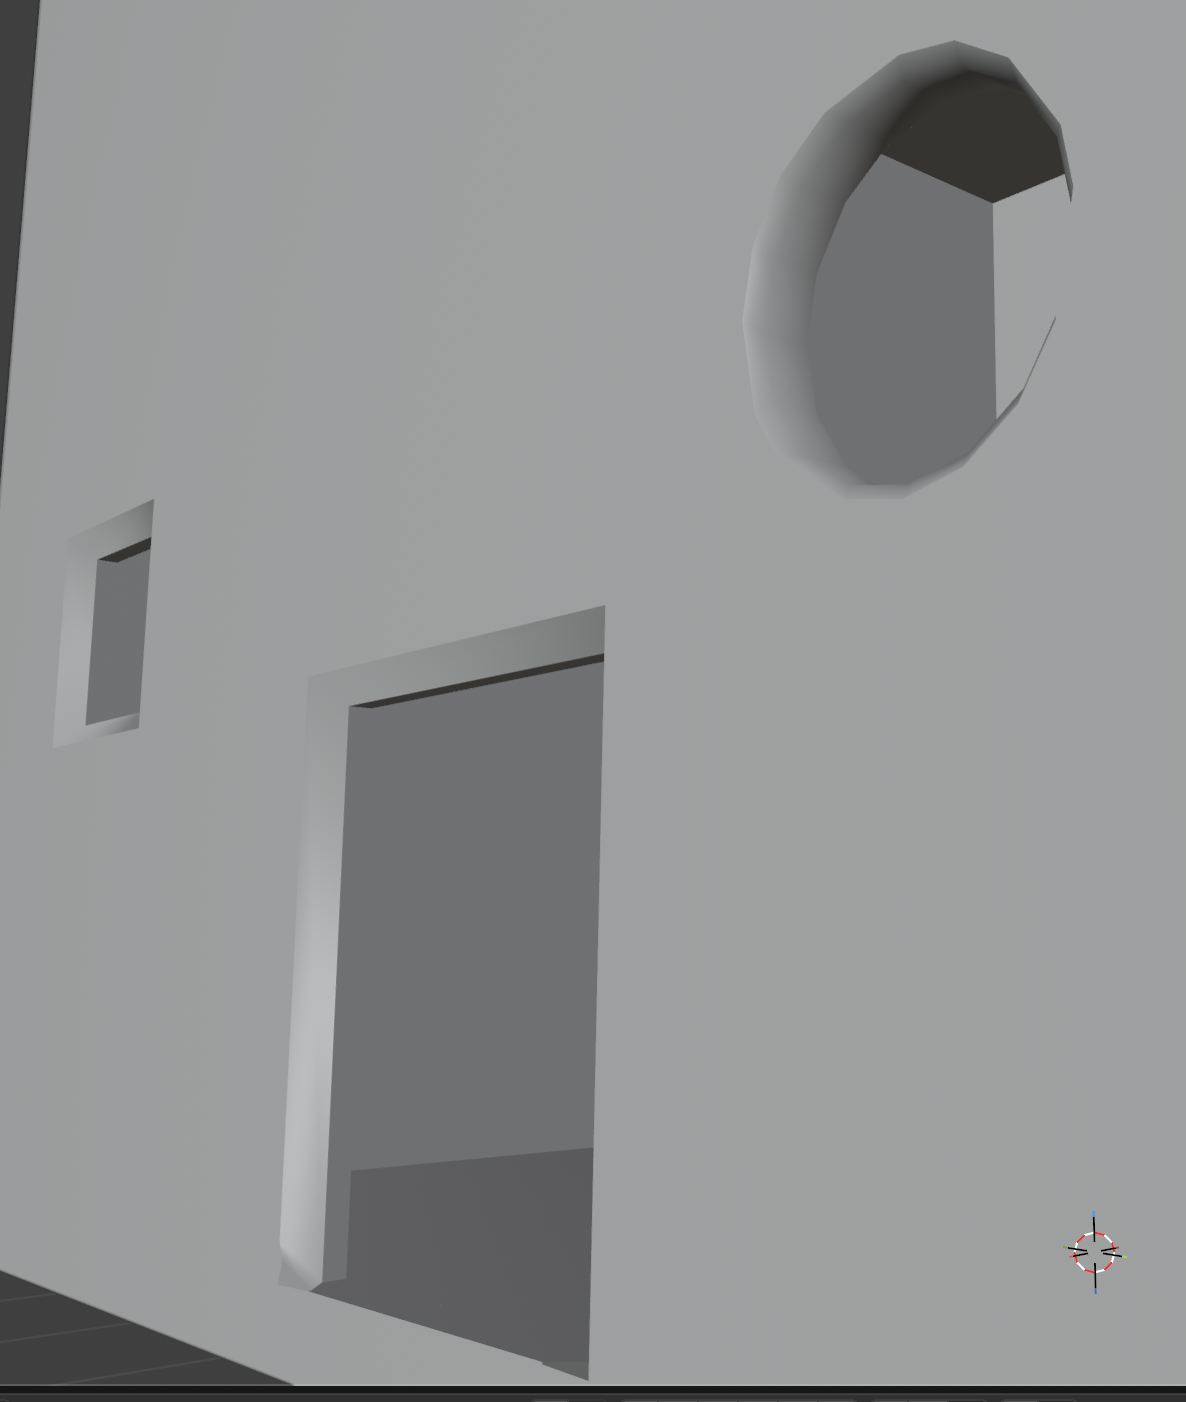
As an example, I added some super simple bevels around the windows here:
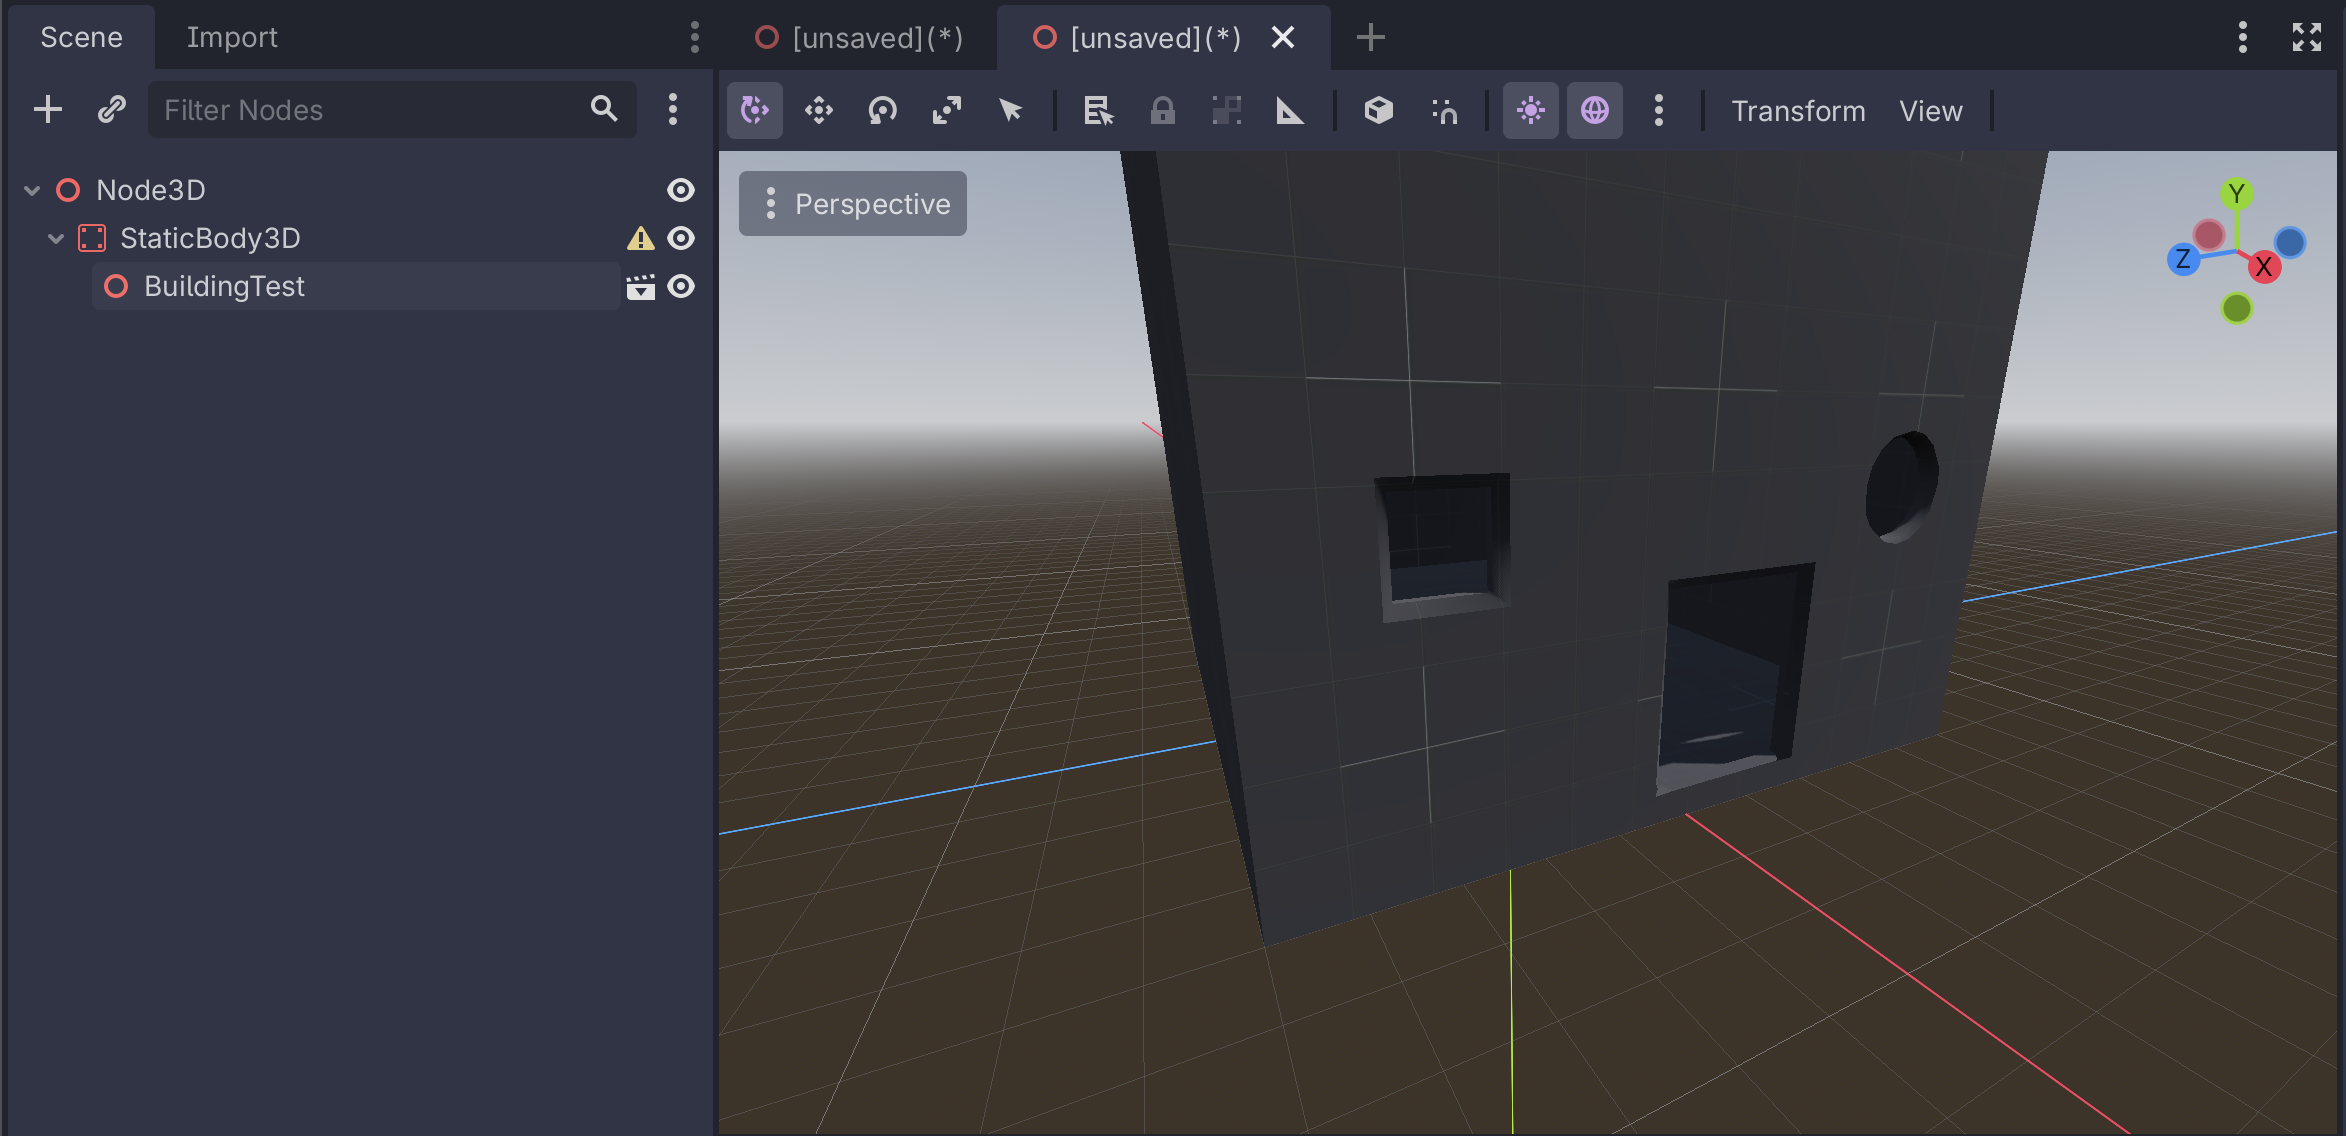
Create a new scene in Godot.
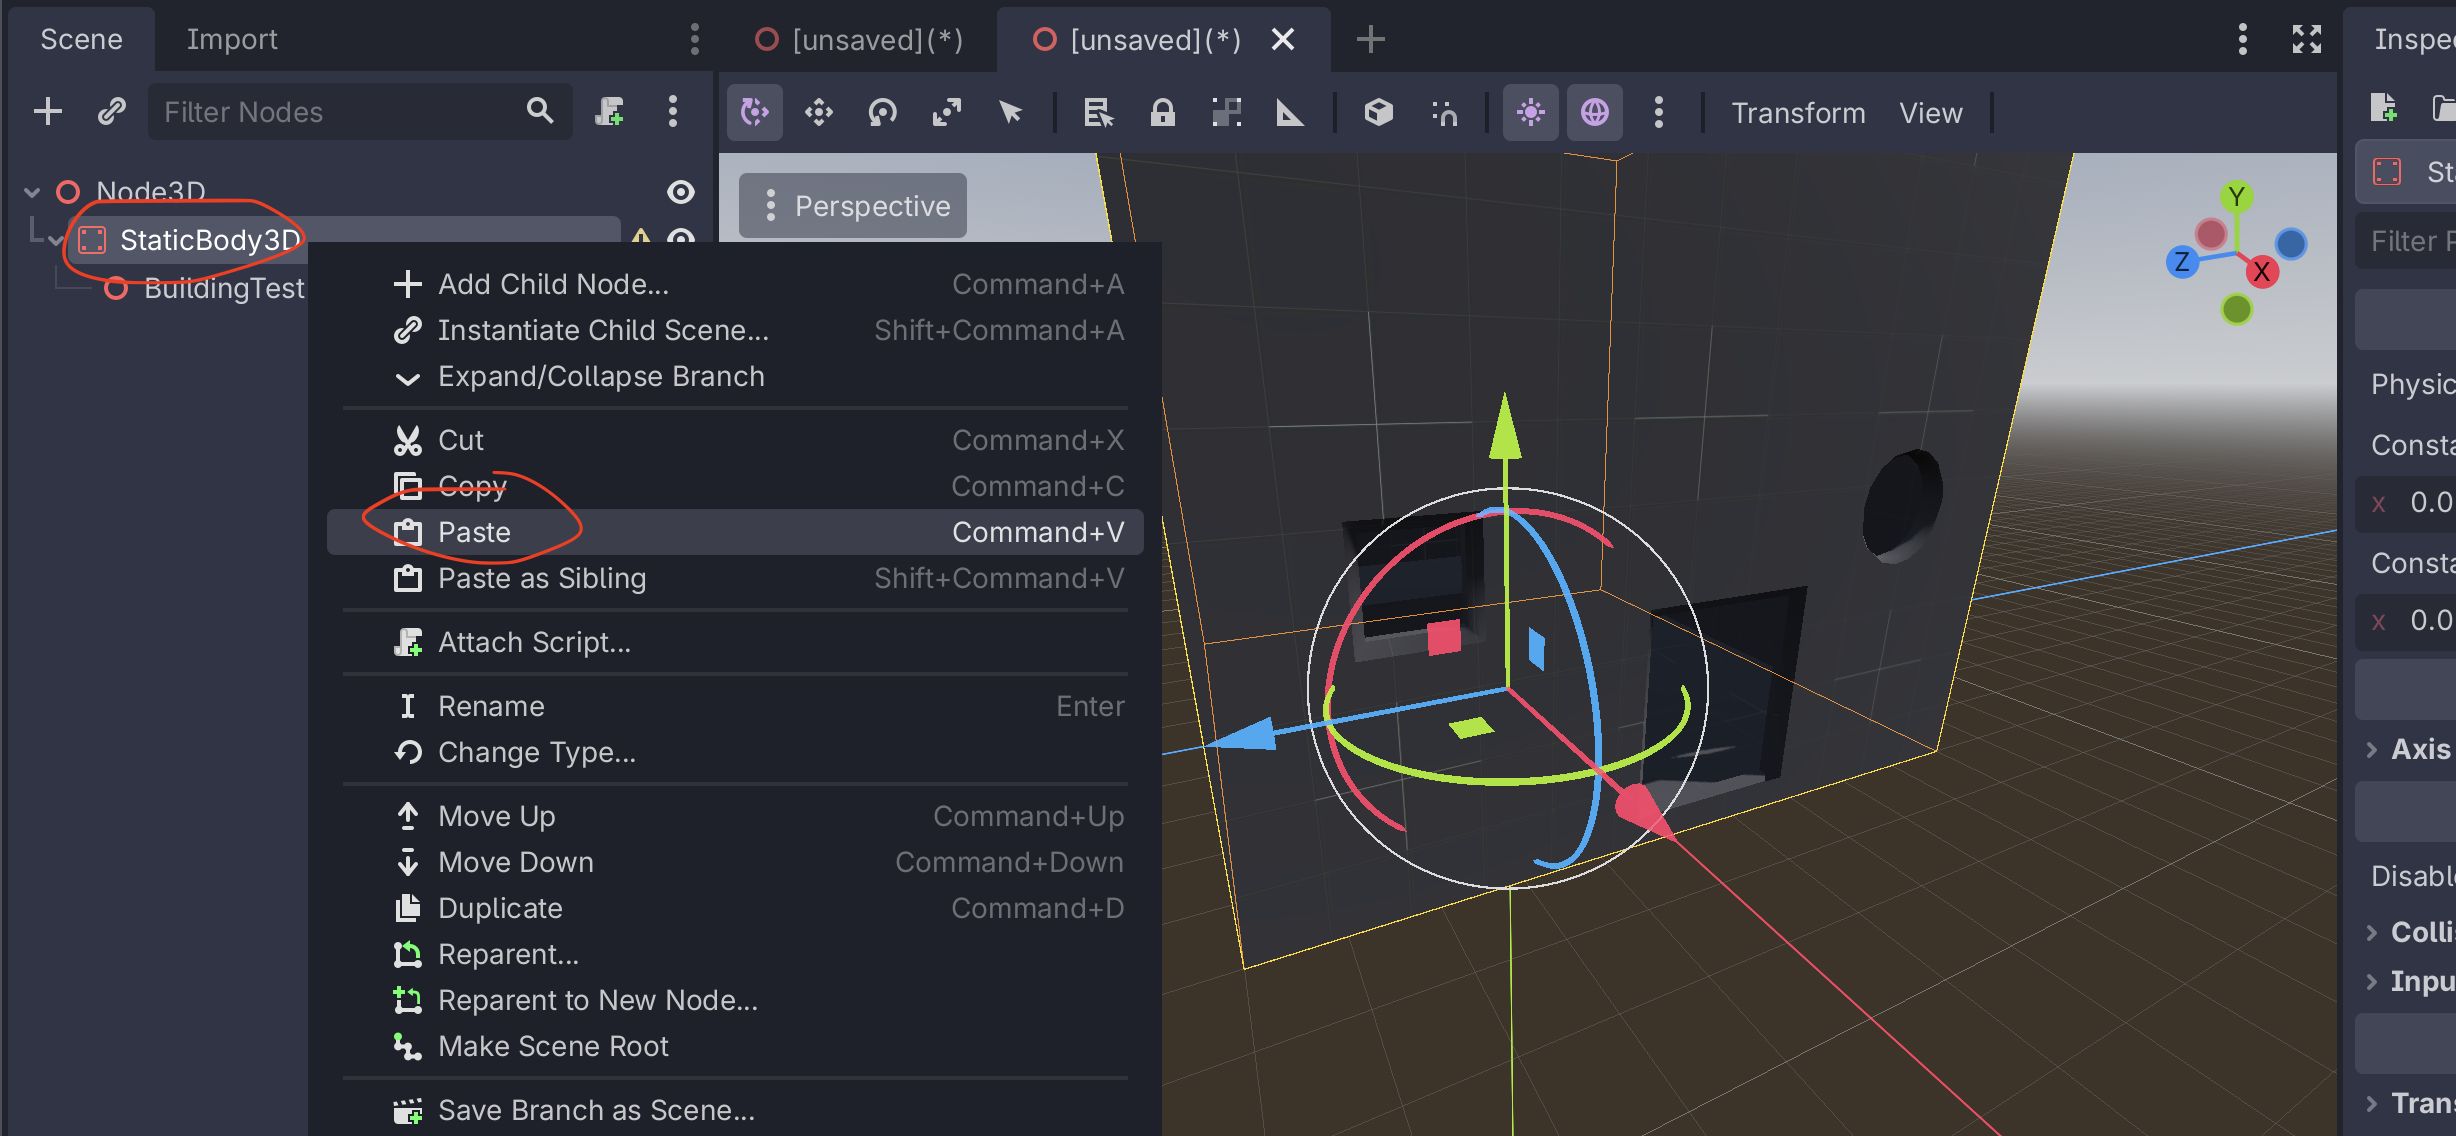
Add a StaticBody3D to the scene. Underneath that StaticBody3D, add your new mesh that was exported from Blender:
Back in the scene with the CSG nodes, select the root CSGCombiner3D and select CSG → Bake Collision Shape
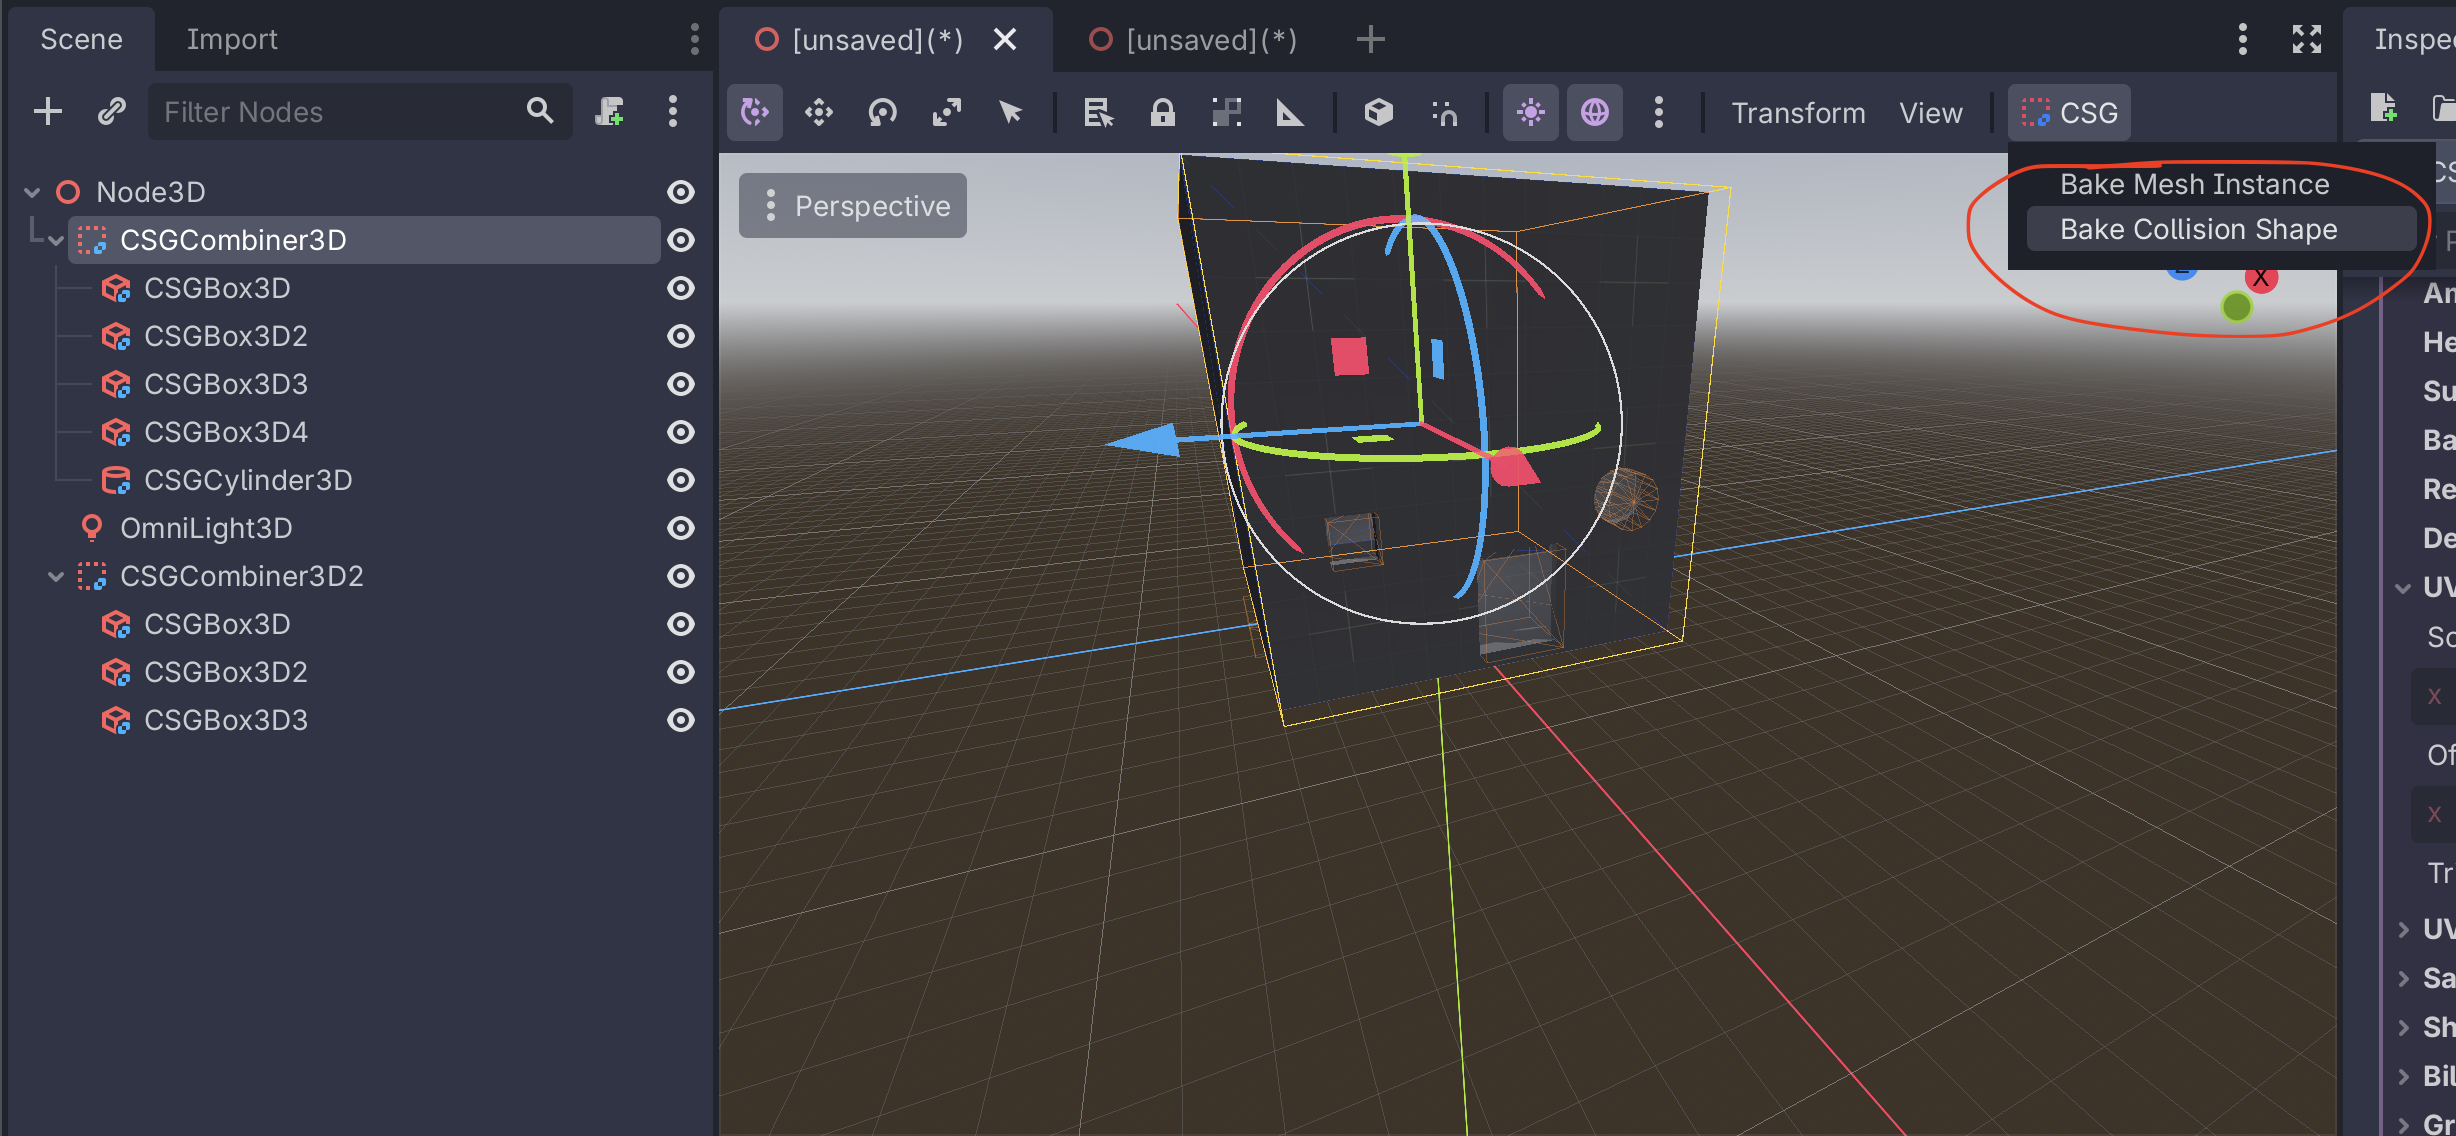
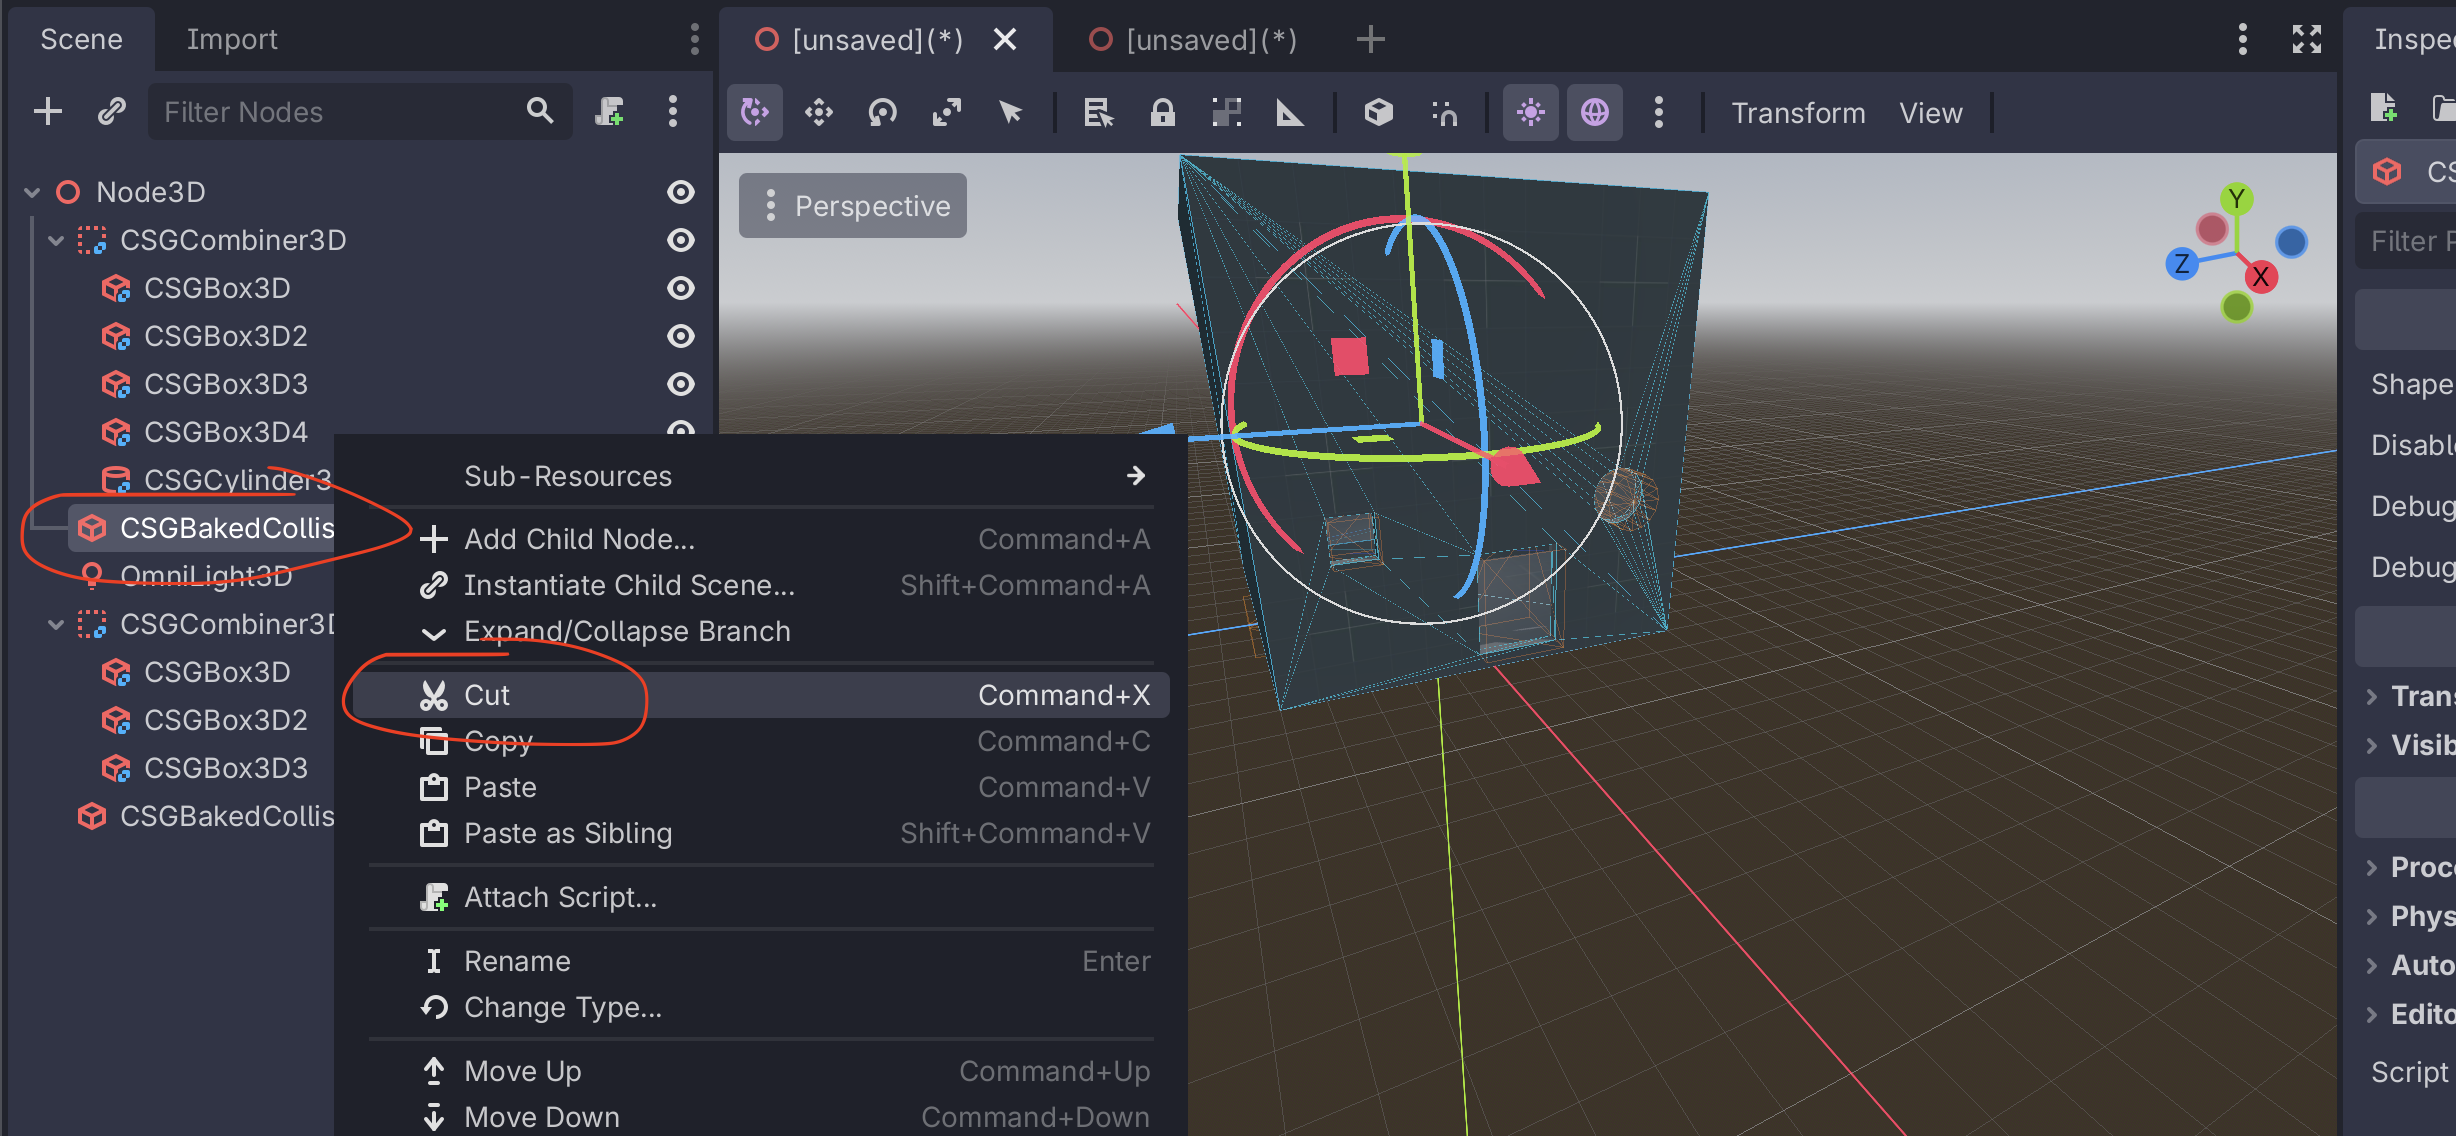
This will add a node called CSGBakedCollisionShape3D to the scene. Cut this node and then paste it in your new scene as a child of the StaticBody3D. If you have mulitple CSGCombiner3D in your scene, do this for each one.
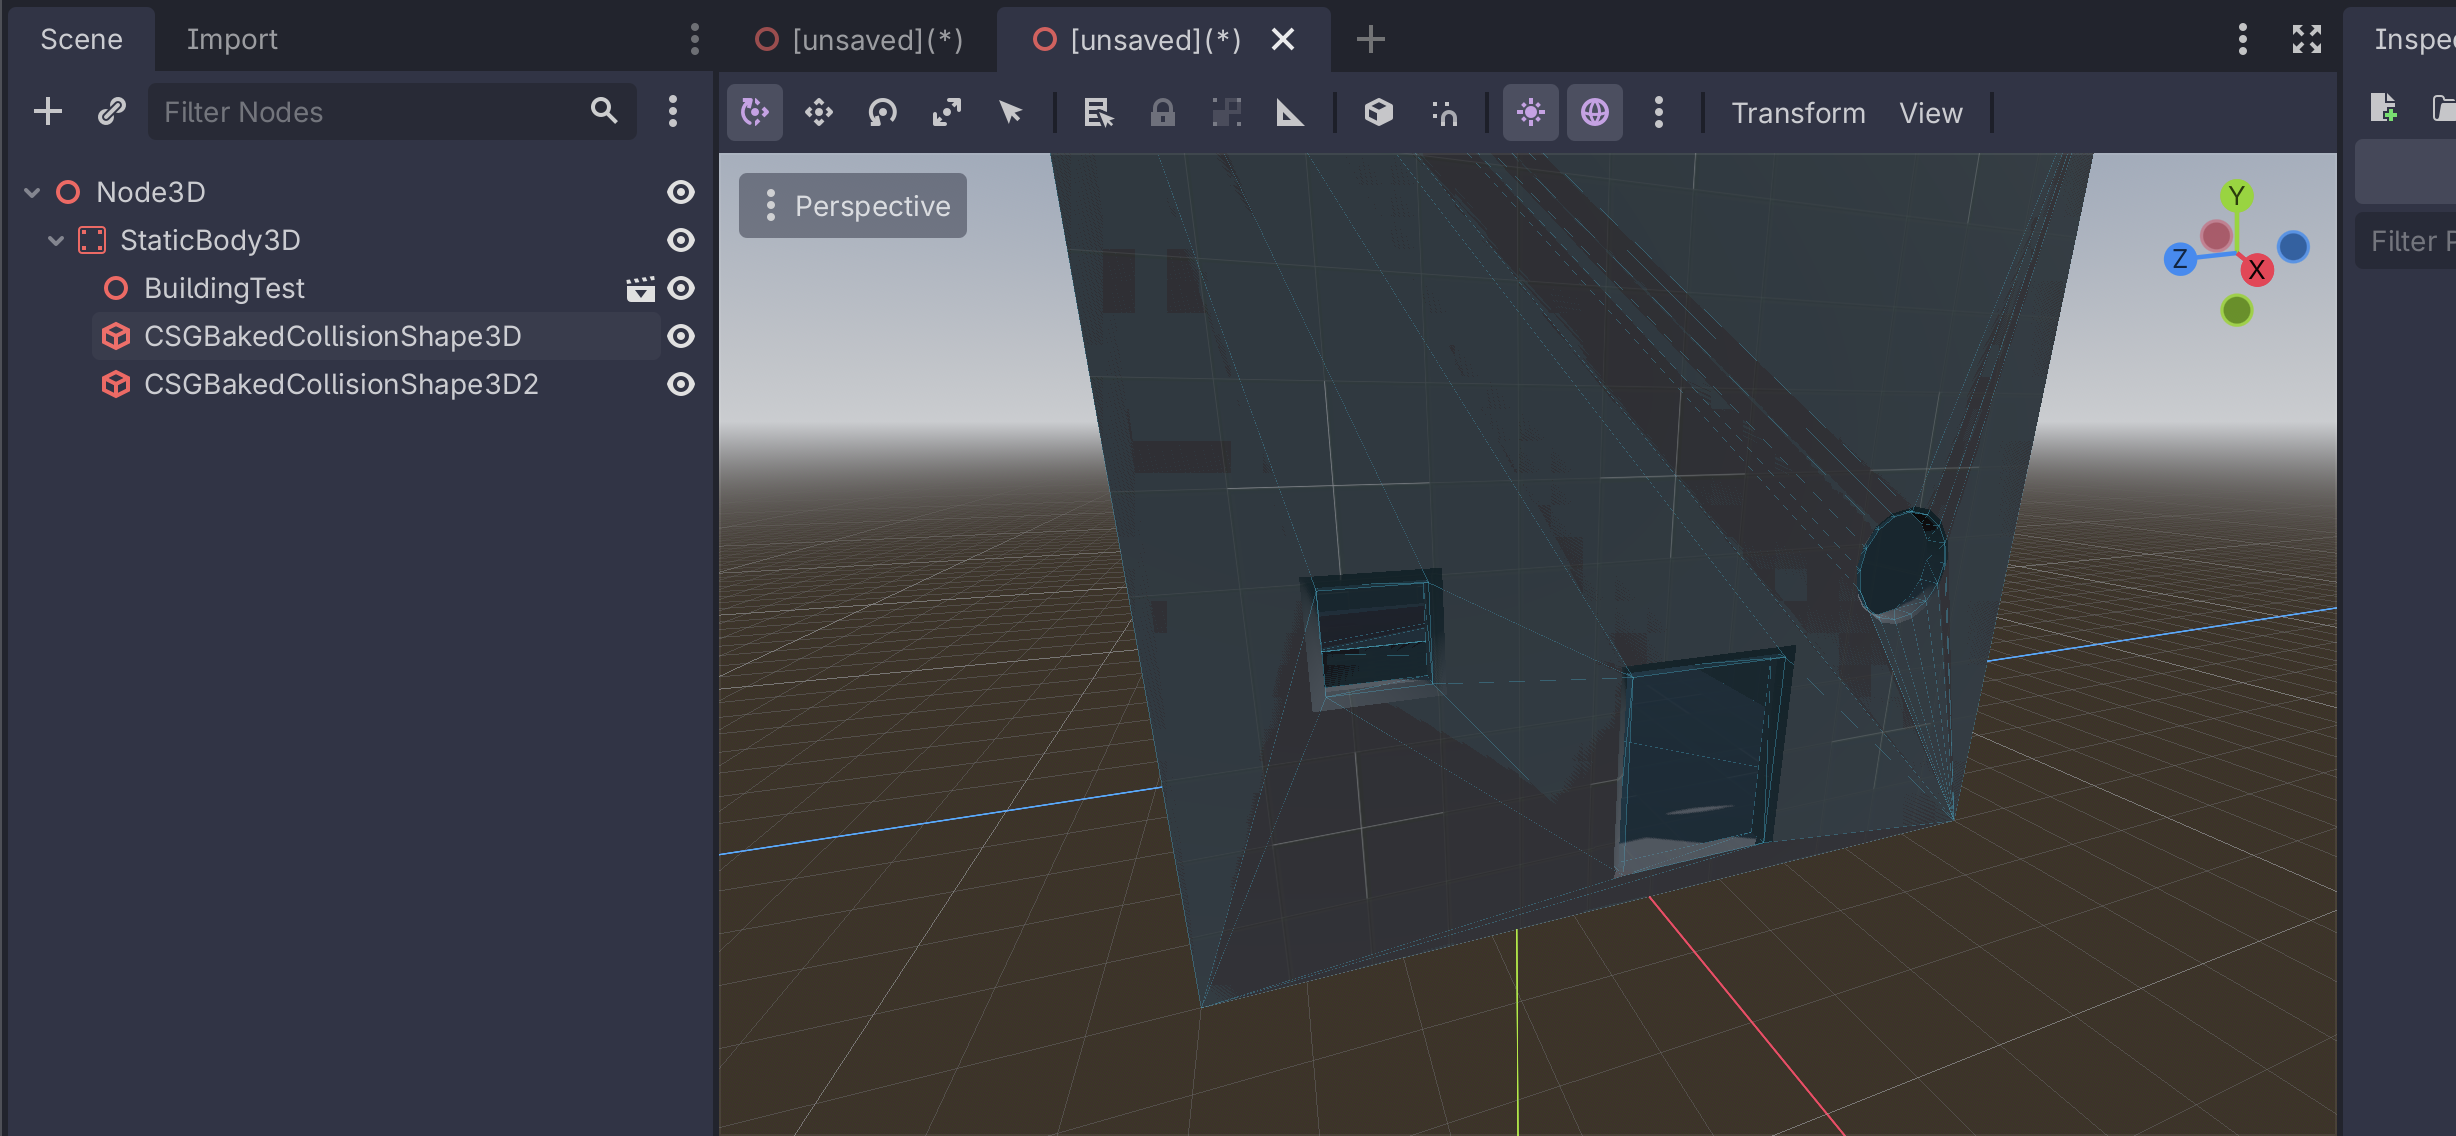
Then, your scene is ready to go! You have your mesh imported from the glTF file and the collision generated from the CSG nodes.
No comments to display
No comments to display