Asset Creation - Part 5: Baking Mesh Maps
For the materials we will extract information from the high resolution model and apply it to the low resolution model. This information can be used to mix materials and make the assets look professional.
Goals
- Bake mesh maps from the high poly to the low poly mesh
- Use mesh maps to mix PBR materials / create smart materials
- Export final texture set
- Create in-game materials
1) Start in your asset_low file with the high resolution mesh linked
If you followed last steps, this is very easy to do! If not, revist the last page andmake sure your assset_low file is completely ready to bake. that means it has
- Optimized + Clean Topology
- It is already UV unwrapped
- The High res mesh is linked in and overlapping the low res mesh
2) Make sure you have a current working version of the bakery
To make sure you have the most up to date version of the bakery
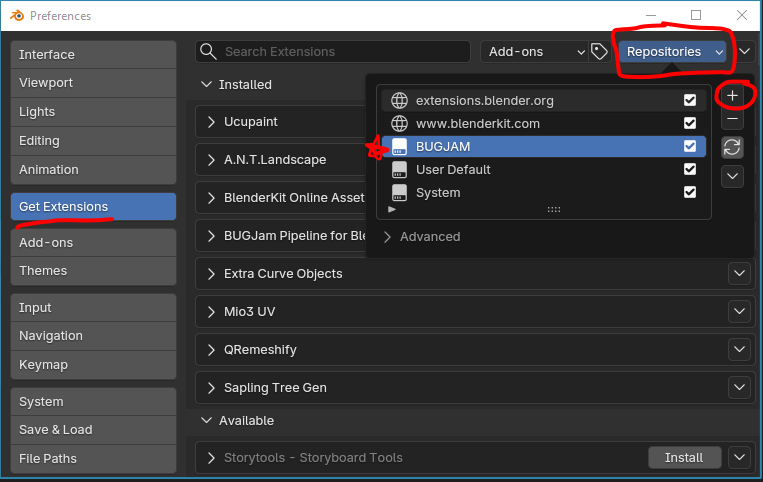
Edit > Preferences > Get Extensions , then in the repositories menu, hit the little plus icon
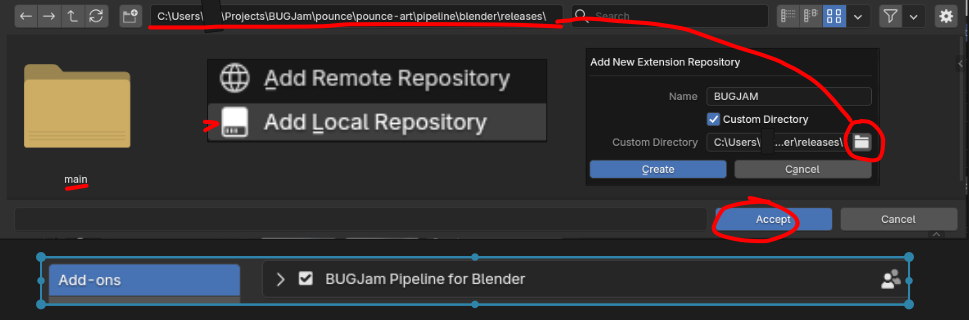
Select "Add Local Repository", name it "BUGJAM", check "custom directory" and then, after clicking the file icon, you can select the directory with the blender pipeline that should look as follows
Users............\BUGJam\pounce\pounce-art\pipeline\blender\releases\
Hit Create, done! You should see 'BUGJam Pipeline for Blender Users" now listed as installed
IF it is greyed out, navigate to your add-ons (still within preferences) and check the box next to the pipeline to enable it
Hit "save preferences" and then restart blender
if you have manually downloaded the bakery as a zip file, delete it or disable it in blender add-ons and follow this installation path instead, this way bug fixes come through automatically
3) Set up the Bakery + Bake
Make sure both objects are set to 'shade smooth'
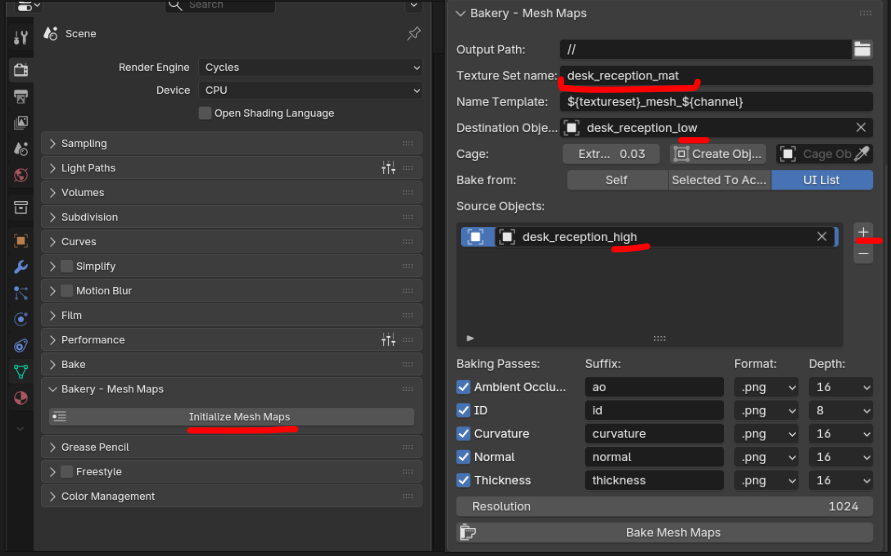
At this step, the bakery will be located in your render properties panel, scroll down to bakery - mesh maps and hit "initialize"
Then, setup is fairly simple, check that output path is going to the same folder as your blend file
then name the texture set the same as your object but with '_mat'
DO NOT change the name template
Under destination object, select your _low mesh | Under source object, select your _high mesh
SAVE YOUR BLENDER FILE FIRST then hit 'bake mesh maps, this can take up to 5 minutes but if it is taking longer reach out for support
4) Check your maps
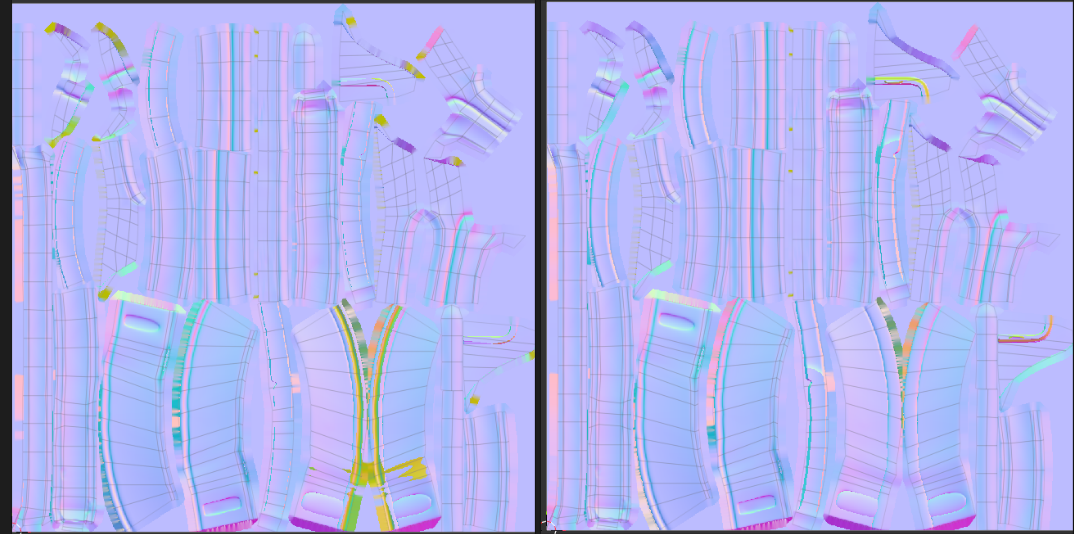
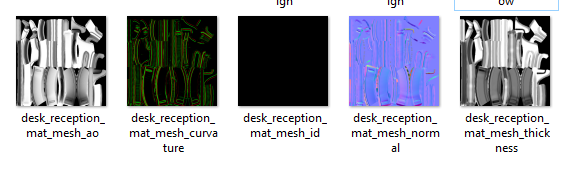
The easiest way to spot changes is with your normal map, if you see lots of yellow, that means the bake missed those areas, this is easy to fix by increasing the extrusion amount a little bit, or by double checking your UV maps.
A tiny but of 'mustard' is expected in areas that overlap or fold over themselves in the mesh, but minimize it as much as possible.
If all has gone well, you should have 5 maps baked into your asset folder. Save your .blend file again
Go ahead and make a push to the repo with these to make sure nothing gets lost. The commit message can be "Mesh Maps Baked"
No comments to display
No comments to display