Asset Creation - Part 2: Block Mesh Plus
The purpose of the block mesh plus is to spendtake lessthe thanblock 20 minutesmesh to createthe annext extremelylevel. roughSince the asset was already established during the block outmesh versionphase, the rest of the modelteam thatmay have already started using the block mesh in their gray box level designs. Now we can betake the usedasset ascloser ato stand-inthe versionfinal shape and silhouette. Still using placeholder pieces and block-out techniques, the finished block mesh plus model should look reminiscent of the asset.final Thismodel allowsand usbe ready for approval by the art director before doing the refining it. If the art director asks for major design changes after this, it shouldn't be difficult to getiterate anon earlysince versionno indetail thework gamehas asapbeen sodone that the level designers and programmers aren't blocked in their ability to do there work.yet.
Goals
Save a file intoUpdate thecorrectblocklocationmeshwithmodel to get to thecorrectdesirednamingshape,convention.
Step1: #1Update the block mesh model
You should...
You should not...
2: Name fileall andcontent
Nothing has changed here, but there might be new mesh pieces now, so you should make sure everything is named.
3: Export the model
The great thing about the export collection that was set up in the appropriateblock directorymesh phase, is that it's already ready to go, including the correct file path. Just re-run the exporter and overwrite the in-game asset.
4: Update collision
Name
If there were substantial changes to the model the collision from the first version might not line up correctly anymore. Take a moment to update that in-game.
5: Commit to both repositories
All art files should use `snake_case` all lower case letters, with underscoreschanges to separate words. absolutely no spaces in file names, this can break tools and pipelines.
Multi-part assets should be named with the primary part appearing in the name first e.g. dog_main, dog_collar, dog_shoes 'dog' is the descriptive part here so it comes first so that all parts are sorted together in the file system.
Directory
All art production files will be created inside of the pounce-art repository. The output of these files will be exported into the pounce-game repository. The file paths for these files will match 1:1 between the two repositories. See the game folder structure page for more info.
All art assets should go inside of the art_assets folder within each repository.
Your prop should be categorized into the appropriate sub-folder based on its type:
Within this sub folder, you should create a folder named after the specific asset. All files for creating that asset should be saved in that folder. If you have reference images, make a reference folder inside of that asset's folder. In most cases, it should be one asset per .blend file. It's okay to create multiple assets within the same .blend file if they are logically grouped and it makes senseneed to makebe themchecked together all atinto the same time e.g. a bunch of rocks, or a fence post + fence scaffolding.
BUGJam
└── pounce
  └── pounce-art └──repository. art_assets
      ├── characters
      │ └── example_character
      │   ├── example_character.blend
      │   └── reference
      │     ├── reference.pur
      │     └── reference_image.png
      ├── environments
      │ └── example_environment
      │   └── example_environment.blend
      └── props
        └── example_prop
          └── example_prop.blend
Examples
A reflective mirror object that's used as a puzzle element inAnd the newly exported mesh / collision update need to be checked into the pounce-game would go here:repository.
BUGJam/pounce/pounce-art/art_assets/props/mirror/mirror.blend
6: Get feedback from art director
The Tanuki characterNow that the playerasset willhas playbeen as would go here:
BUGJam/pounce/pounce-art/art_assets/characters/tanuki/tanuki.blend
Naming Conventions (for assets):
All art files should use `snake_case` all lower case letters, with underscores to separate words.
Please name EVERYTHING in your outliner DO NOT leave things as "cube.001/cube.002" when naming in your outliner, use the conventions assetname_suffix with one of the following suffixes.
"_sm" - static mesh"_sk" - skeletal mesh"_mat" - material"_basecolor" - base color texture"_normal" - normal map texture"_ao" - ambient occlusion texture (mesh map)"_curvature" - curvature texture (mesh map)"_orm" - channel-packed texture containing Ambient Occlusion, Roughness, and Metallic maps
All artwork for the game (characters/ materials/ props/ etc) will be submitted as .blend filespushed to the GITserver, repo
Scale:art
Wedirector will behave workingaccess withto standardit. blenderContact unitsLexi akato meters.let Oneher meterknow isit's oneready blenderfor unit.review. OneIf metershe ishas alsofeedback 100cm,for soyou, working from measurements likemake the onesappropriate attached is easier than it seems if you're used to imperial!
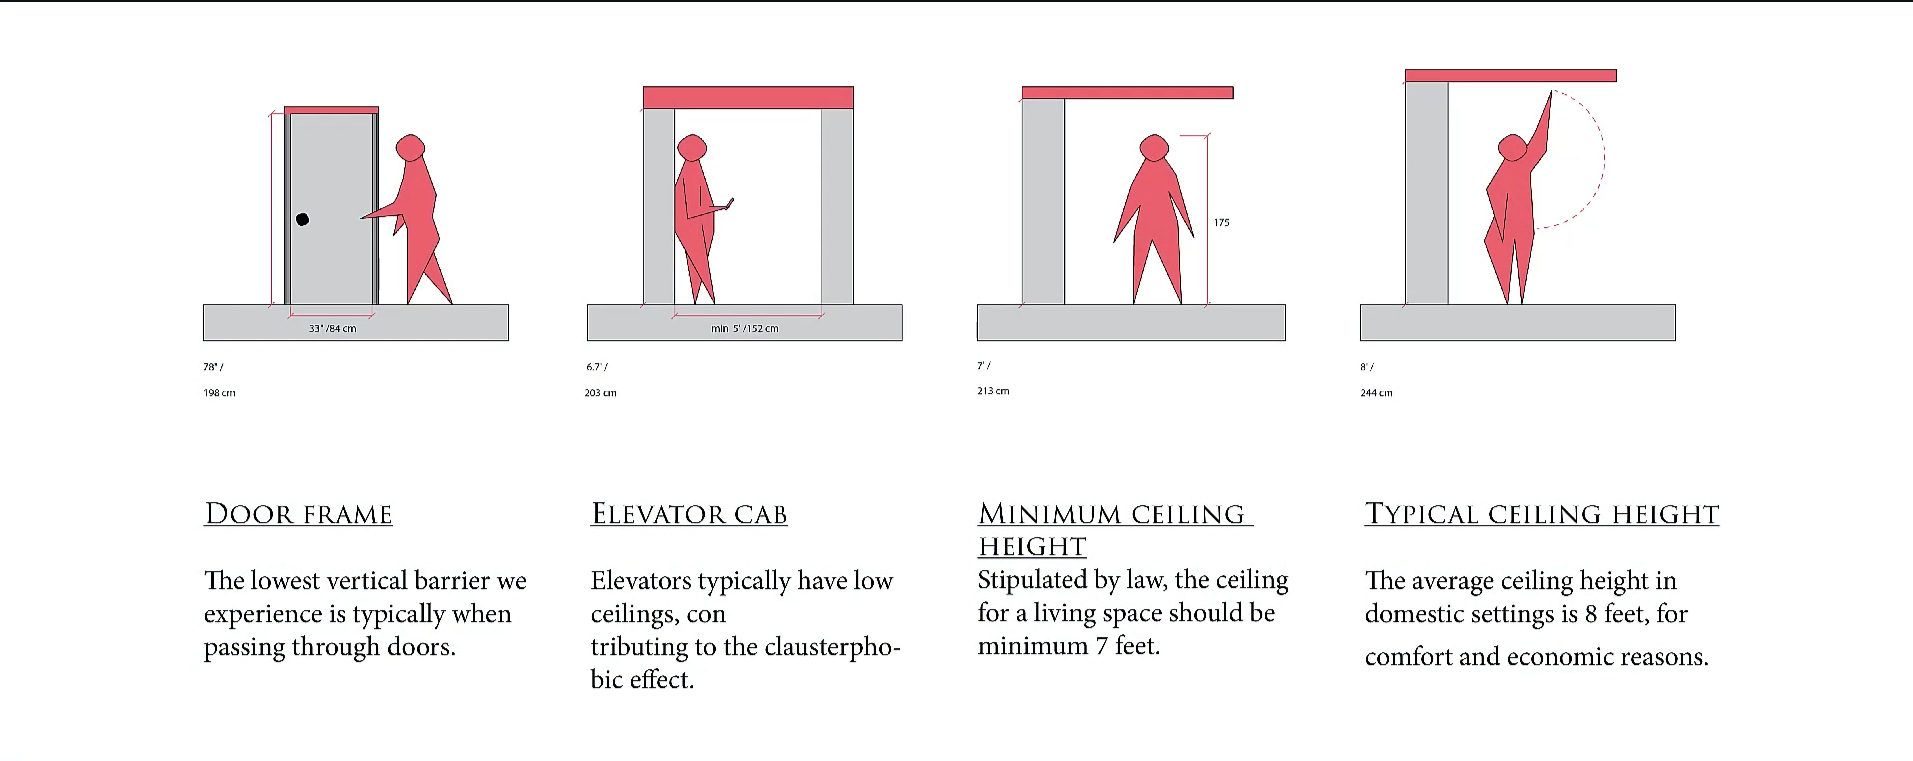
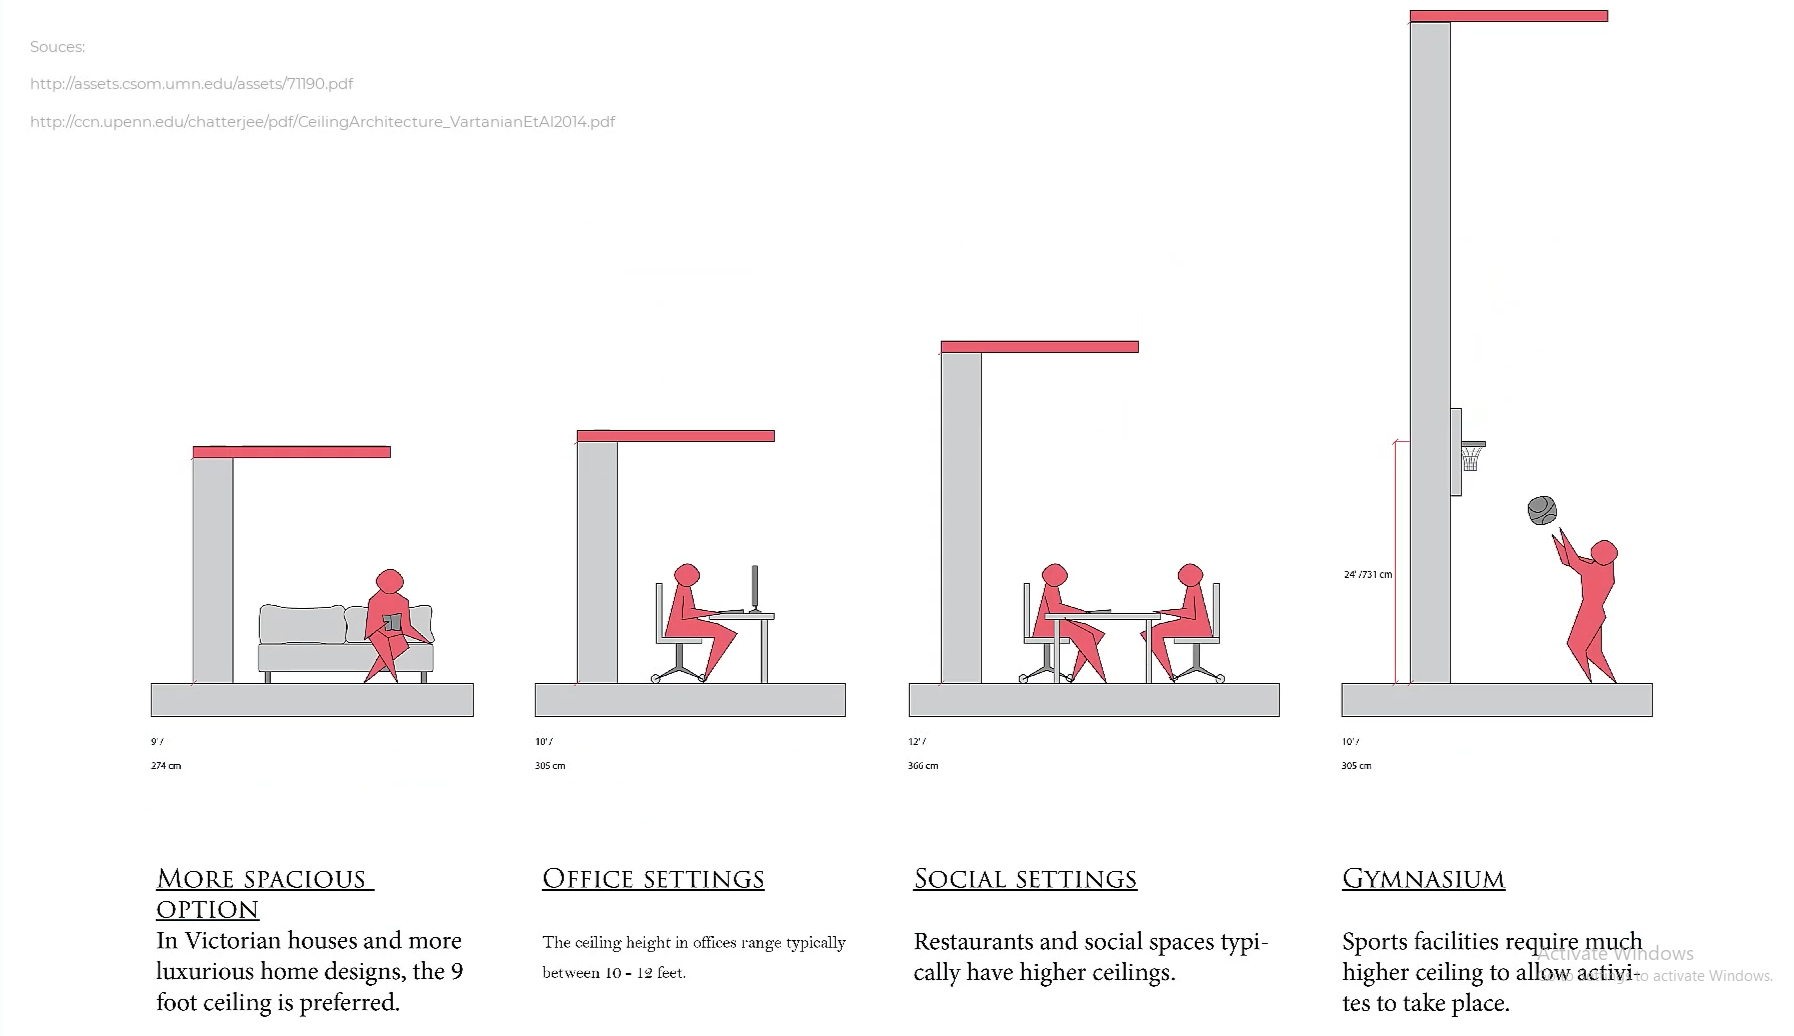
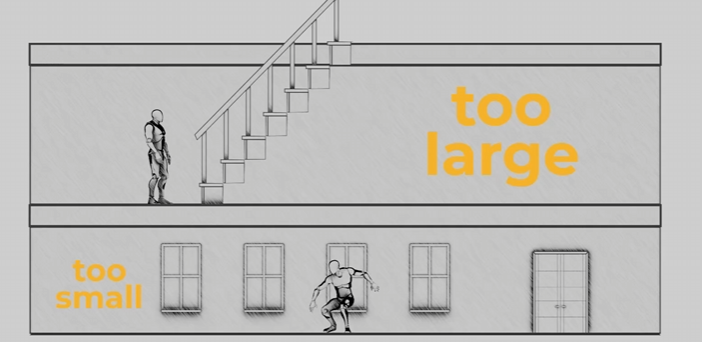
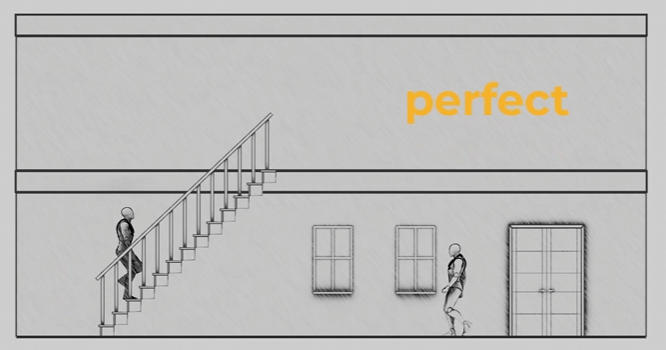
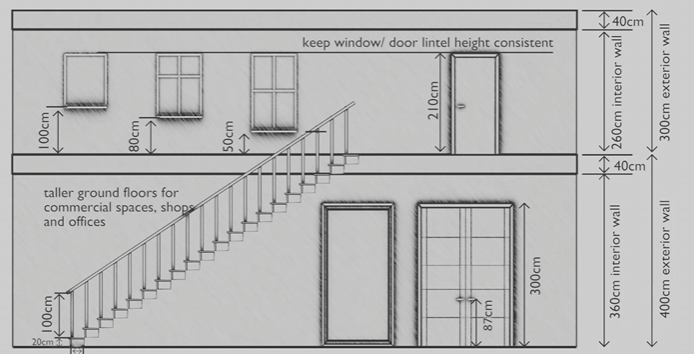
For scale, please also utilize a "main_character" mesh (attached) to compare to your mesh whenever possible! When working, we will start with a blockout for your objects/ character that will be tested in the game engine.
reference photos sourced Schoolism. Life – Lesson 71. Schoolism. Accessed 2/11/26. https://schoolism.com/s/life/course/lessons/71
Textures:
We will be using the free addon blenderkit https://www.blenderkit.com/ to source our materials for the project. Please check the recommended textures page when applying materials. Please DO NOT tinker with the material settings (aside from masking) so that all the assets will stay consistent!
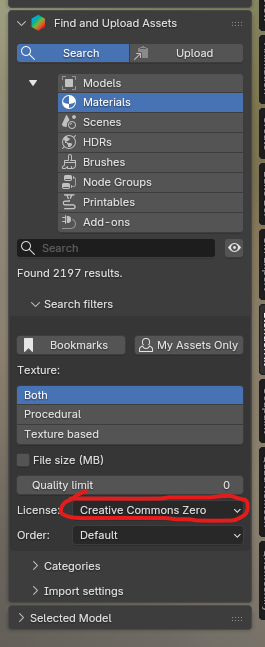
When using blenderkit please check preapproved materials list first! But if you want to explore ones we haven't tested, just make sure you limit search results to CC0 in the filters.
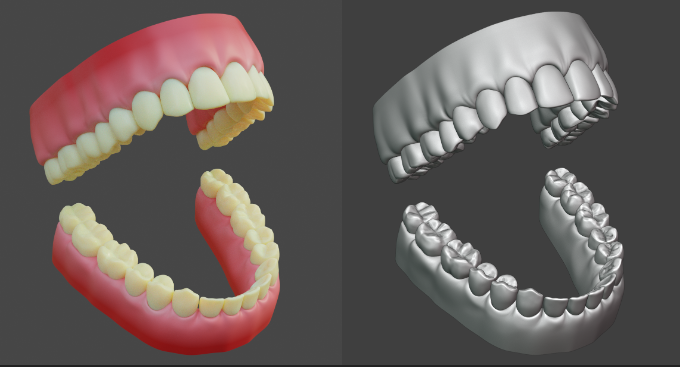
Polygons:
We are going to be using a high - low polygon workflow, which means you can go pretty high when working on the details of your model! Please see Xury's punk character series to understand this workflow in depth. Included example is this pair of teeth by Xury- see the difference in the original sculpt vs final game model