Asset Creation
Naming Conventions:Conventions (for files)
NameAll art files should use `snake_case` all lower case letters, with underscores to separate words.
Place files in the appropriate directory
All art production files will be created inside of the pounce-art repository. The output of these files will be exported into the pounce-game repository. The file paths for these files will match 1:1 between the two repositories. See the game folder structure page for more info.
All art assets should go inside of the art_assets folder within each repository.
Your prop should be categorized into the appropriate sub-folder based on its type:
Within this sub folder, you should create a folder named after the specific asset. All files for creating that asset should be saved in that folder. If you have reference images, make a reference folder inside of that asset's folder. In most cases, it should be one asset per .blend file. It's okay to create multiple assets within the same .blend file afterif they are logically grouped and it makes sense to make them together all at the namesame time e.g. a bunch of the asset you're working on within it. Ex. asset.blendrocks, or tree.a fence post + fence scaffolding.
BUGJam
└── pounce
  └── pounce-art
    └── art_assets
      ├── characters
      │ └── example_character
      │   ├── example_character.blend
      /│   book.blend/└── etc.reference
      Where│     you├── savereference.pur
      the│     file└── isreference_image.png
      the├── veryenvironments
      important,│ ensure└── it'example_environment
      │   └── example_environment.blend
      └── props
        └── example_prop
          └── example_prop.blend
Examples
A reflective mirror object that's used as a puzzle element in the rightgame location.would Forgo example,here:
BUGJam/pounce/pounce-art/art_assets/props/mirror/mirror.blend
The are working on a punkTanuki character youthat the player will play as would bego savinghere:
BUGJam/pounce/pounce-art/art_assets/characters/tanuki/tanuki.blend
Naming Conventions (for assets):
All art files should use `snake_case` all lower case letters, with aunderscores fileto pathseparate that looks like this:
BUGJam/genesis/genesis-art-source/art_assets/characters/punk/punk.blend
If you are making a guitar for said punk character, then the file path will look like this
BUGJam/genesis/genesis-art-source/art_assets/props/guitar/guitar.blendwords.
Please name EVERYTHING in your outliner DO NOT leave things as "cube.001/cube.002" when naming in your outliner, use the conventions assetname_suffix with one of the following suffixes.
"_m" - material"_t" - texture"_sm" - static mesh
"_sk" - skeletal mesh
"_mat" - material
"_basecolor" - base color texture
"_normal" - normal map texture
"_ao" - ambient occlusion texture (mesh map)
"_curvature" - curvature texture (mesh map)
"_orm" - channel-packed texture containing Ambient Occlusion, Roughness, and Metallic maps
All artwork for the game (characters/ materials/ props/ etc) will be submitted as .blend files to the GIT repo
Scale:
We will be working with standard blender units aka meters. One meter is one blender unit. One meter is also 100cm, so working from measurements like the ones attached is easier than it seems if you're used to imperial!
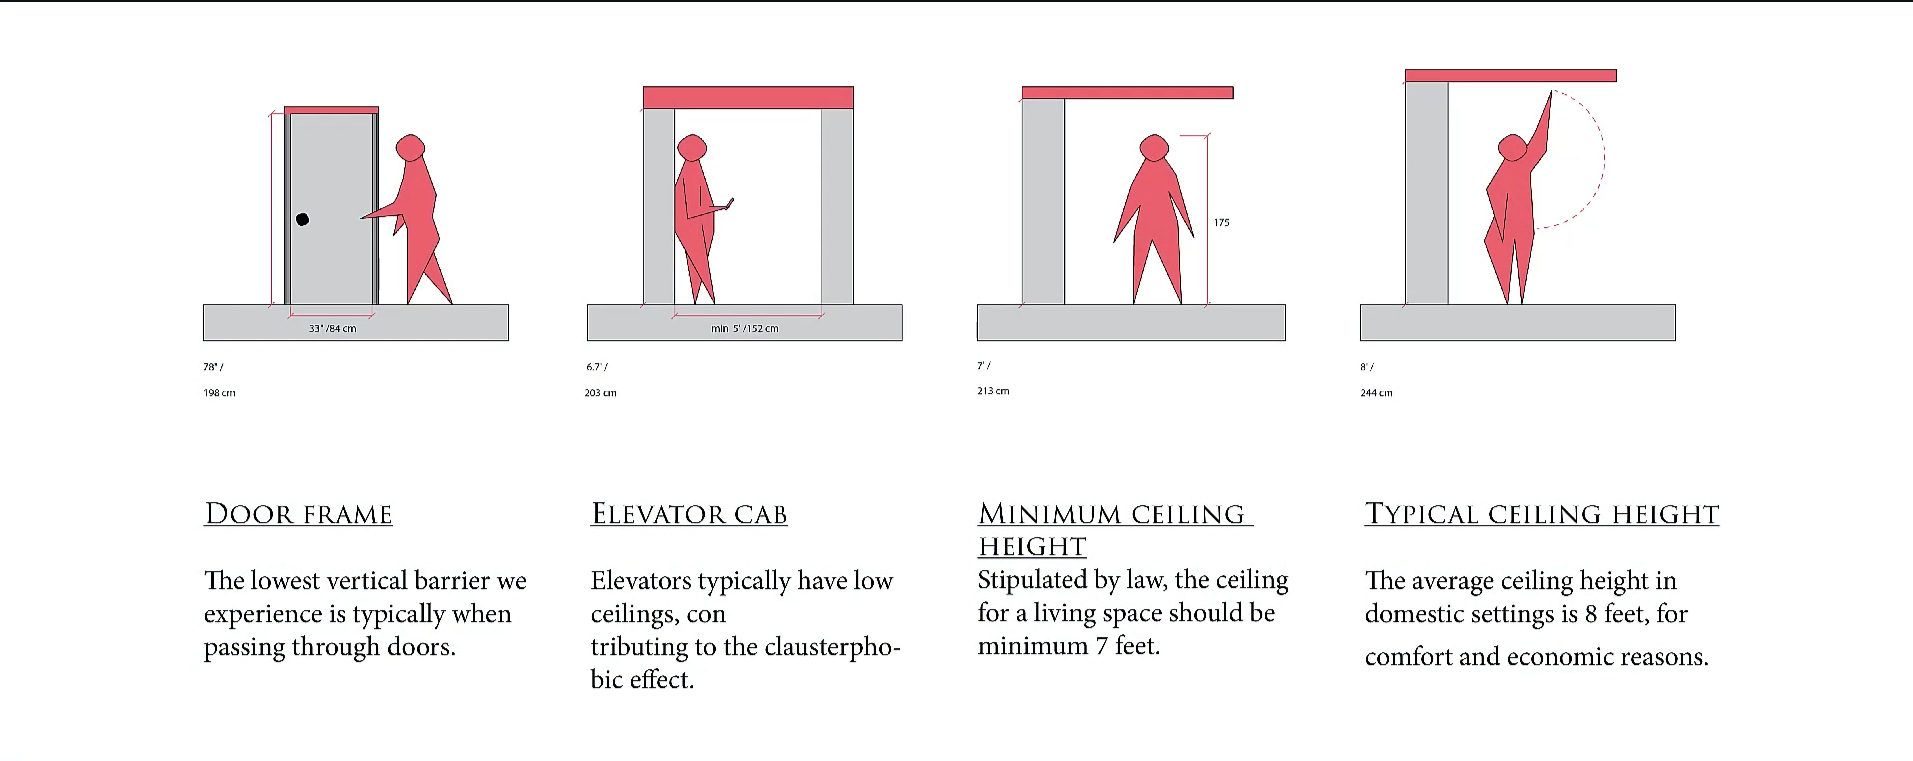
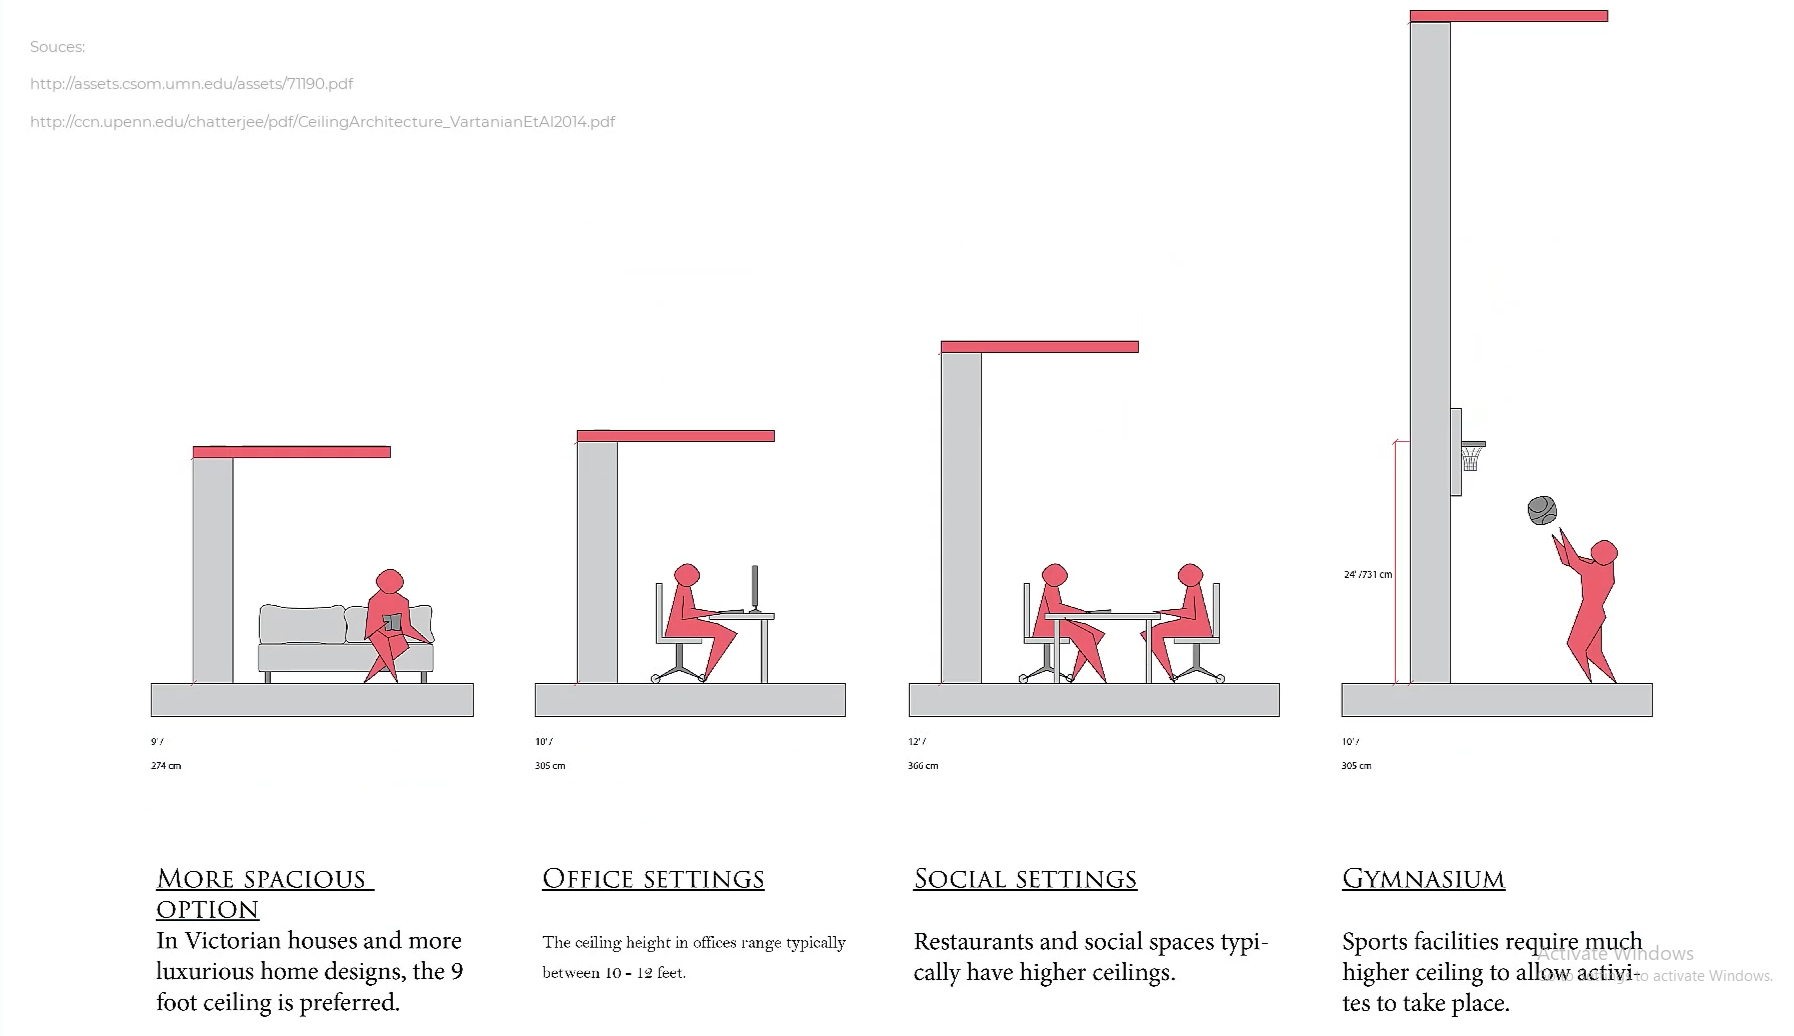
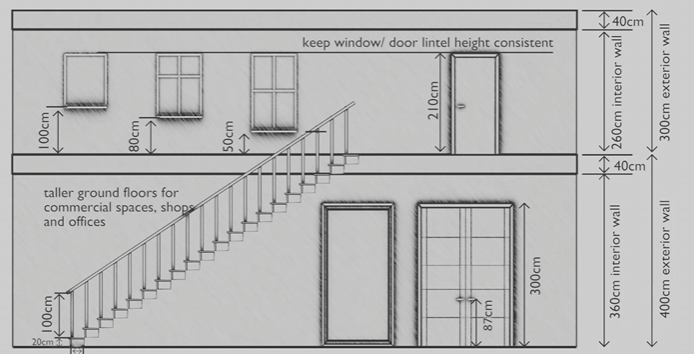
For scale, please also utilize a "main_character" mesh (attached) to compare to your mesh whenever possible! When working, we will start with a blockout for your objects/ character that will be tested in the game engine.
reference photos sourced Schoolism. Life – Lesson 71. Schoolism. Accessed 2/11/26. https://schoolism.com/s/life/course/lessons/71
Textures:
We will be using the free addon blenderkit https://www.blenderkit.com/ to source our materials for the project. Please check the recommended textures page when applying materials. Please DO NOT tinker with the material settings (aside from masking) so that all the assets will stay consistent!
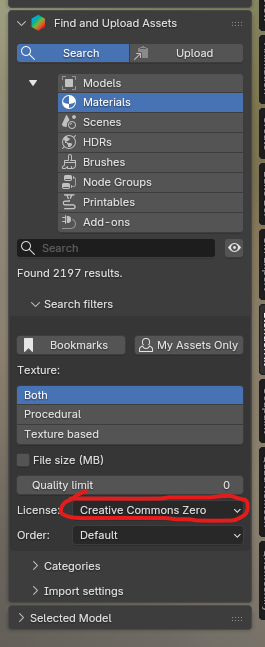
When using blenderkit please check preapproved materials list first! But if you want to explore ones we haven't tested, just make sure you limit search results to CC0 in the filters.
Polygons:
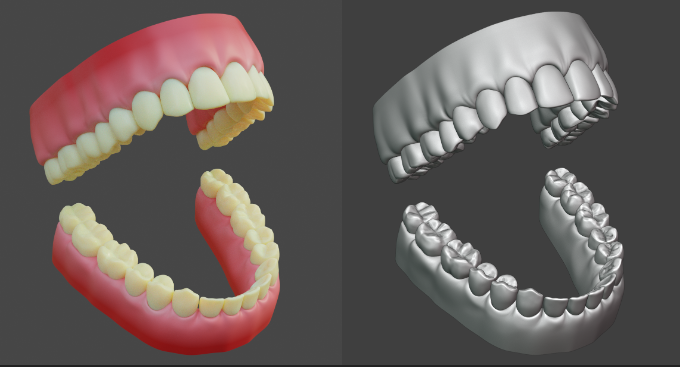
We are going to be using a high - low polygon workflow, which means you can go pretty high when working on the details of your model! Please see Xury's punk character series to understand this workflow in depth. Included example is this pair of teeth by Xury- see the difference in the original sculpt vs final game model

Checklist:
- Your .blend file is saved in the correct location in the git repository
- Your .blend file is clearly named
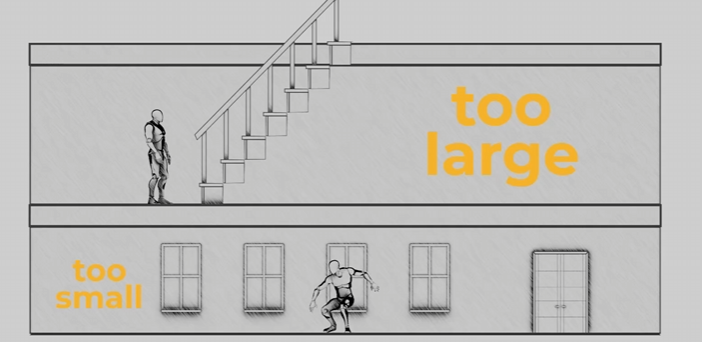
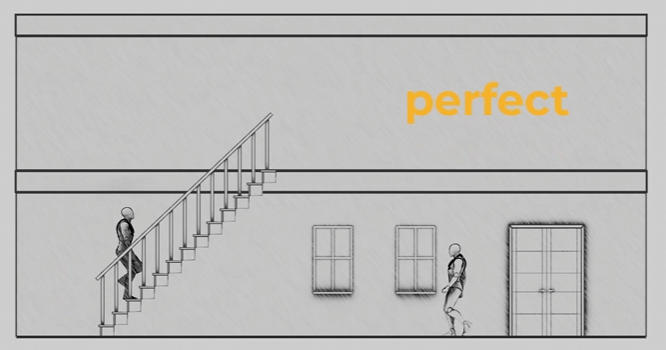
- Your model is made to an accurate and reasonable scale
- Your model's origin point is set to the world origin, and is the lowest center point of your mesh
- Everything in your outliner is clearly named
- All transforms have been applied (scale / rotation / location)
STEPS
- Name your .blend file and save it to the correct location for GIT repo
- Make a 'greybox' of your model that shows the correct dimensions + scale
- Commit your greybox to the GIT repo and get the greenlight on file handling
- Blockout your model in more detail (not fine detail), think of it as a rough sketch of what you will be making
- Commit your blockout to the GIT repo and get greenlight on design
- Refine + detail your model/ finish the sculpting/ modeling phase
- Commit final sculpt to GIT repo and get greenlight
- Use blenderkit to add textures to your model
- Commit textured model and get greenlight to finalize asset
- Create a new .blend file and link in the high poly version of your asset. Name guitar_low.blend, and save it to the correct location for the GIT repo
- Create the low-poly version of your mesh using retopology workflow
- UV Unwrap your low-poly mesh and optimize texture space
- Commit Low poly model + UV Map to GIT repo to get greenlight for baking
- Bake your high poly mesh to your low poly mesh (PBR texture set- normal map / albedo / AO /metallic / roughness)
- Commit and finalize / hand off low poly version for rigging + game integration