Asset Creation - Part 4: Low Resolution / Game-Ready Mesh
Since the high resolution mesh often has hundreds of thousands, if not millions of polygons, it can't be used in-game. We need to create a low-resolution version of the mesh. Usually the involves re-topology, but we can usually get a good start by copying the high resolution mesh and removing and subdivision / multi-resolution modifiers.modifiers - or working from our blockout + file
Goals
- Replace the old block mesh plus file with a mesh that has the final topology that will be used in the game.
- Name all of content inside of the file appropriately.
- UV Unwrap
- Set up materials
- re-export to game.
11: Create the final low poly mesh
WIP WIP WIP WIP WIP WIP
Polygons:
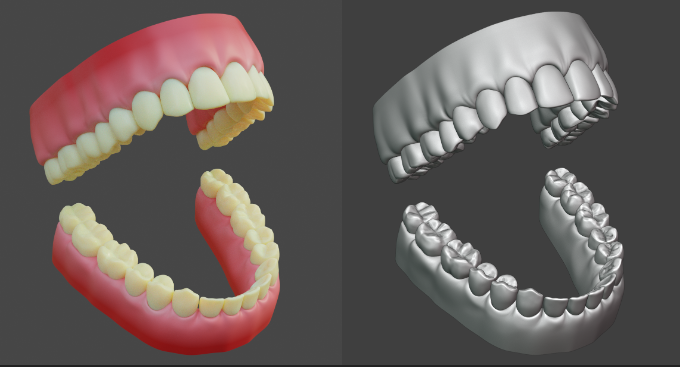
We are going to be using a high - low polygon workflow, which means you can go pretty high when working on the details of your model! Please see Xury's punk character series to understand this workflow in depth. Included example is this pair of teeth by Xury- see the difference in the original sculpt vs final game model

Checklist:
STEPS
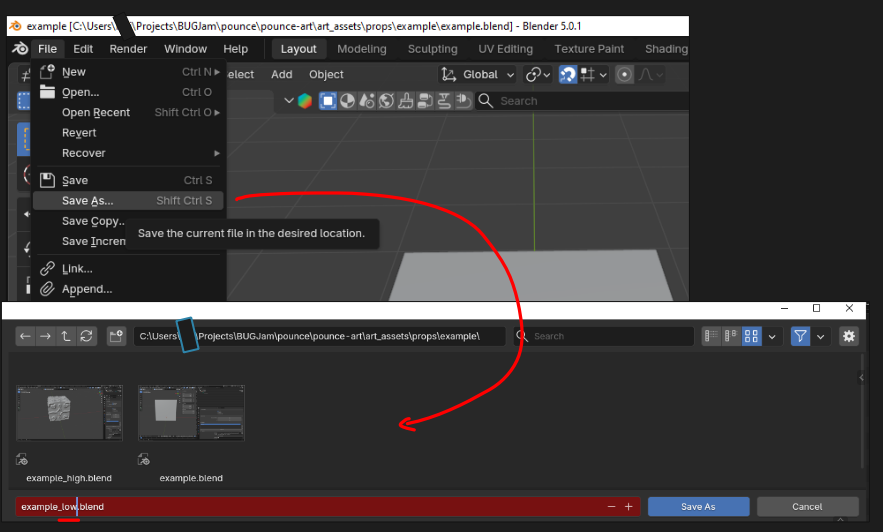
Starting from your blockout+ blend file - go to file > save as> and add '_low" to the file name, this creates a duplicate working file
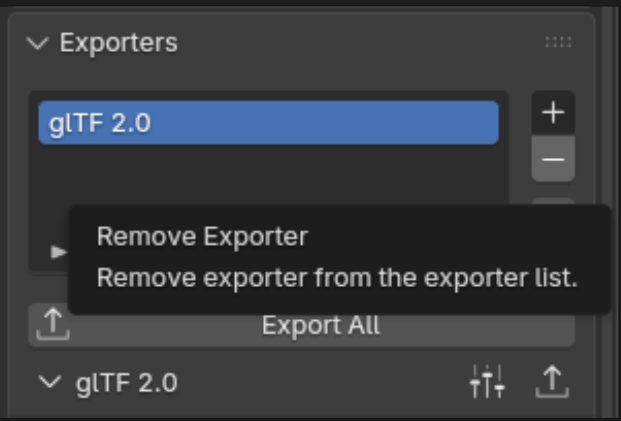
This will not be put into the game, so you can delete the collection exporter inside of this file
link2.) Link the High- Res Mesh to this file
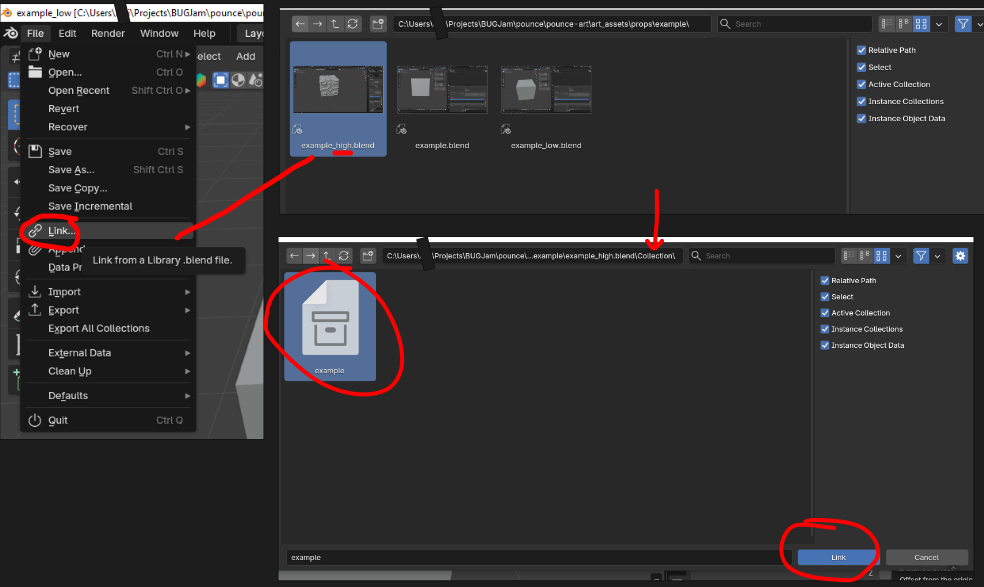
In blender, go to file > Link and and a popup showing your asset's folder should appear. Double click the folder to show data inside the _high blend file
go to collections > and select the collection with your high resolution mesh
your high res mesh should appear in the same location as your blockout with some z-fighting (this is a great sign). Because it is linked in, you wont be able to edit the high polyresolution versionmesh in this file, only your new low resolution mesh.

3.) Apply Modifiers + Optimize Topology
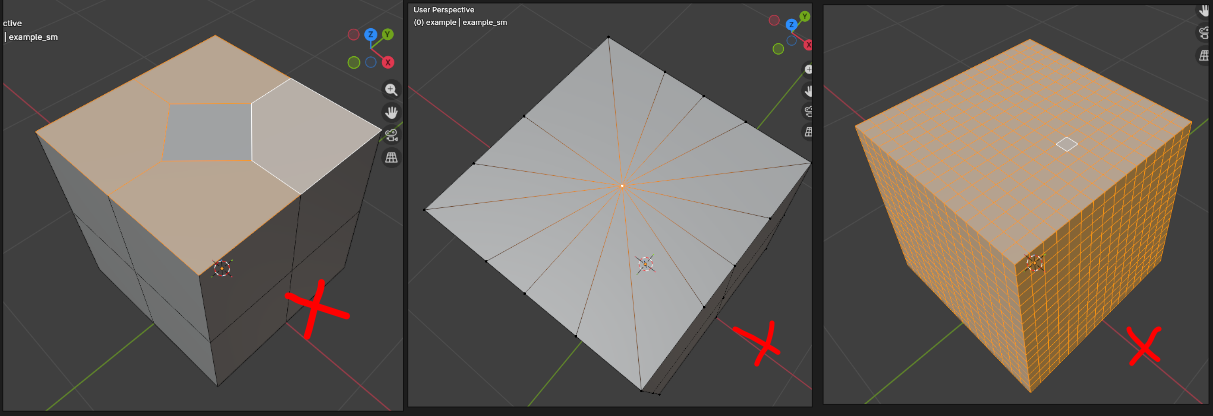
Identify where your topology needs to be repaired! Signs of bad topo are N-gons (left), poles (middle), and unnecessary loops (right)
NGONS
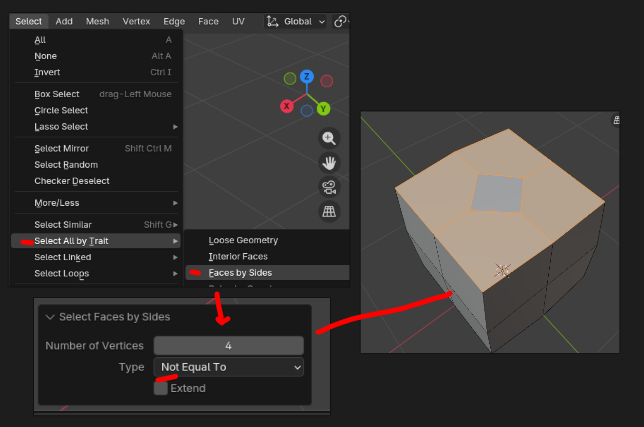
An N-gon is a face with more than 4 vertices. The easiest way to spot them is to use select > all by trait > faces by sides > not equal to and set to 4. (triangles are okay sometimes, but should be minimized or avoided when possible.
N-Gons are often caused by beveling and boolean modifiers, if those were part of your asset.workflow Namealways guitar_low.blend,check using the above selection
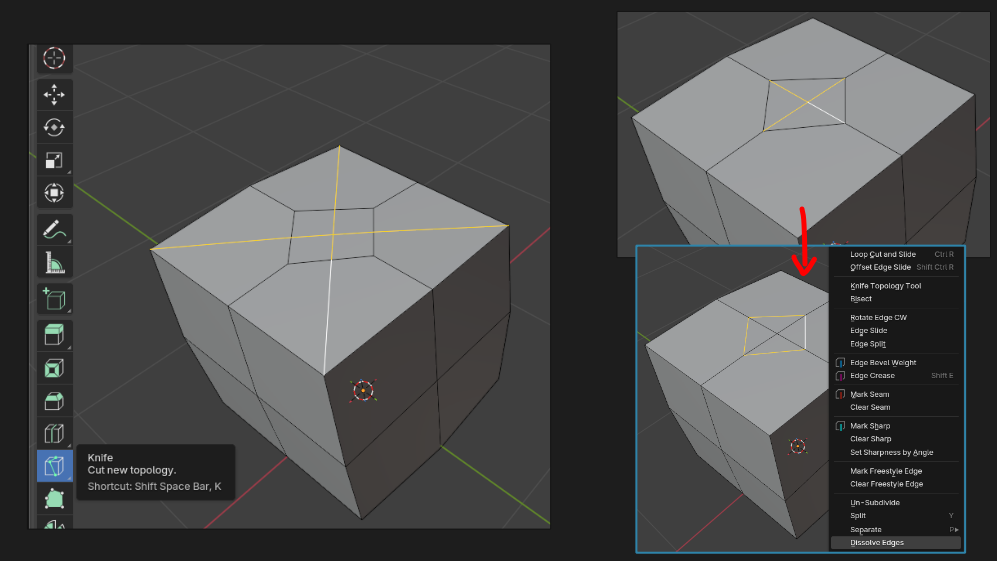
Solutions include cutting strategically with the knife tool to turn n-gons into quads (left), or re-directing edges + dissolving unnecessary cuts (right)
every time you use the knife tool make sure you are in vertex mode (1) so that the knife can snap to vertices, this is an imperfect system so always cleanup afterward by hitting m > merge by distance
POLES

poles are points where many triangle meet, that are often made by poking faces, insetting circles, and savemerging itmany vertices. They are fixed by selcting the entire series of triangles and selecting face > grid fill
keep the span low unless the extra faces are necessary for a rounded part
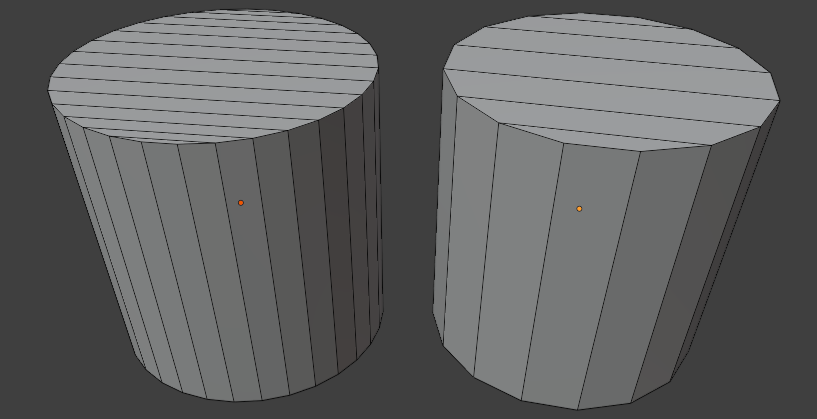
UNNECESSARY LOOPS
The goal is to have as few faces as possible without changing the correctsilhouette, locationa cylinder that has 32 segments could be reduced to 16 for example, without significantly affecting the shape of the object. Similarly, a shape with lots of supporting loops can be reduced carefully, to leave only what is necessary for the GITsilhouette repo
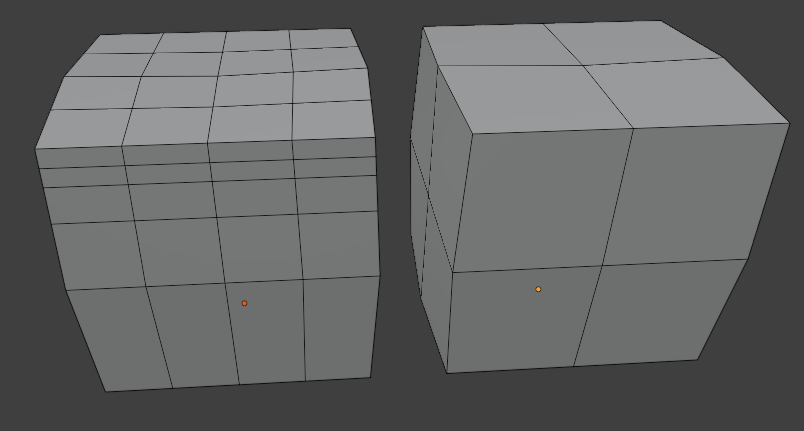
keep high poly meshtoggled on with "retopo" enables in viewport to see where the geometry is necessary or unneeded. Also consider using a second viewport set to flat shading, with a black object + white background to easily check the silouette
3.) UV- Unwrapping
Now that your low poly mesh (PBRis texturedone, set-its normaltime mapto / albedo / AO /metallic / roughness)
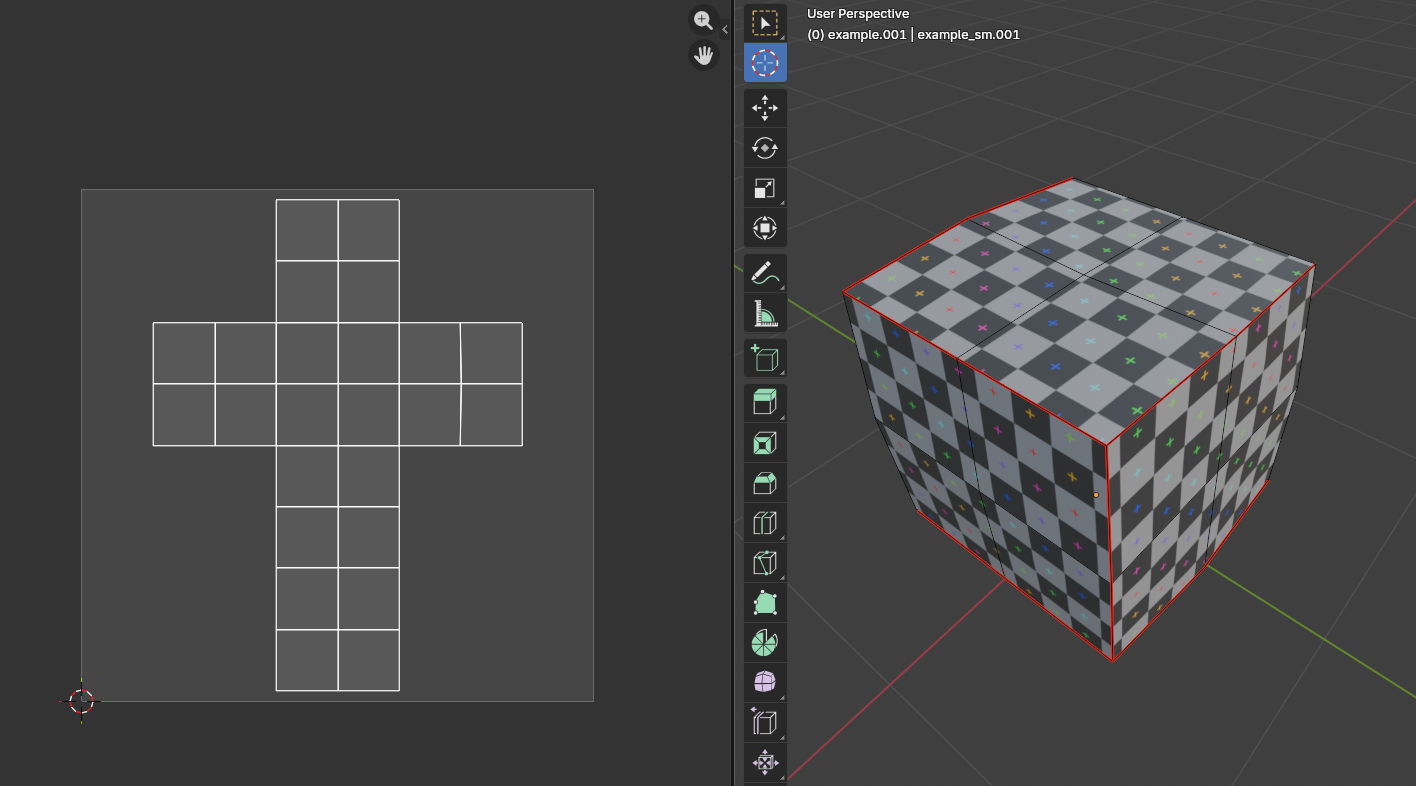
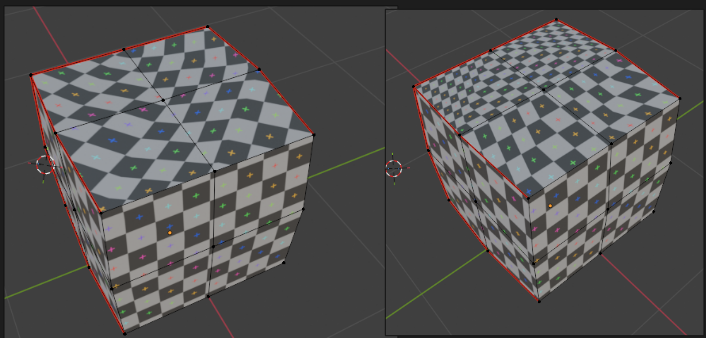
Apply a checkerboard pattern to preview scale of the UV map and trouble areas, but make sure you delete the checker material after use to clean up the blend file.
A good UV map has all islands within the image space, with no faces or islands hanging outside, or overlapping
It should also be optimized, meaning you use "average islands scale" and arrange elements so there isnt excessive crowding in corners of the texture space. Also ensure that there are enough seams so that the unwrapped face isnt crammed to a small area, this allows the resolution of the texture maps to remain consistent
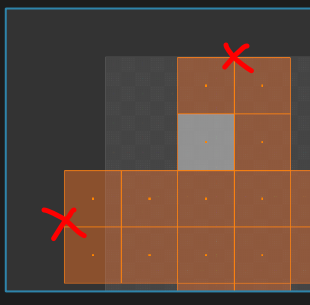
too close to the edge + overhanging the texture space. Fix by moving or scaling island
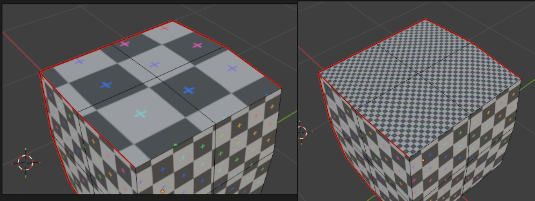
inconsistent island / face scale: fix with average islands scale
stretching / warping: fix by adjusting seam placement + re-unwrapping
4.) Push to the repository
Commit changes / complete the task:
All changes to the .blend file need to be checked into the pounce-art repository. And the newly exported mesh / collision update need to be checked into the pounce-game repository.
Now that the asset has been pushed to the server, the art director will have access to it. Contact Lexi to let her know it's ready for riggingreview. +If gameshe integrationhas feedback for you, make the appropriate adjustments and repeat steps 1-4 as needed.
Commit to the pounce-art repo:
dev
Stage only the .blend file for the newly created asset.