Asset Creation - Part 4: Low Resolution / Game-Ready Mesh
Since the high resolution mesh often has hundreds of thousands, if not millions of polygons, it can't be used in-game. We need to create a low-resolution version of the mesh. Usually the involves re-topology, but we can usually get a good start by copying the high resolution mesh and removing and subdivision / multi-resolution modifiers.
Goals
- Replace the old block mesh plus file with a mesh that has the final topology that will be used in the game.
- Name all of content inside of the file appropriately.
- UV Unwrap
- Set up materials
- re-export to game.
1 Create the final low poly mesh
WIP WIP WIP WIP WIP WIP
Polygons:
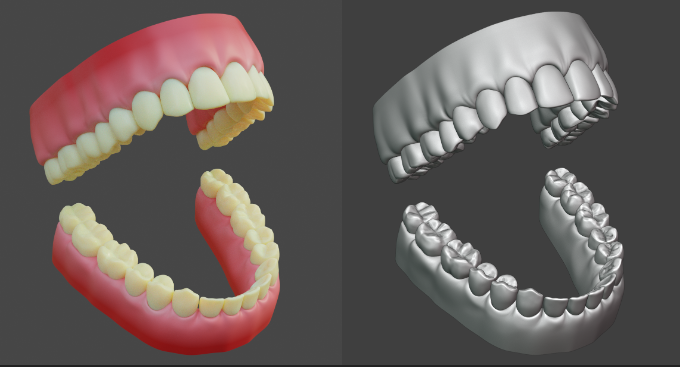
We are going to be using a high - low polygon workflow, which means you can go pretty high when working on the details of your model! Please see Xury's punk character series to understand this workflow in depth. Included example is this pair of teeth by Xury- see the difference in the original sculpt vs final game model

Checklist:
- Your .blend file is saved in the correct location in the git repository
- Your .blend file is clearly named
- Your model is made to an accurate and reasonable scale
- Your model's origin point is set to the world origin, and is the lowest center point of your mesh
- Everything in your outliner is clearly named
- All transforms have been applied (scale / rotation / location)
STEPS
- Name your .blend file and save it to the correct location for GIT repo
- Make a 'greybox' of your model that shows the correct dimensions + scale
- Commit your greybox to the GIT repo and get the greenlight on file handling
- Blockout your model in more detail (not fine detail), think of it as a rough sketch of what you will be making
- Commit your blockout to the GIT repo and get greenlight on design
- Refine + detail your model/ finish the sculpting/ modeling phase
- Commit final sculpt to GIT repo and get greenlight
- Use blenderkit to add textures to your model
- Commit textured model and get greenlight to finalize asset
- Create a new .blend file and link in the high poly version of your asset. Name guitar_low.blend, and save it to the correct location for the GIT repo
- Create the low-poly version of your mesh using retopology workflow
- UV Unwrap your low-poly mesh and optimize texture space
- Commit Low poly model + UV Map to GIT repo to get greenlight for baking
- Bake your high poly mesh to your low poly mesh (PBR texture set- normal map / albedo / AO /metallic / roughness)
- Commit and finalize / hand off low poly version for rigging + game integration