Asset Creation - Part 3: High Resolution Mesh
Once the block mesh plus has been approved, it's time to refine it into a high quality high resolution mesh. There are multiple ways to do this depending on the asset you're trying to make: hard surface models tend to rely on subdivision surface workflows and geometry nodes, while organic forms tend to rely on sculpting. We should use whatever combination of techniques are appropriate.
Goals
- Create a high resolution mesh that will eventually be used to bake normals and other mesh maps.
- Save the file as a new file with the "_high" suffix: asset_high.blend
1: Create a new file for the high resolution mesh
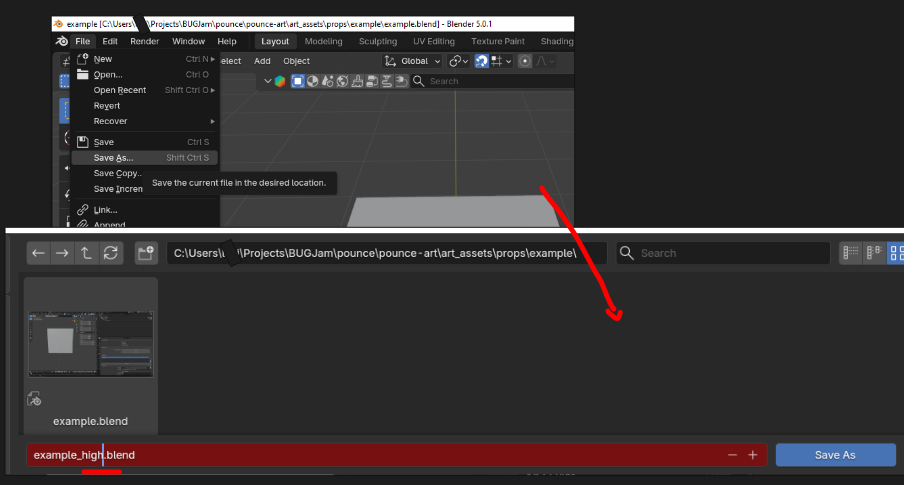
Starting from your blockout+ blend file - go to file > save as> and add '_high" to the file name, this creates a dupicate working file
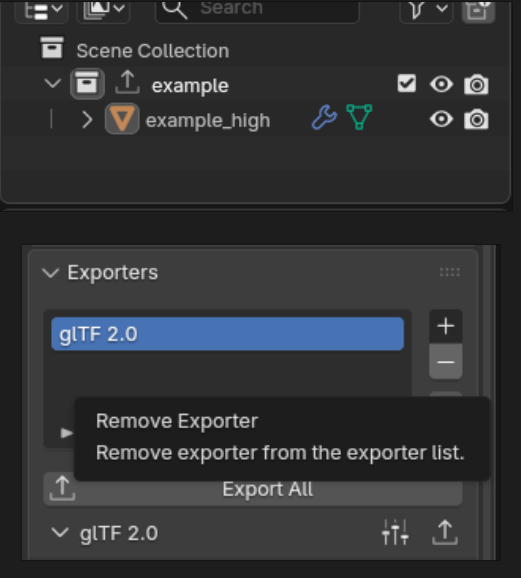
This high poly mesh will NEVER be put into the game, so you can delete the collection exporter inside of this file, as well as updating the mesh data in your outliner with the suffix '_high'
2: Increase Resolution
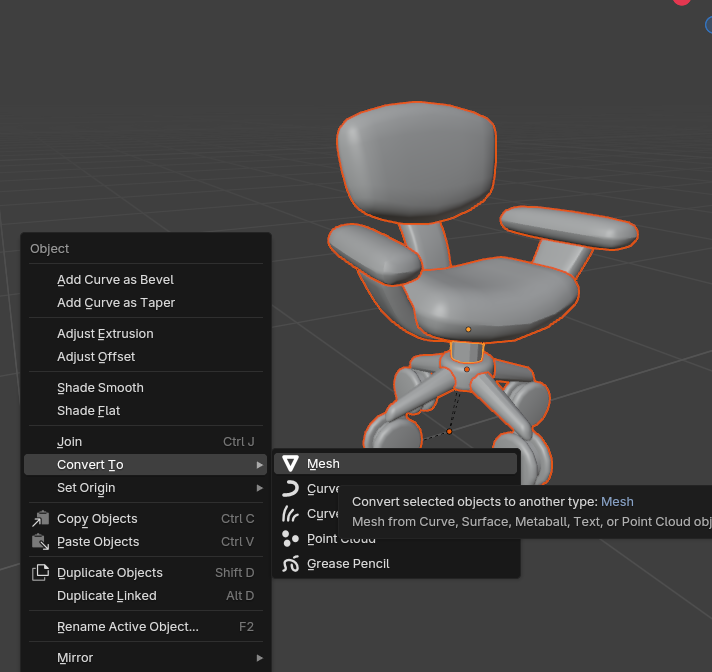
- start by applying all current modifiers to your mesh (excluding
mirrorsinstances)+Ifinstances)you are working on a symmetrical mesh, use the mirroring effect in the sculpt workspace, and go ahead and apply any mirror modifiers - apply a
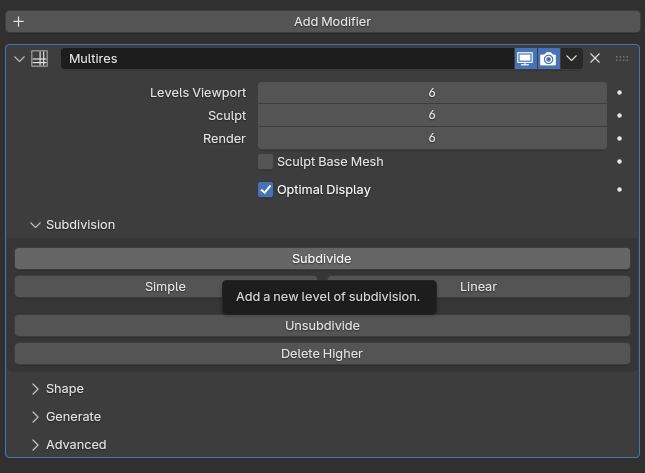
subdivisionmultires modifier with4-3-6 iterations, this increases the polygon count to a level that is appropriate for sculpting (if you find you need more when you are sculpting, justrepeathitthis'subdivide'stepagain)with 1 iteration) apply subdivision modifier +switch to the sculptingworkface
workspace
Hit ctrl + S frequently while working on the high poly mesh + sculpting! it is a very likely time for blender to crash and you don't want to lose work! when you are done, only the most recent save will get pushed to the repo so dont worry!
Polygons:Polygon Notes:
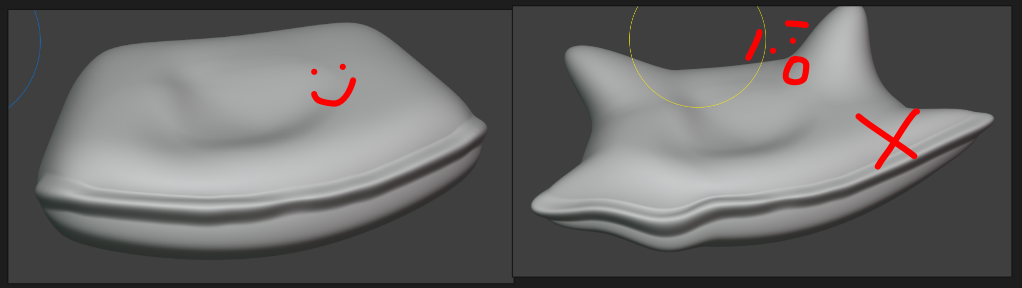
We are going to be using a high - low polygon workflow, which means you can go pretty high when working on the details of your model! PleasePoly counts + budgets arent a thing in this step, but please be considerate of the server's capacity and dont add 20 subdivs just because you can, add as many as you need to capture the details you want, but start low and go up instead of just throwing on 1 million faces
Just make sure there is enough to create a smooth surface- see Xury'sbelow: punkwhen characteryou seriessee shading artifacts and little jagged edges, thats a sign to understandincrease thisyour workflowsubdivision in depth. Included example is this pair of teeth by Xury- see the difference in the original sculpt vs final game modellevel
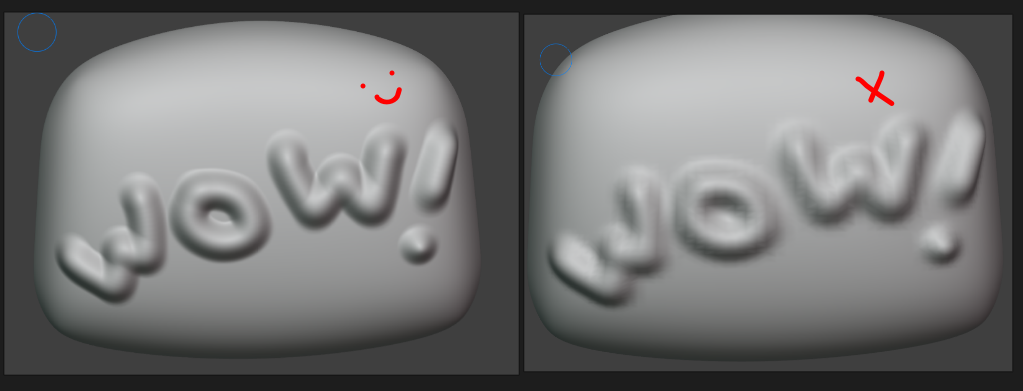
A good high res sculpt adds detail (like dents, wrinkles, seams, fur, etc.) without making noticeable changed to the silhouette or size of the object
Checklist:Push to the repository
Commit
All changes to the .blend file isneed savedto be checked into the pounce-art repository. And the newly exported mesh / collision update need to be checked into the pounce-game repository.
Now that the asset has been pushed to the server, the art director will have access to it. Contact Lexi to let her know it's ready for review. If she has feedback for you, make the appropriate adjustments and repeat steps 1-5 as needed.
Commit to the pounce-art repo:
dev
high res pass"