Programming
- Behavior trees and state machines with LimboAI
- Using Scene Builder
- Physics layers and navigation regions
Behavior trees and state machines with LimboAI
LimboAI addon overview
We'll be using LimboAI for behavior trees and state machines
LimboAI docs | LimboAI on GitHub
LimboAI includes a demo project. It is highly recommended that you download it and check it out. When you run it, it has a nice little tutorial that walks you through the basics: https://github.com/limbonaut/limboai/tree/master/demo
In its classes and nodes, LimboAI uses the following prefixes:
BT: Behavior Tree- Nodes/classes that start with this have to do with parts of behavior trees
- As an example, the
BTPlayernode "plays" a behavior tree every frame and inside of that tree you haveBTSequence,BTSelector, etc
BB: BlackBoard- The blackboard is a shared place for agents to write values to.
- These values can be read and written by any task in the tree.
LimboHSM: Hierarchical State Machine- HSMs have
LimboStates inside of them. LimboHSMis itself aLimboState, andBTStatecan put states inside of behavior trees
- HSMs have
Behavior trees
Read the intro to behavior trees here
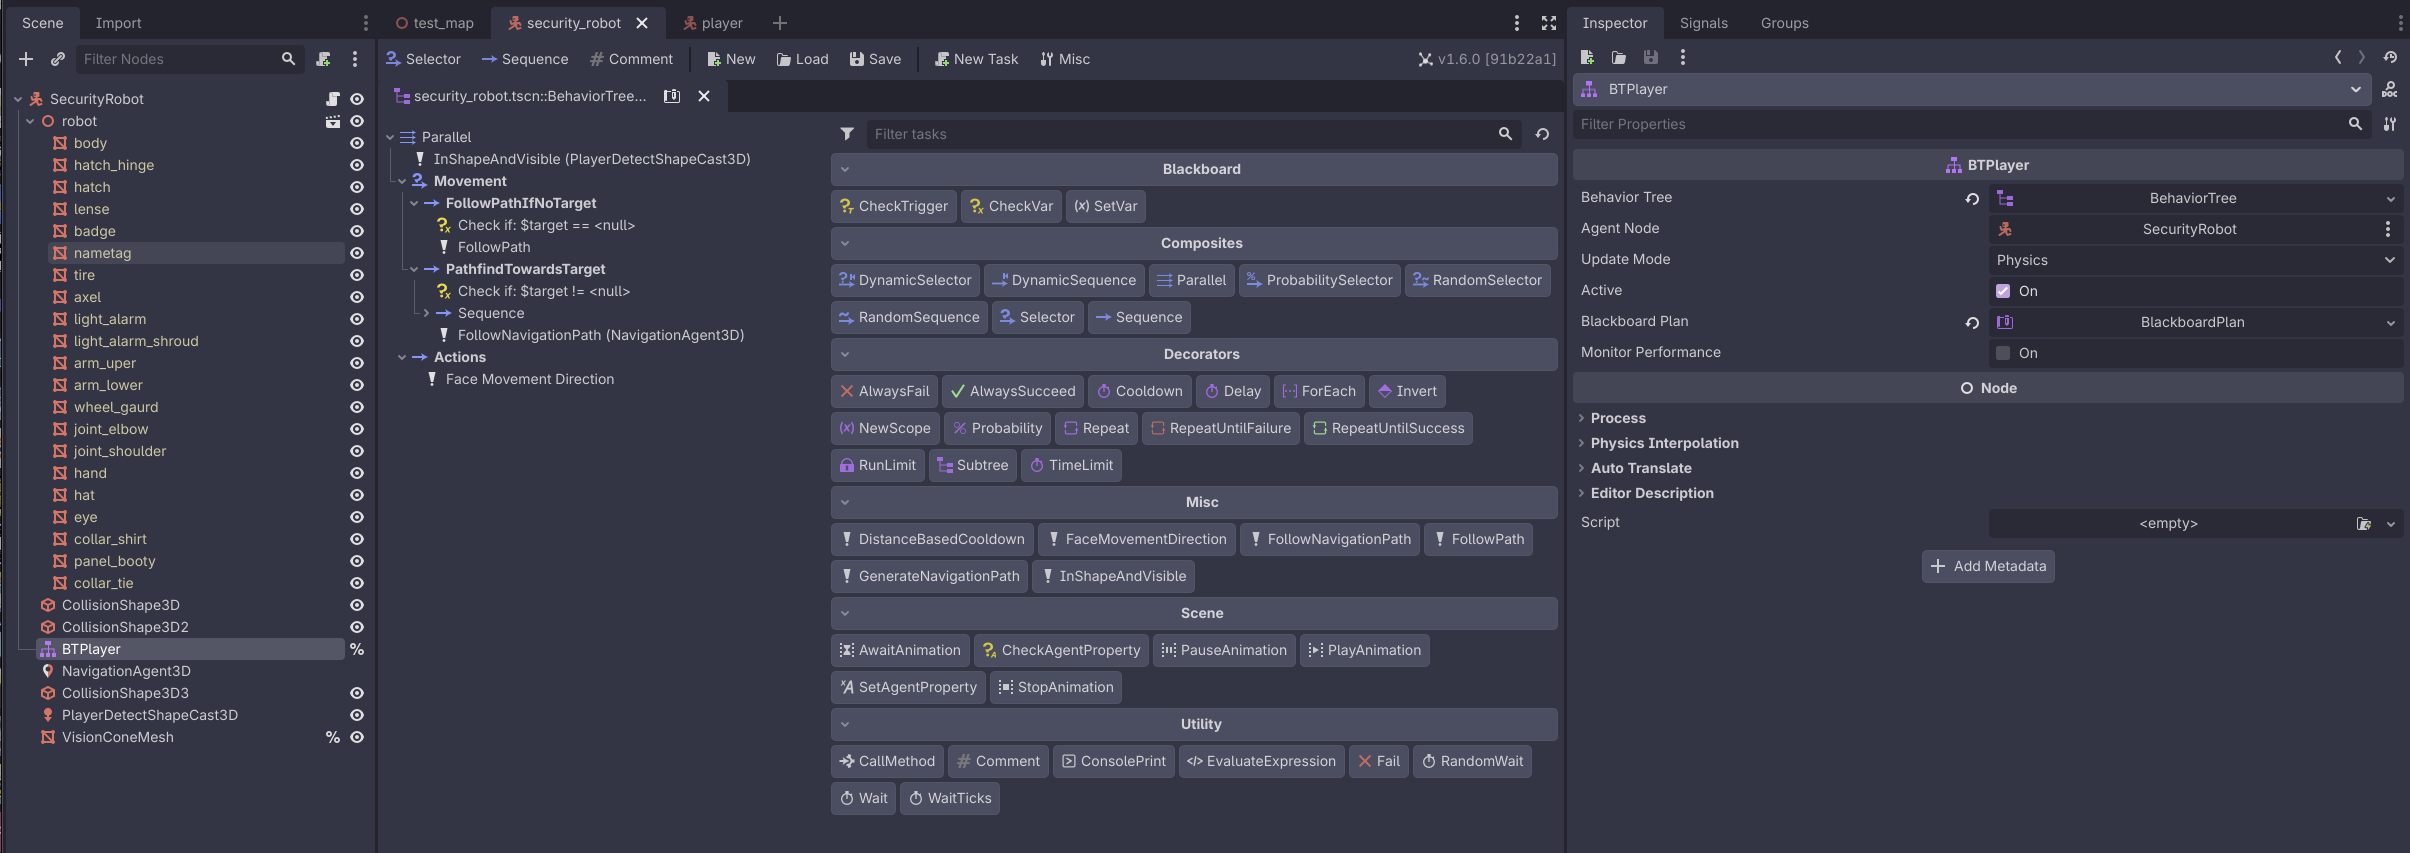
Accessing LimboAI behavior tree editor
When installed, LimboAI adds a button to the top of the Godot editor, alongside the 2D/3D/Script buttons

When you click on a BTPlayer node, it has a BehaviorTree attached to it. When clicking that, it will automatically switch over to the LimboAI tab.
Building blocks: sequences and selectors
The main building blocks of a behavior tree are:
BTSequence: Think of these like an AND operator on the child tasks.- As long as a task return
SUCCESS, the next one will be executed.
- As long as a task return
BTSelector: Think of these like an OR operator on the child tasks.- On the first task that returns
SUCCESS, it will stop executing.
- On the first task that returns
Writing custom tasks
Read the documentation on writing custom tasks.
Custom tasks go inside of ai/tasks in the project.
At the time of writing, we have:
follow_path: Follows aPath3Dnode (i.e. for preset patrol paths)generate_navigation_path/follow_navigation_path: Using aNavigationAgent3D, generate and follow a path to atargetin the blackboardfollow_navigation_pathwill follow the path until it gets close enough to thetarget, it will returnRUNNINGuntil it gets there
distance_based_cooldown: Takes in aCurve2Dand uses that to do a cooldown based on how close the agent is to thetarget- Useful for generating navigation paths more frequently the closer you are to the
target, and less frequently the further you are
- Useful for generating navigation paths more frequently the closer you are to the
in_shape_and_visible: ReturnsSUCCESSif there's a target in aShapeCast3Dthat is visible (hit by a raycast, in "front" of the agent)- This also sets the
targetwhen it is visible
- This also sets the
State machines
https://limboai.readthedocs.io/en/stable/hierarchical-state-machines/create-hsm.html
Using Scene Builder
Scene Builder overview
The Scene Builder addon has been installed an initialized in the project. This is an open source addon written in GDScript.
Scene Builder can be used to easily place assets inside of a scene.
AssetPlacer is a popular addon for this functionality but it: a) Costs money, b) Is not open source, c) Requires the .NET (C#) build of Godot.
Using Scene Builder
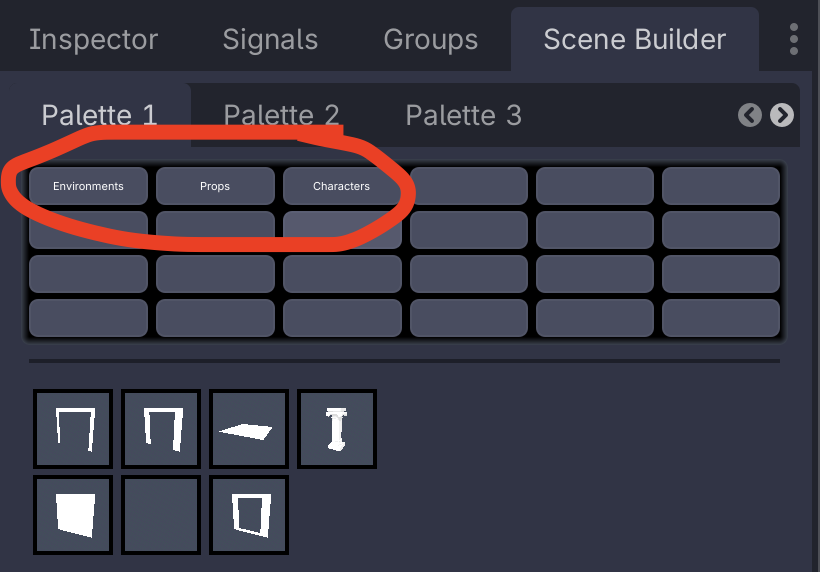
On the right panel of the Godot editor, there is a Scene Builder tab:
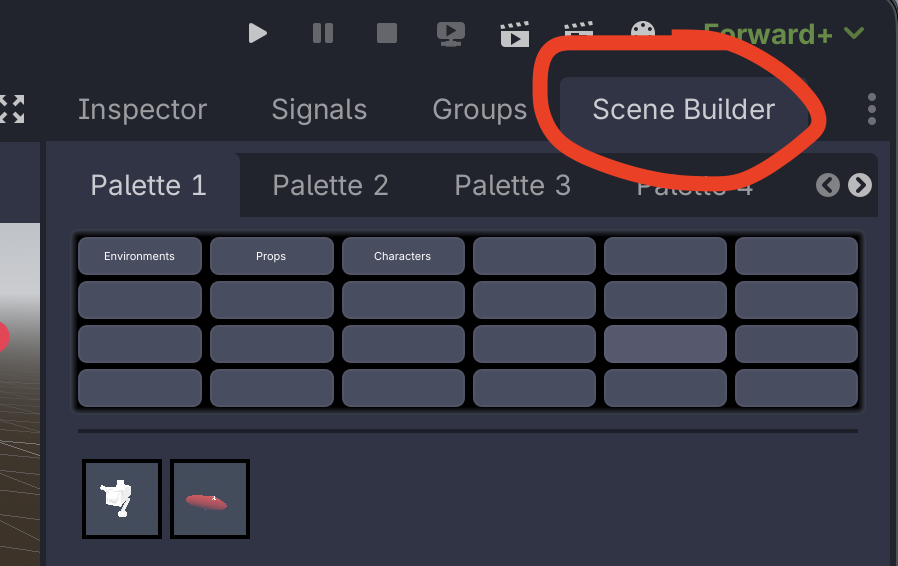
Selecting that, you can see a series of "Palettes" and below that categories.
When selecting an item from the icon list, that item can then be placed into the scene.
To rotate an item along the Y axis when placing it, click and drag left/right.
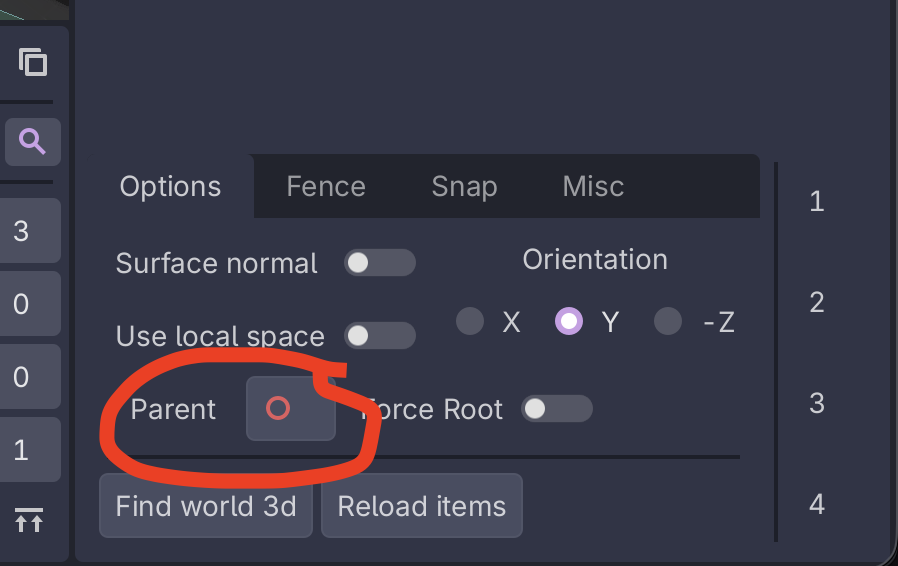
Parent node
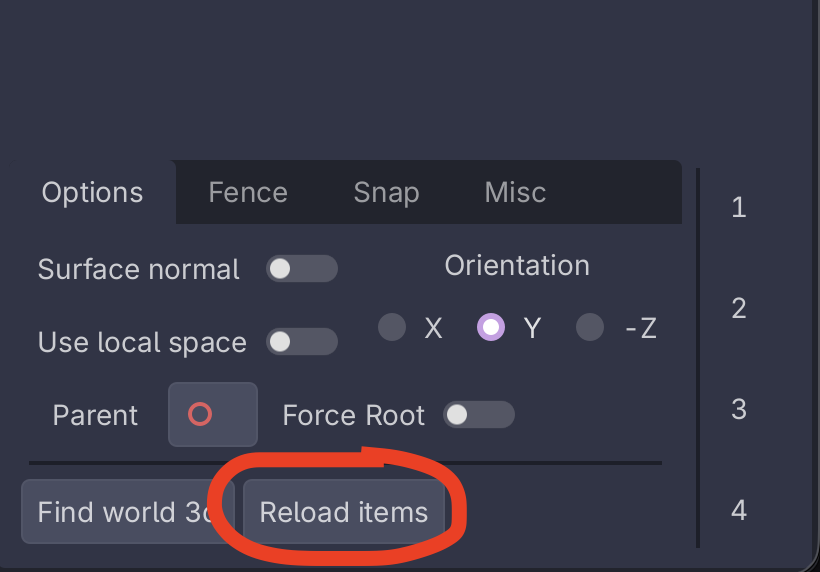
At the bottom of the scene builder tab, there's a "Parent" option that can be used to set which node items that are added as children to.
To set this, drag a node from the scene tree over to the "Parent" option.
If this doesn't work, click "Find world 3d" first.
Adding scenes to Scene Builder
To add scene(s) to the Scene Builder list,
- Select the scene(s) you want to add from within the "FileSystem" tab
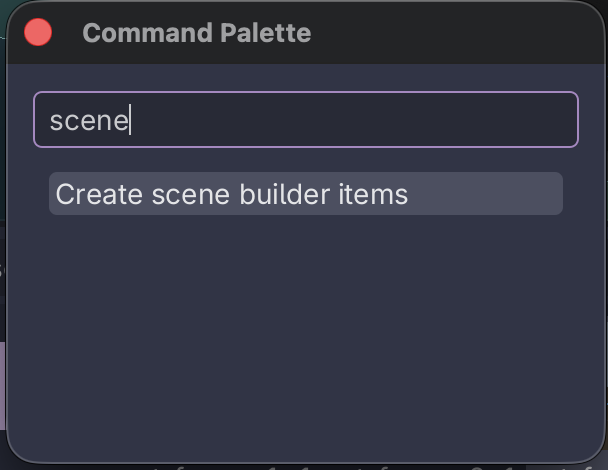
- Open the command pallette
- On all operating systems: ` (backtick, to the left of the "1" key)
- On macOS: Command+Shift+P
- Search for / select "Create scene builder items"
- A window will pop up asking for info

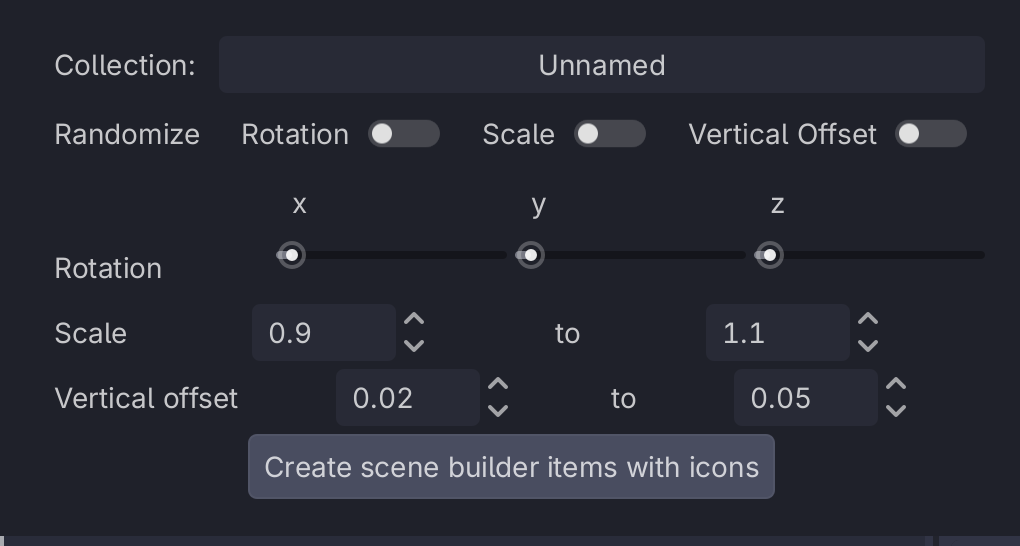
- Leave the "Randomize" toggles un-checked (unless you do want some randomness)
- In "Collection", type in the name of the collection you want the scenes to show up under

- At the time of writing these are
Environments,Props, andCharacters
- Click "Create scene builder items with icons"
- Click "Reload items" in the Scene Builder tab's options to show the new item
If the item doesn't show up, it could mean that there is a UID issue.
Open the .tscn file itself and then save it and try again - in source control you may notice that its UID gets updated.
Commit this change in source control and everybody should see your object show up in their scene builder list.
Managing Scene Builder
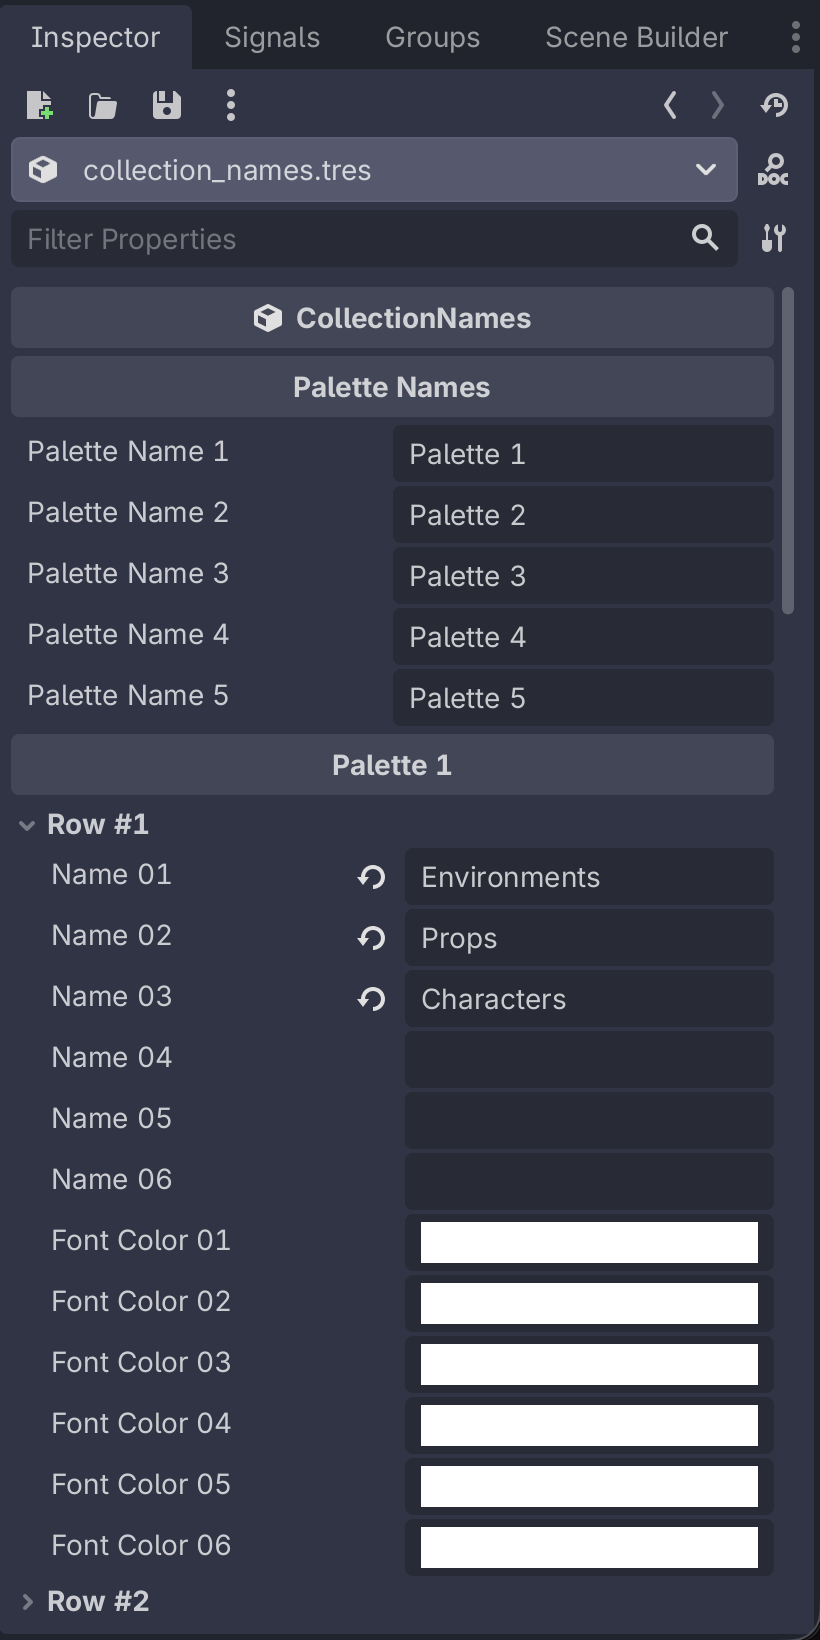
Scene builder has two resources inside the project that it uses to store data.
Data/scene_builder/collection_names.tres contains all of the names of the collections that are used. Double click on this in the FileSystem to view it in the Inspector.
---
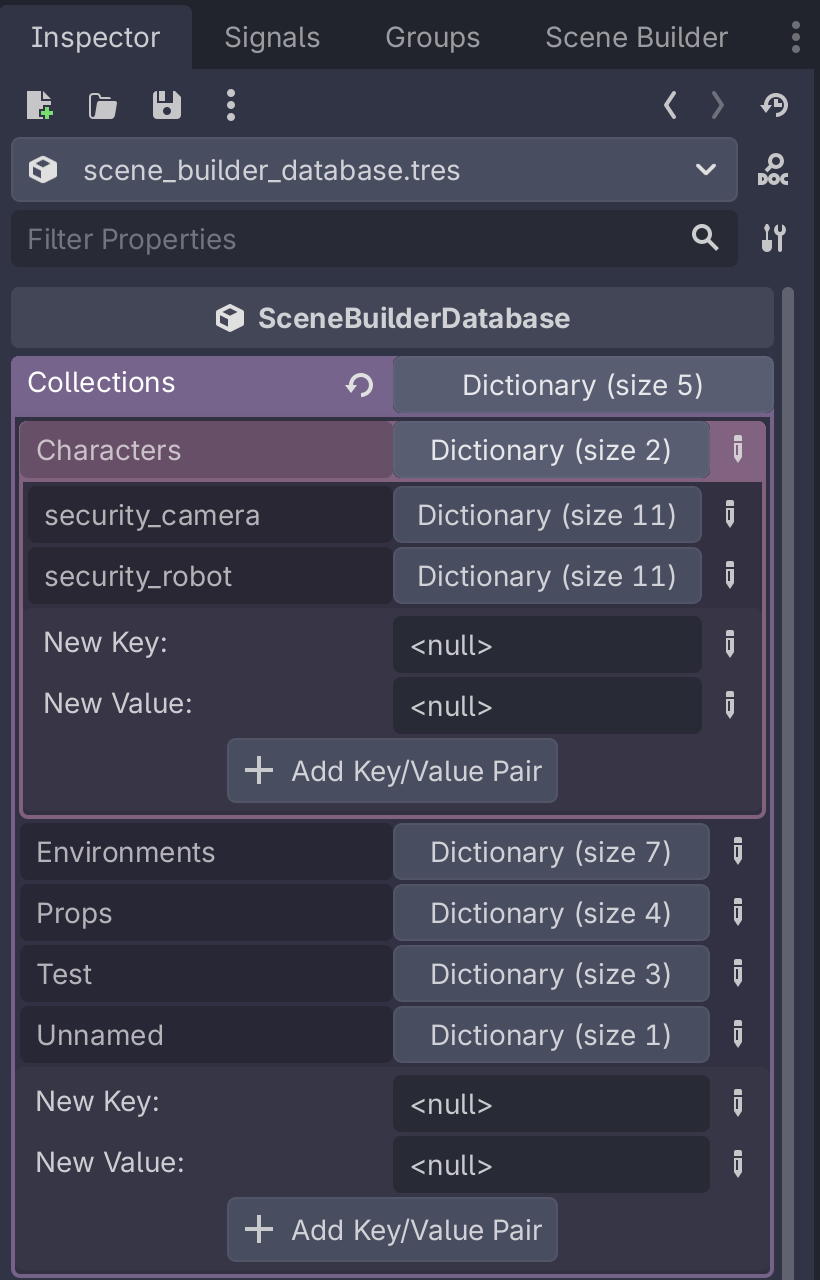
Data/scene_builder/scene_builder_database.tres contains the database of scenes, stored in a few nested dictionaries. Double click on this and open it in the inspector to edit/remove items from the different collections.
Physics layers and navigation regions
Physics layers
Current physics layers are:
- Environment: Anything in the environment that the player should collide with and get stopped by
- The player and the over-the-shoulder camera will collide with these
- Player: The player is on their own layer
- Walls: Anything that the overhead camera should interact with
- In general, all Walls should also be in the Environment group
- Props that the player might hide behind (i.e. pillars) should be in Envrionment but not Walls
- This way, when the player has the overhead camera active and they move behind something, the camera doesn't "snap" in front of the object
- Pickups: Things that the player can pick up
- The player has a shapecast on them that checks for this
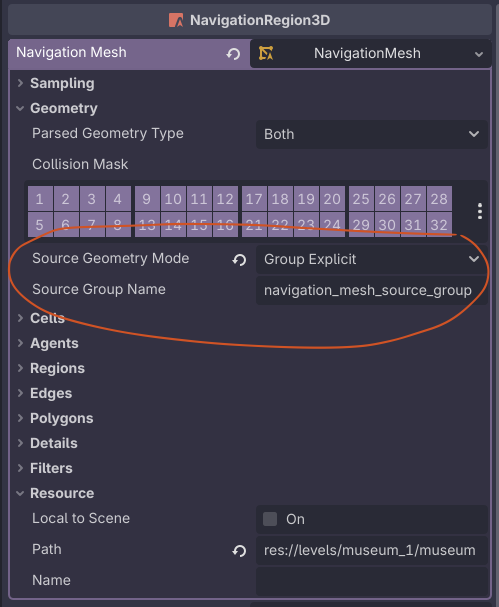
Navigation regions
Meshes that should be part of the navigation mesh must be added to the navigation_mesh_source_group group. This is a global group that should